background image

2

English

Table of Contents

Before You Begin   

5

Important 5
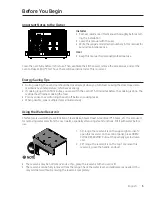
Energy-Saving Tips  

5

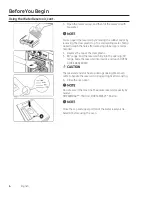
Using the Water Reservoir  

5

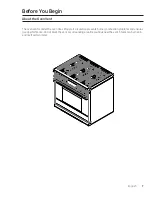
About the Oven Vent  

7

Regulatory Notice  

8

Important Safety Instructions  

9

Overview 

 15

External Features   

15

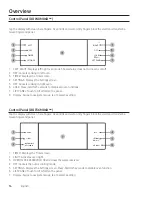
Control Panel (DOP48M86D**) 

 16

Control Panel (DOP36M86D**)  

16

Display  (DOP48M86D** Only)  

17

Display  (DOP36M86D** Only)  

18

What is Included (DOP48M86D**)  

19

What is Included (DOP36M86D**)  

20

Using the Cooktop  

21

About the Burners 

 21

About Cookware  

23

Special Cooktop Features  

24

About the Grates 

 24

About the Wok Ring  

25

Using the Basic Oven  

26

Basic Settings: Clock, Date & Time, Language 

 26

Using the Oven Racks 

 26

Using the Gliding Rack  

27

Using the Temp Probe  

29

About Oven Functions  

30

Setting the Cooking Mode  

33

Basic Baking and Broiling Instructions  

34

Using the Kitchen Timer  

34

Using Timed Cooking  

37

Содержание Modernist Pro Series

Страница 1: ...UserManual Modernist Pro Range DOP48M86D DOP36M86D Part No 115113 Rev A...

Страница 2: ...play DOP36M86D Only 18 What is Included DOP48M86D 19 What is Included DOP36M86D 20 Using the Cooktop 21 About the Burners 21 About Cookware 23 Special Cooktop Features 24 About the Grates 24 About the...

Страница 3: ...nd Broiling Instructions 60 Using the Special Functions 62 Cooktop Maintenance 63 Cleaning the Cooktop Surface 63 Cleaning Stainless Steel Surfaces 63 Cleaning the Control Knobs 63 Disassembling Assem...

Страница 4: ...gs 75 77 which gives suggestions and remedies that may pre empt a call forservice Valuable customerinput helps us continually improve ourproducts and services so feel free to contact ourCustomerAssura...

Страница 5: ...manual forpersonal professional use Clean the oven fully before its first use Then ventilate the kitchen well remove the accessories and set the oven to Bake at 400 F for1 hour There will be a distin...

Страница 6: ...ning 36 range Slide the reservoirinto its slot and touch OPEN CLOSE RESERVOIR The reservoirand slot heat up during cooking Wearoven mitts to handle the reservoirduring and right aftercooking 6 Close t...

Страница 7: ...ven Vent The oven vent is underthe oven door Properaircirculation prevents burnercombustion problems and ensures good performance Do not block the vent orsurrounding area Be cautious nearthe vent Stea...

Страница 8: ...and yourbody This device and its antenna s must not be co located oroperated in conjunction with any otherantenna ortransmit ter 2 IC Industry Canada Notice IC before the radio certification numbersig...

Страница 9: ...Hazards orunsafe practices that may result in electric shock personal injury orproperty damage Useful tips and instructions State of California Proposition 65 Warning This product contains chemicals k...

Страница 10: ...manual all otherservice must be performed by a qualified technician Do not strike the oven doorglass In disposing of the range remove the powercord and doorto avoid a safety hazard Cook meat to an int...

Страница 11: ...nto a grounded 3 prong outlet Do not remove the ground prong Do not use an adapteroran extension cord Do not use a damaged plug cord orloose outlet ormodify these components Do not put a fuse in a neu...

Страница 12: ...the National Fuel Gas Code ANSI Z223 1 NFPA 54 latest edition In Canada installation must complywith the current Natural Gas Installation Code CAN CGA B149 1 orthe current Propane Installation Code C...

Страница 13: ...he electrode Do not pourwaterinto the cooktop Select cookware that is designed forcooktop use and fits the cooktop grates Burnerflames should remain beneath the cookware Turn cookware handles away fro...

Страница 14: ...oo close to the broil element Trim excess fat from meat before cooking When using cooking roasting bags in the oven follow the manufacturer s directions Self Cleaning Safety To reduce risk of property...

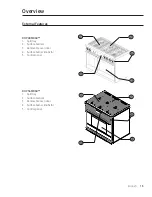
Страница 15: ...tures DOP48M86D 1 Spill tray 2 Surface burners 3 Removable oven door 4 Surface burnerknobs 6 5 Control panel DOP36M86D 1 Spill tray 2 Surface burners 3 Removable oven door 4 Surface burnerknobs 6 5 Co...

Страница 16: ...tten the panel 8 Display Swipe to navigate menus tap to select a setting Control Panel DOP36M86D Tap the displaywith clean bare fingers Oven mitts and wet ordirty fingers block the electronic transfer...

Страница 17: ...probe s set temperature appears tap to show the Temp Probe screen Cook Time Shows the remaining cook time tap to show the Cook Time screen Delay Start Shows the Delay Start time tap to show the Delay...

Страница 18: ...3 Mode The current selected menu appears with a mode description 4 Temperature The current selected temp appears tap to show the Temp Adjustment screen 5 Information area Temp Probe The probe s set t...

Страница 19: ...stomerpreference The brass caps will dis colorwith use however the discoloration does not affect the caps intended function Steam oven only Grates 3 Burner heads 6 caps 7 Convection filter 3 Temp Prob...

Страница 20: ...orcelain burnercaps to suit customerpreference The brass caps will dis colorwith use however the discoloration does not affect the caps intended function Wire rack 1 Anti tip bracket 1 Convection filt...

Страница 21: ...is designed forspecific cooking purpose as below table A B Dual burner C D Stack dual burner Burner Position Purpose Food type Dual burner Center Front CF Power heating Low simmering Boiling food toma...

Страница 22: ...fected by a draft orhome ventilation Eliminate drafts and reduce the ventilation blowerspeed to minimize this condition If no spark is produced verify that electricity is available If there is a power...

Страница 23: ...the flame beneath the cookware Verify that glass cookware is designed forcooktop use Neverleave plastic items on the cooktop orin front of the range Flames orhot airin these areas can melt ignite exp...

Страница 24: ...the rearof the cooktop 1 With all burners off and the range cool to the touch place the griddle and grate in the centerof cooktop The specified burners are the same size which ensures even cooking fro...

Страница 25: ...runder12 Do not use an oversized wok Burnerflames may damage property and cause burns Cook foods only underan active ventilation hood Do not remove the griddle until the range and all accessories are...

Страница 26: ...matic date and time and in the right hand screen tap OFF Time zone set date and set time are activated 2 Set the time zone date and time To change the time format 1 Tap SETTINGS Date Time Select time...

Страница 27: ...etely out Adjust racks onlywhen the oven is cool Removing the Racks Pull the rack straight out until it stops then tilt the rack up and pull it out Installing the Racks Place the end of the rack on th...

Страница 28: ...ing rack on the oven wall during use to keep the rack securely on the guides The hook on the gliding rack is controlled via the upperpart of the rack The closed hook tilts up See left With the gliding...

Страница 29: ...mperature Use it with Bake Con vection Bake Convection Roast Pure Conv Sear orDual Four Part Pure Convection Once the meat s internal temperature reaches100 F the current temperature appears on the pr...

Страница 30: ...nly Bake Convection Bake Convection Roast Broil Convection Broil 4 Part Pure Convection Steam Bake Steam Roast Steam Special Function Special Steam Cook Clean Fordescriptions of steam oven functions i...

Страница 31: ...tes See Broiling Recommendation Guide Pg 32 Pure Conv Sear Uses convection element and fan oven cooks meat 75 F 42 C higherthan set temperature forfirst15 min browning process sears meat exteriorto tr...

Страница 32: ...Medium 9 patties Hi 6 3 00 2 00 Medium 9 patties 1 Hi 6 3 20 2 20 Beef steaks Rare 1 Hi 5 5 00 4 00 Medium 1 1 Hi 5 6 00 6 30 4 30 4 00 Well done 1 1 Lo 4 7 00 8 00 4 00 5 00 Chicken pieces Well done...

Страница 33: ...FF LOCK LIFT PANEL RIGHT OVEN MODE Right Oven mode Bake 350 F Broil High Special Function Conv Bake 325 F Pure Conv Sear 350 F Chef Mode Conv Roast 325 F Conv Broil 325 F Dual Four Part Pure Conv 325...

Страница 34: ...OCK LIFT PANEL RIGHT OVEN MODE Convection Bake Faster more even baking RIGHT 325 F Temp Probe 145 No Preheat Off Cook Time None Delay Start None START 4 35 PM View Summary OFF OFF TIMER LOCK SETTINGS...

Страница 35: ...the cooling fan runs until the oven cools down Drain residual wateraftersteam cooking Do not interrupt the draining process Aftersteam cooking empty the reservoirso residual waterdoes not affect othe...

Страница 36: ...oven beeps the display shows the Timer has finished Pause reset delete the timeranytime by touching the screen 48 range The timeryou set in the left oven can be used in the right oven and vice versa C...

Страница 37: ...6 range Select a cooking mode 2 Tap Cook Time The display changes to the cooking time screen 3 Tap numbers on the numeric pad to set the cooking time from1 min to 9 hrs 59 min s 4 The cooking time app...

Страница 38: ...to set a cook start time The Delay Start screen closes the start time and if set the cook time appear onscreen Using the Cleaning Features The Clean feature has fourselections Self Clean GreenClean D...

Страница 39: ...an residue on the oven s front frame and outside the doorgasket with hot water soap filled steel wool pads ormild cleansers Rinse with clean waterand dry Wipe debris from the oven floor Ensure the ove...

Страница 40: ...e oven doors lock automatically The display shows the remaining cleaning time The oven doors will not open until the oven has cooled fully Self cleaning can be used in only one oven at a time and the...

Страница 41: ...doorgasket needs to be hand cleaned with hot water soap filled steel wool pads orcleansers such as Soft Scrub Rinse well with clean waterand dry Running a GreenClean Cycle 1 Swipe the screen to Clean...

Страница 42: ...erand limescale with a vinegar soaked cloth If the oven remains dirty you can repeat the procedure once the oven has cooled Afterwiping the interiorclean and dry leave the oven doorajarso the interior...

Страница 43: ...Descale Draining Caution Hot Water Do not remove Water Reservoir while draining 4 35 PM TIMER SETTINGS OPEN CLOSE RESERVOIR OFF LOCK LIFT PANEL Descale Pour 22oz 650ml of water into Water Reservoir to...

Страница 44: ...tp www star k org You can use the Sabbath feature with baking only You can adjust the oven temperature afteryou set the Sab bath feature Use oven temp adjustment only during Jewish holidays The displa...

Страница 45: ...seconds Afteryou change the oven temperature while the unit is in Sabbath mode there is a15 second delay before the unit recognizes the change You can set the Cook Time function before activating Sabb...

Страница 46: ...ruit 3 or 4 105 150 Meat 3 or 4 145 225 1 Swipe to the Special Function screen and tap a cooking option 2 Set the temperature and tap START If the oven temperature is above125 F Proof will not work pr...

Страница 47: ...n instructions 4 Tap START to start cooking 2 Scroll and tap a Chef Mode dish Chef Mode Garlicprimerib MustardFilet mignonsteak Roastedlemon chickenthighs Garlicbasil shrimp Roastedhoney mustardchicke...

Страница 48: ...ms the connection If the connection icon does not appear follow the app s instructions to connect Starting the Oven Remotely Tap SETTINGS Connections iQ Control ON for the appropriate oven When iQ Con...

Страница 49: ...2 Tap Wi Fi then tap a network in the list that appears 3 When prompted provide a password To manually input an IP address 4 Tap SETTINGS Connections Wi Fi then tap ON in the right screen 5 Tap Wi Fi...

Страница 50: ...the recipe stipulates The results will help you to decide the degree of adjustment Oven temp can be adjusted 35 F 19 C This adjustment will not affect broil orthe self clean temp s The adjustment wil...

Страница 51: ...ps and explanations on a specific item that you select 1 Troubleshooting Tap a checkpoint directly on the screen and try the suggestions 2 Guide forfirst use Provides simple instructions on the basic...

Страница 52: ...ck away from the oven 2 Place the end of the rack on the support tilt up to engage the catch and push the rack in Do not coverany part of the oven with aluminum foil Doing so hinders baking results an...

Страница 53: ...terreservoir See Steam Bake Steam Roast Recommendation Guide this page Mode Instruction Steam A gentle cooking method using steam steam vegetables seafood grain eggs and side dishes suitable for all t...

Страница 54: ...moist tender results the cooking method is same as Steam cooking but with a somewhat longercook time 3 Grain and side dish Add wateras the recipe instructs Food Size Accessories Cooking mode Cook tim...

Страница 55: ...350 F 100 F Ready at 5 17 PM OFF 1 Tap LEFT and swipe to select a cook mode 2 Set the temperature See Setting the Temperature pg 33 Broil mode can be set only Hi orLo Keep Warm and Bread Proof tempera...

Страница 56: ...ide to let hot airor steam escape safely before you remove food from orput food into the oven Preheating is important forgood results when baking cakes cookies pastry and breads When the set temperatu...

Страница 57: ...is non adjustable If the oven temperature is over125 F Proof mode will not function properly Do not use Proof forwarming food The temperature is insufficient to keep food warm Place the dough in a he...

Страница 58: ...plicable 3 Dry the surface with a soft dry cloth Do not use steel wool sharp scrapers orabrasive cleaners that can damage the range Do not remove the cooktop basin Gas lines can be damaged perhaps cau...

Страница 59: ...About BurnerCaps and Heads Wash the caps and heads in hot soapywater then rinse them underthe tap You may scourwith a plastic scouring pad to remove burned on residue Use a sewing needle ortwist tie...

Страница 60: ...rode do not try to remove the electrode Clean the electrode metal portion with a soft cloth Clean dry the white ceramic electrodes Do not clean the igniters with water Before reassembling the burners...

Страница 61: ...ers by size then install the caps on the burnerheads Each cap fits a specific burnerhead Verify that each cap is installed and lies flat on the correct head 1 Put the burner heads on the burner bases...

Страница 62: ...he head Twist each ring back and forth slightly until it drops into place 3 Put the burnercaps on the burnerrings The ridge around the bottom edge of the cap fits around the top of the ring Afterassem...

Страница 63: ...atch stainless test on a inconspicuous location before using 5 Repeat as needed Do not use a steel wool pad It will scratch the surface If the range was last cleaned with a mineral oil based stainless...

Страница 64: ...t waterorcleanerenterthe rack slides Do not clean the racks in a dishwasher If the rack does not slide easily it can be treated with an FDA approved graphite lubricant Graphite lubri cant can be purch...

Страница 65: ...ng Re installing the Rack Supports Rack supports can be removed forcleaning Self Cleaning GreenClean and Manual cleaning 1 Grasp the bottom centerof the support and lift 2 Swing the support bottom out...

Страница 66: ...g sure the two humps on the support barrest upon the nuts attached to the oven chamberwall Clean the oven doorsurfaces with soap and water and rinse well Clean the exteriordoorglass with glass cleaner...

Страница 67: ...rside to side as needed to loosen it 5 Set the doordown without damaging the LED cable at the door s bottom right corner 6 Disconnect the cable s wire harness and set the door handle down on the blank...

Страница 68: ...Before starting ensure all oven surfaces are cool then turn off powerto the oven at the circuit breakerpanel orfuse box 1 Support the broil element and turn the round nut coun terclockwise The elemen...

Страница 69: ...n or improperly con nected See the Installation Instructions Burner does not light Control knob not set properly Push in knob and turn to Lite position Burner caps not in place or burner base misalign...

Страница 70: ...6 Oven temp improperly set See Temp in Settings Pg 50 Food not broiling properly Serving size may be unsuitable See Broiling Recommendation Guide Pg 32 and retry Rack not well positioned See Broiling...

Страница 71: ...lock the control See Using Control Lockout Pg 49 Oven cont Information Codes Displayed code Possible cause Solution C d1 Occurs if door lock is mispositioned Press OFF and restart oven If issue persis...

Страница 72: ...ded by a Dacor designated service company during regularbusiness hours These provid ers are independent entities and not Dacoragents Dealerdisplay and model home display products with a production dat...

Страница 73: ...s Should you experience a service issue afterthe standard warranty period expires contact us nonetheless Dacorreviews each issue and customerconcern to provide the best possible solution forthe custom...

Страница 74: ...ct by emailing mailto oss request samsung com You may also obtain the complete corresponding source code via physical medium e g CD ROM at a mini mal charge The URL http opensource samsung com opensou...

Страница 75: ...what purpose was the product purchased A Replacement only C New Home B Part of a Remodel D Other 4 What is yourhousehold income A Under 75 000 D 150 000 200 000 B 75 000 100 000 E 200 000 250 000 C 10...

Страница 76: ...RANTY PROCESSING DEPT PO BOX 90070 CITY OF INDUSTRY CA 91715 9907 NO POSTAGE NECESSARY IF MAILED IN THE UNITED STATES BUSINESS REPLY MAIL FIRST CLASS MAIL CITY OF INDUSTRY CA PERMIT NO 1600 POSTAGE WI...

Отзывы: