


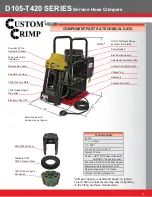


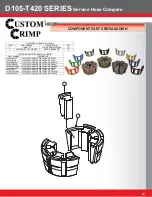

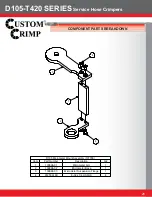


D105-T420 SERIES
Service Hose Crimpers
15
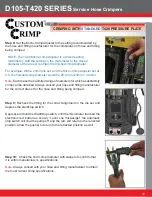
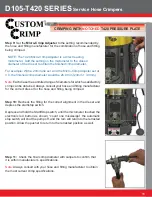
Step 8:
After placing the notched pressure plate covering all 8 die
fi ngers as shown, slide the
Pusher
onto the pusher retaining ring on
the hydraulic cylinder.
Note:
Make sure the slot in the pusher goes over the lip on the pusher
retaining ring.
Refer to page 11 for details if needed.
CAUTION:
Damage to the pusher and retaining ring can occur if they
are misaligned.
Note:
Recheck that the notched pressure plate is covering all 8 die
fi ngers.
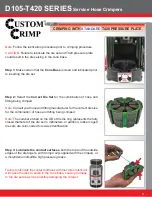
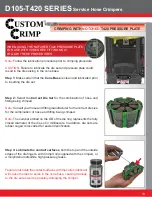
Step 7:
CAUTION: DO NOT MISALIGN NOTCHED
PRESSURE PLATE OR DAMAGE WILL OCCUR.
Note:
You
MUST
follow these steps when crimping
with the notched pressure plate.
A. Die split must face operator.
B. Notched Pressure Plate
MUST
to cover all 8
die fi ngers.
Damage can occur to the die fi ngers if the parts
aren’t aligned properly.
Broken Die Finger
Wrong Alignment
CRIMPING WITH
NOTCHED
T420 PRESSURE PLATE


