Sensors
Chassis
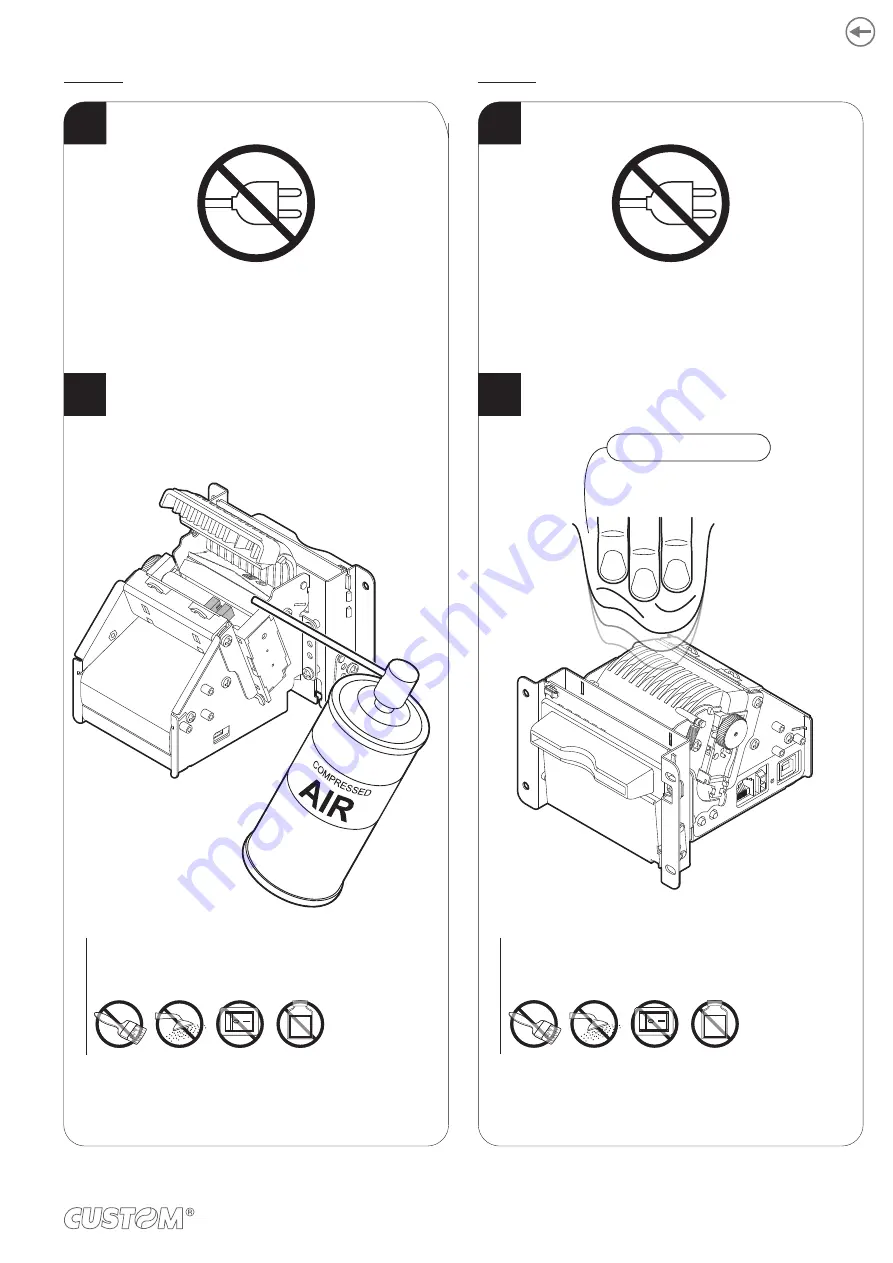
Disconnect the power supply cable.
ISOPROPYL ALCOHOL
To clean the device,
use compressed air or a soft cloth.
ATTENTION:
Do not use alcohol, solvents, or hard brushes.
Do not let water or other liquids get inside the device.
ON
Alcohol, solvent
Disconnect the power supply cable and open
the inspection door (see paragraph 5.1).
ATTENTION:
Do not use alcohol, solvents, or hard brushes.
Do not let water or other liquids get inside the device.
ON
Alcohol, solvent
Clean the paper presence sensor and
the sensor for the opening of the inspection door
by using compressed air.
1
2
1
2
Disconnect the power supply cable and open
the inspection door (see
).
93
Содержание TG1260HIII BP
Страница 1: ...USER MANUAL TG1260HIII TG2460HIII ...
Страница 2: ......
Страница 4: ......
Страница 6: ......
Страница 10: ...10 ...
Страница 12: ...12 ...
Страница 14: ...TG1260HIII BP 1 Documentation installation instruction sheet 2 Device 1 2 14 ...
Страница 15: ...TG1260HIII CUT BP 1 Documentation installation instruction sheet 2 Device 1 2 15 ...
Страница 16: ...TG1260HIII CHROMED 1 Documentation installation instruction sheet 2 Device 1 2 16 ...
Страница 17: ...TG2460HIII CHROMED 1 Documentation installation instruction sheet 2 Power supply cable 3 Device 1 2 3 17 ...
Страница 18: ...TG2460HIII TRANSP 1 Documentation installation instruction sheet 2 Power supply cable 3 Device 1 2 3 18 ...
Страница 19: ...TG2460HIII CUT 1 Documentation installation instruction sheet 2 Power supply cable 3 Device 1 2 3 19 ...
Страница 20: ...TG2460HIII EJC 1 Documentation installation instruction sheet 2 Power supply cable 3 Device 1 2 3 20 ...
Страница 46: ...The green status LED turns on and the device is ready COM 24Vdc 2 46 ...
Страница 48: ...Wait until the paper is automatically loaded and cut VROOM 3 48 ...
Страница 56: ...The user withdraws the ticket from the paper mouth Ejector rollers Paper output sensor Ticket withdrew 5 56 ...
Страница 66: ...66 ...
Страница 86: ...86 ...
Страница 88: ...Rotate the platen roller in the shown direction to eject the paper from the rear side of the device 3 88 ...
Страница 90: ...Remove the paper from the rear side of the device Lift the unlocking lever for the printhead 4 3 90 ...
Страница 100: ...100 ...
Страница 113: ...TG1260HIII BP 54 8 26 8 77 5 145 136 3 108 3 40 5 173 145 77 5 113 ...
Страница 114: ...TG1260HIII CUT BP 38 8 10 8 99 166 5 152 3 124 3 56 5 194 5 166 5 99 114 ...
Страница 115: ...TG1260HIII CHROMED TG2460HIII CHROMED 53 2 25 91 158 5 138 110 42 2 186 5 158 5 91 115 ...
Страница 116: ...TG2460HIII TRANSP 131 6 103 6 59 5 36 31 4 191 4 163 4 95 7 95 7 163 4 116 ...
Страница 117: ...TG2460HIII EJC 134 5 106 7 56 5 39 3 28 4 188 1 160 2 92 5 92 5 160 2 117 ...
Страница 124: ...124 ...


