background image

47

46

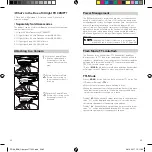
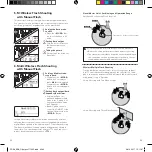
Using the Wide Panel

Pull out the wide panel and 

place it over the flash head as 

shown. The flash coverage will 

then be extended to 14 mm.
•  The catchlight panel will 

come out at the same time. 

Push the catchlight panel 

back in.

•  When pull out the wide panel, the ZOOM will constantly 

be 14mm. The <ZOOM> button will not work.

Low Battery Warning

If the battery power is low, 

<   > will appear and blink on 

the LCD panel. Please replace 

the battery immediately. When 

the low battery indicator is dis-

played, the ZOOM can not be 

adjusted, it will constantly be 

24mm.

C.Fn: Setting Custom Functions

The following table lists the available and unavailable custom 

functions of this flash.

C.Fn Custom Functions

Custom Func-
tion Signs

Function

Setting No.

Settings & De-
scription

ST

Auto sleep 

(standby)

ON

ON

OF

OFF

BL

Backlighting 

control

10 sec.

Off in 10 sec.

OF

Always off

ON

Always lighting

1.  Press the < 

ZOOM

 > Button for 2 seconds until C.Fn menu is 

displayed.

2.  Turn the Select Dial to select the Custom Functions.
3. Press the < 

SET 

> Button and the Setting No. blinks.

4.  Turn the Select Dial to set the desired number. Pressing the 

SET 

> Button will confirm the settings.

5. Press the < 

ZOOM 

> Button to exit.

Protection Function

1. Over-Temperature Protection

•  To avoid overheating and deteriorating the flash head, do not fire 

more than 30 continuous flashes in fast succession at 1/1 full 

power. After 30 continuous flashes, allow a rest time of at least 

10 minutes.

•  If you fire more than 30 continuous flashes and then fire more 

flashes in short intervals, the inner over-temperature protection 

function may be activated and make the recycling time over 10 

seconds. If this occurs, allow a rest time of about 10 minutes, 

and the flash unit will then return to normal.

•  When the over-temperature protection is started,   is shown on 

the LCD panel.

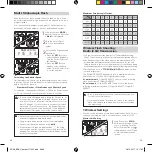
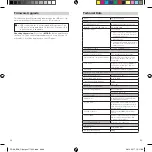
Number of flashes that will activate over-temperature pro-
tection:

Power Output Level

Number of Flashes

1/1

30

1/2 +0.7

40

1/2 +0.3

50

1/2

60

1/4(+0.3,+0.7)

100

1/8(+0.3,+0.7)

200

1/16(+0.3,+0.7)

300

1/32(+0.3,+0.7)

500

1/64(+0.3,+0.7)

1000

1/128(+0.3,+0.7)

Number of flashes that will activate over-temperature pro-
tection in high-speed sync triggering mode:

Power Output

Times

1/1

15

1/2(+0.3,+0.7)

20

1/4(+0.3,+0.7)

30

1/8(+0.3,+0.7)

1/16(+0.3,+0.7)

40

2. Other Protections

The system provides real-time protection to secure the device 

and your safety. The following lists prompts for your reference:

Prompts on 
LCD Panel

Meaning

E1

A failure occurs on the recycling system so that the flash 

cannot fire. Please restart the flash unit. If the problem still 

exists, please send this product to a maintenance center.

E2

The voltage on two outlets of the flash tube is too high. 

Please send this product to a maintenance center.

E3

There are some errors occurred during the upgrading pro-

cess. Please using the correct firmware upgrade method.

FR36_BDA_Olympus 171005.indd   46-47

06.10.2017   15:11:38

Содержание CuLight FR 36MFT

Страница 1: ...FR 36MFT for Olympus Panasonic FR36_BDA_Olympus 171005 indd 27 06 10 2017 15 11 32 ...

Страница 2: ...side it may result in electric shock Do not disassemble Should repairs become necessary this product must be sent to an authorized maintenance center Stop using this product if it breaks open due to extrusion fall ing or strong hit Otherwise electric shock may occur if you touch the electronic parts inside it Do not fire the flash directly into the eyes especially those of babies within short dist...

Страница 3: ...utoflash 35 FEC Flash Exposure Compensation 36 High Speed Sync 36 Second Curtain Sync 36 Flash Mode M Manual Flash 37 Flash Mode Multi Stroboscopic Flash 38 Wireless Flash Shooting Radio 2 4G Transmission 39 Wireless Settings 39 Setting Master Unit s Flash Mode 40 Setting the Communication Channel 40 TTL Fully Automatic Wireless Flash Shooting 41 M Wireless Flash Shooting with Manual Flash 42 Mult...

Страница 4: ...flash High speed sync Page 36 Focus length Page 45 M Manual flash Manual flash output Multi Stroboscopic flash Flash frequency Number of flashes Slave Firing group Master Channel 05 12 13 14 19 20 11 10 15 Slave Unit 01 02 08 03 04 Control Panel 11 MODE Mode Selection Button 12 ZOOM Zoom Selection Button 13 SYNC High Speed Sync Button 14 SLAVE S1 S2 Optic Slave Triggering Selection Button in non w...

Страница 5: ...sh it will enter sleep mode after a certain period adjustable 60 minutes by default of idle use Pressing any flash button will wake it up C Fn Disabling Auto Power Off function is recommended when the flash is used off camera C Fn ST Page 46 Flash Mode TTL Autoflash This flash has three flash modes TTL Manual M and Multi Stroboscopic In TTL mode the camera and the flash will work together to calcu...

Страница 6: ...r to 1 128th pow er in 1 3rd stop increments To obtain a correct flash exposure use a hand held flash meter to determine the required flash out put 1 Press MODE button so that M is displayed 2 Turn the Select Dial to choose a desired flash out put amount In high speed sync mode the ad justable flash range is 1 16 1 1 Flash Output Range The following table makes it easier to see how the stop change...

Страница 7: ...remote control is recommended Stroboscopic flash can be used with bulb If the number of flashes is displayed as the firing will continue until the shutter closes or the battery is ex hausted The number of flashes will be limited as shown by the following table Maximum Stroboscopic Flashes Wireless Flash Shooting Radio 2 4G Transmission You can set up three slave groups for TTL autoflash shooting W...

Страница 8: ...ess the SET button to confirm 4 TTL Fully Automatic Wireless Flash Shooting Autoflash Shooting with One Slave Unit 1 Master Unit Setting Attach a CUlight FR 36MFT camera flash on the camera and set it as the master unit Page 39 A B C can be set as TTL mode independently 2 Slave Unit Setting Set the CUlight FR 36MFT that to be controlled as the wireless slave unit Page 40 The slave unit can be set ...

Страница 9: ...ash master slave with a radio transmission wireless shooting function make it easy to shoot with advanced wireless multiple flash lighting in the same way as TTL autoflash shooting The basic relative position and operation range are as shown in the picture You can then perform wireless TTL autoflash shoot ing just by setting the master unit to TTL Slave Master Unit s Positioning and Operation Rang...

Страница 10: ... panel you can create a catchlight in the sub ject s eyes to add life to the facial expression 1 Point the flash head upward by 90 2 Pull out the wide panel The catchlight panel will come out at the same time 3 Push the wide panel back in Push in only the wide panel Follow the same proce dures as for bounce flash ZOOM Setting the Flash Coverage and Using the Wide Panel The flash coverage can be se...

Страница 11: ... succession at 1 1 full power After 30 continuous flashes allow a rest time of at least 10 minutes If you fire more than 30 continuous flashes and then fire more flashes in short intervals the inner over temperature protection function may be activated and make the recycling time over 10 seconds If this occurs allow a rest time of about 10 minutes and the flash unit will then return to normal When...

Страница 12: ...sure control system TTL autoflash and manual flash Flash exposure compensation FEC Manual FEB 3 stops in 1 3 stop increments Manual FEC can be combined Sync mode High speed sync up to 1 8000 sec onds first curtain sync and sec ond curtain sync Multi flash Provided up to 90 times 99Hz Wireless Flash 2 4G radio transmission Wireless flash function Master Slave Off Controllable slave groups 3 A B and...

Страница 13: ...rection The camera flash s internal battery is exhausted If appears and blinks on the LCD panel replace the bat tery immediately The Camera Flash does not fire The camera flash is not attached securely to the camera Attach the camera s mounting foot securely to the camera The electrical contacts of the Camera Flash and camera are dirty Clean the contacts The power turns off by itself After 90 seco...

Отзывы: