background image

CANifier 

User’s

 Guide                                                                www.ctr-electronics.com                                                                10/8/2017 


Cross The Road Electronics                                                                    Page 15                                                                              10/8/2017 
 

2.4. Test CANifier assembly and wiring 

Before installing CANifier into the final enclosure or heat shrink tubing, test CANifier in isolation.  This is the best 
opportunity to field-upgrade CANifier to latest firmware, and test peripherals to ensure wiring is correct before 
burying the CANifier assembly into the final robot/platform. 
 

It is recommended to perform basic functional testing on all control system components as soon as they are 
received.  Many of these components have manufacture warranties that can expire if a boxed component is left 
unused/untested for an excessive period.  

Spare/backup components meant for competition should be checked 

in advance as well.  This will ensure the 

best chance of success during competition events

 where

 repair time 

is 

limited

 between matches. 

  
If the 5V or 3.3V rail is used to power a sensor, confirm the sensor is functional and the rails meet the expected 
voltages with a voltmeter. 
 
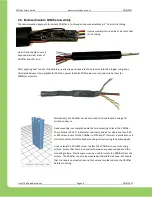
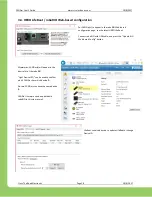
Below, CANifier is directly inserted into a HERO with a simple C# app that streams thru LED strip colors. 
 
Example source is available on 

www.ctr-electronics.com

 and 

www.github.com/CrossTheRoadElec


Содержание CANifier

Страница 1: ...CANifier User s Guide www ctr electronics com 10 8 2017 Cross The Road Electronics Page 1 10 8 2017 CANifier User s Guide Revision 1 0 Cross The Road Electronics www ctr electronics com...

Страница 2: ...ose Insulate CANifier assembly 16 3 Phoenix Framework Software 17 3 1 Software Examples 17 3 2 Status Frame Rates 17 3 3 Custom Platforms 17 3 4 HERO LifeBoat roboRIO Web based configuration 18 4 Func...

Страница 3: ...cumentation possible to ensure successful use of your CTRE products To this end we will continue to improve our publications examples and support to better suit your needs If you have any questions or...

Страница 4: ...ototyping need to quickly add another sensor Example use cases solved by CANifier Integrates PWM sensors like LIDAR Sonar into a CTRE HERO FRC CAN Bus control system Add more sensors into the FRC CAN...

Страница 5: ...Limit switches o Pixy CMUcam5 o Pulse width ultrasonic e g MaxBotix MB1013 o LIDAR Lite v3 o Talon Tach o Digital Sharp distance sensors Outputs for common devices including o PWM motor controllers o...

Страница 6: ...round 6 QUAD B Quadrature channel B 7 INDEX Quadrature Index 8 LIMF Limit Switch Forward 9 GND Ground 10 LIMR Limit Switch Reverse 11 GND Ground 12 CS PWM3 SPI Chip Select PWM input 3 13 CLK PWM0 SPI...

Страница 7: ...28 0V 12 24 mA Vdrop_5V 5V rail dropout voltage At Vdd 6 5 2 V Vdrop_3 3V 3 3V rail dropout voltage At Vdd 3 9 3 V Vdrop_CAN CAN dropout voltage At Vdd 5 2 V Imax_5V Max continuous 5V current draw 50...

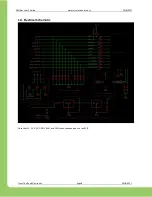
Страница 8: ...CANifier User s Guide www ctr electronics com 10 8 2017 Cross The Road Electronics Page 8 10 8 2017 1 4 Electrical Schematic Note that V 5V 3 3V GND CANH and CANL have exposed pads on the PCB...

Страница 9: ...he table below shows the possible color states and their respective operation Note 1 LEDs Alternate Status LEDs are always different colors The 2X LEDs will swap colors when blinking Blink Codes LEDs...

Страница 10: ...ittent change in LED activity If this is being witnessed ensure that the LED pattern isn t simply an intermittent red LED blink superimposed on to the typical orange LED pattern This is typically obse...

Страница 11: ...ery use case will require power and ground wire leads and CAN bus Twist rat tail splice two CAN pigtail wire pairs so that it can be easily soldered This allows for daisy chaining of CAN bus devices P...

Страница 12: ...y increase the risk of fire PDP breakers fuses do not improve this problem since they do not open until 10 40A of continuous draw depending on which fuse breaker type If in doubt feel the wire harness...

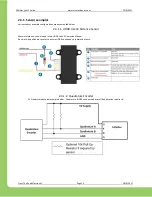
Страница 13: ...nfigurations are documented below 2 3 1 1 LIDAR Lite V3 Distance Sensor More information can be found in the LIDAR Lite V3 Operation Manual Be sure to tie pull down resistor to ensure LIDAR continuous...

Страница 14: ...CANifier User s Guide www ctr electronics com 10 8 2017 Cross The Road Electronics Page 14 10 8 2017 2 3 1 3 Limit Switch Inputs...

Страница 15: ...mponents as soon as they are received Many of these components have manufacture warranties that can expire if a boxed component is left unused untested for an excessive period Spare backup components...

Страница 16: ...sensors etc Alternatively the CANifier can be mounted to a fixed location using a 3D printed enclosure Fixed mounting is accomplished via the two mounting holes in the CANifier These holes are 0 125...

Страница 17: ...m CrossTheRoadElec Phoenix Examples Languages FRC LabVIEW https github com CrossTheRoadElec Phoenix Examples LabVIEW 3 2 Status Frame Rates After CANifier boots application firmware it transmits the f...

Страница 18: ...the latest HERO LifeBoat Connect roboRIO with USB cable and press the Update RIO Web based Config button Afterwards CANifier s will appear in the device list of the roboRIO Light Device LED can be use...

Страница 19: ...connecting the LIDAR Lite sensor while CANifier is powered may cause CANifier to reboot as the supply rail may reset Since hot swapping sensors is typically not done during robotic movement no workaro...

Страница 20: ...uestions FAQ 5 1 Certain features are not working but this document indicates they should work Update to the latest CANifier firmware CANifier ship firmware is 0 4 which is missing most features 5 2 S...

Страница 21: ...Electronics Page 21 10 8 2017 6 Firmware CRF Version History CRF Version Date Description 0 9 7 Sept 2017 First public release 0 4 4 Sept 2017 Ship Firmware 7 Revision History Revision Date Descriptio...

Отзывы: