Software
Operation
Right
Click
on
Model
3
4
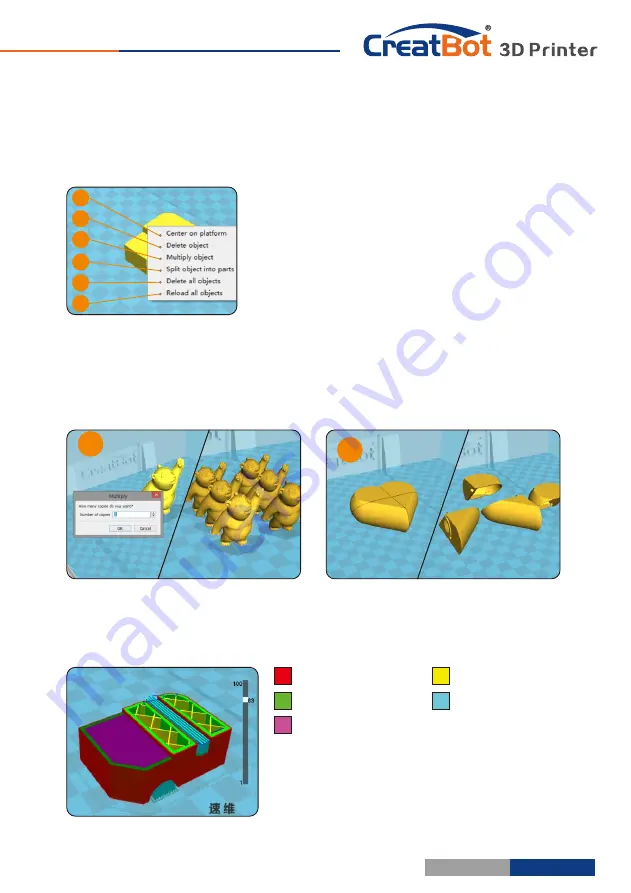
Red
represents
"
outer
shell
"
Green
represents
"
inner
shell
"
Yellow
represents
"
infill
"
Purple
represents
"
bottom
and
top
shell
"
Blue
represents
"
support
"
Toolpath
Structure
Drag layer indicator can browse different
level paths, Ctrl + arrow keys to browse layer by
layer. 3D printing is the superposition of these
different layers and built layer by layer.
4
6
5
2
3
1
Right-click on the model pop-up shortcut
menu, here are more features:
[1]
"Centered" make the model back to the
center position of the platform.
"Delete" to
[2]
remove the currently selected model.
"Multiply"
[3]
to copy the currently selected model and
automatically position, which is useful for printing
more than one model at a time.
"Split" multi-
[4]
component model can be split into its separate
components, this process more time-consuming, try to split the model in the
modeling software,
models splited can be printed individually and then assembled
together .
"Delete All" to delete all the models loaded.
"Reload all" Reload all
[5]
[6]
- 27 -
Model
Mirror
Software
Operation
Click the mirror button
,
[1]
you can pop up the mirror menu.
Button
is a mirror along
[2]
the X axis.
Button
is a mirror along
[3]
the Y axis.
Button
is a mirror along
[4]
the Z axis.
Note that the mirror
transformation is different from
the rotation, such as the mirror
transformation will lead to a
change in the direction of
rotation, and the rotation will not change the
model.
3
1
2
4
View
Mode
From the overhang
view
,
you
can
see
the
suspended
part
of
the
model which
is
shown
in red color.
By changing the supporting angle
can be seen suspended parts size is
dynamically changing.
By slice view can easily observe
the generated path, you can easily
observe the different layers of sliced
by slicing altitude indicator, use Ctrl
+ arrow keys can also be observed
layer-by-layer.
- 26 -


