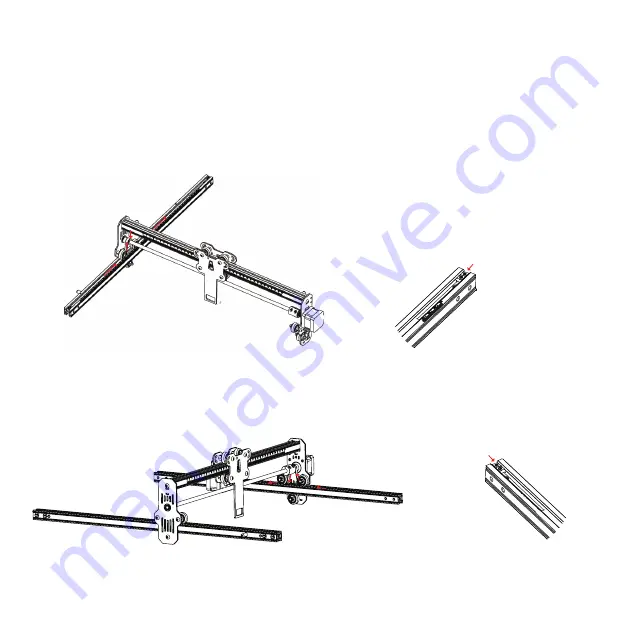
Assemble the left Y-axis assembly:Pass the left Y-axis assembly (with the belt up) through the X-axis
assembly and put on the belt in the direction shown in the figure:
Tighten the belt, and insert two T-shaped nuts into the
left Y-axis assembly.Then lock the belt with hexagon screw.
1. 安装左 Y 轴组件:将左 Y 轴组件(同步带朝上)穿过 X 轴组件,按图示方向穿好同步带:
Assemble the right Y-axis assembly and it is the same as above.
2. 安装右 Y 轴组件:方法同上。
拉紧同步带,同时将两颗 T 型船型螺母嵌入左 Y 轴组件中,再使
用内六角紧定螺钉锁紧同步带。
组装说明
Assemble directions
T 型船型螺母
T-shaped nuts
T 型船型螺母
T-shaped nuts
注意不能锁得太紧,防止皮带穿孔。
Not to lock too tightly to prevent
the belt from perforating.
Содержание CR-Laser Falcon
Страница 1: ...CR Laser Falcon CR Laser Falcon User Manual V1 0 SHENZHEN CREALITY 3D TECHNOLOGY CO LTD...
Страница 2: ......
Страница 3: ......
Страница 19: ......


