12
10.
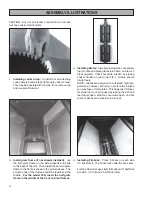
Install grate frame (if not already installed):
Lay
the
fi
rst grate frame on the side supports and slide
to the back of the unit. Then install the second grate
frame to the front as shown in the picture above. The
smooth ends of the frames should be together in the
middle.
For the model 30A, insert the half grate
frame in the middle of the front and rear frames.
12.
Installing Firebrick:
Place 5 bricks on each side
(10 brick total). The bricks tuck under
fi
rebox seem.
For the 30A model, use six(6) full brick and 1 half brick
per side. (12 full and 2 half brick total)
9.
Installing collar to top:
To install hot air attaching
collar, simply bend all tabs right angle under shroud.
This may be possible with thumbs, if not, remove top
and use small hammer.
CAUTION: Any hot air plenum connection to a furnace
must be constructed of metal.
Installing Grates:
Install grates together, slip shaker
lug into hole and place grates into frame. Grate arch
faces upward. Check out grate rotation by placing
shaker handle on grate lug (3/4”). Grates should
rotate freely.
NOTE: Grates are designed to withstand high tem-
peratures, however, should you over
fi
re the furnace
you may fuse or melt grates. This happens if furnace
receives too much air caused by leaving the ash and
feed doors open, draft fan cover wide open, and hot
coals or ashes are excessive in ash pan.
11
.
ASSEMBLY ILLUSTRATIONS
Содержание 24A
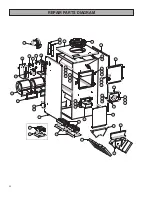
Страница 22: ...22 REPAIR PARTS DIAGRAM ...
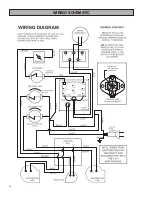
Страница 24: ...24 WIRING SCHEMATIC ...
Страница 25: ...25 NOTES ...
Страница 26: ...26 NOTES ...
Страница 27: ...27 NOTES ...


