background image


8

the top hole of Handlebar support (7).   

e.

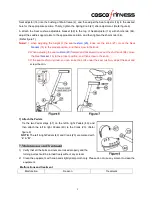
 Insert the Handlebar support (7) to the Main frame (4) and secure it with   

four M8x16 Bolts (42), 

Φ

8 Spring washer (50) 

and Arc washers (34). (Refer figure 3)


4) 

Attach the Handle Pulse Tube and Computer 

a.

 Insert the Tension control wires (19) through into the hole of the 

Handlebar support (7) and then pull them out from the top hole of 

Handlebar support (7). Attach the Handlebar (8) to the Handlebar 

locator(A) of the Handlebar post(7) with the Handlebar cover(69), 

then insert the Tension control wires(19) into the hole of the 

Handlebar support(7) with the Pole plug(70), and put the 

Spacer(70) on the T-knob(71). Adjust the handlebar to the proper 

position, and lock with the T-knob(71) tightly. 

b.

 Connect the Computer wire (18) and the Pulse wires (19)and 

sensor wire, insert the surplus wire into the Handlebar (7).then insert the Computer (11) to the top of 

Handlebar support (7) ,make sure the computer is inserted to the handlebar support firmly. 

then tighten


it 

with M5*10 cross-head screw(74) 

(Refer figure 4) 


5) Attach the Seat Cushion 

Remove three M8 Nylon Nuts (59) and 

Φ

8 Flat washers (55) from 

underneath of the Seat cushion (20), and then attach the Seat cushion 

(20) to the Seat cushion adjustable bracket(62) with the three M8 Nylon 

Nuts (59) and 

Φ

8 Flat washers (55) that were removed. (Refer figure 5) 


6) Attach the Seat bracket 

a. 

with the groove of the D-shaped washer (26) aiming to the slot of the seat support of the main frame (4), 

pat the D-shaped washer (26) gently into the main frame (4). Then 

release the Spring Knob (27), insert the 

Содержание CEB TRIM-300U

Страница 1: ...Magnetic Upright Bike OWNER S MANUAL CEB TRIM 300U...

Страница 2: ...1 Table of Contents 2 Precautions 3 Operation Instruction 4 Parts List 5 Overview Drawing 6 Hardware Packing List Assembly Instructions 8 Maintenance and Treatment 9 Warming up and cooling down...

Страница 3: ...or medical history In order to attain the ideal exercise result besides executing a suitable amount of exercise it is also very important to insist on doing exercise every day 7 Before exercise in ord...

Страница 4: ...RESET CLEAR if have To let the value reset OPERATION PROCEDURES AUTO ON OFF The monitor will be automatically shut off if there is no signal coming in for 4 minutes The monitor will be auto powered wh...

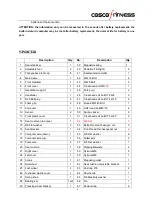
Страница 5: ...f bolt ST4 2 16 8 10 Foam grip 2 48 Round M8 40 Bolt 1 11 Computer 1 49 Half round bolt M8 20 4 12 Sensor 2 50 Spring spacer 8 13 Front plastic cover 1 51 Crosshead self bolt ST4 2 20 9 14 Seat cushio...

Страница 6: ...nob 1 34 Arc washer 4 72 Crank spacer 2 35 Spacer 1 73 Thin flat washer 6 1 36 Flywheel axis 1 74 Crosshead bolt M5 10 1 37 Magnetic guider bracket 1 75 Cover fixing ring 1 38 Tension control wire 1 7...

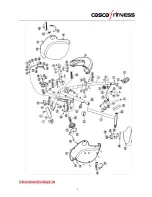
Страница 7: ...6 5 Hardware Packing List...

Страница 8: ...50 and 8 flat washer 55 Refer figure 2 3 Attach the Handlebar Support a Put the cable end of resistance cable of Tension control 41 into the spring hook of Tension control wire 38 as shown on drawing...

Страница 9: ...osition and lock with the T knob 71 tightly b Connect the Computer wire 18 and the Pulse wires 19 and sensor wire insert the surplus wire into the Handlebar 7 then insert the Computer 11 to the top of...

Страница 10: ...he seat cushion 20 forward and backward loose out the short knob 64 move the Seat bracket 16 to the proper position and then screw in the knob 3 If the seat cushion inclined you can loose the bolts un...

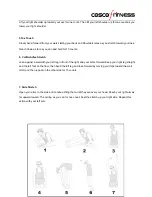
Страница 11: ...workouts to four or five times per week Warming up is an important part of your workout and should begin every session It prepares your body for more strenuous exercise by heating up and stretching ou...

Страница 12: ...retch Lean against a wall with your left leg in front of the right and your arms forward Keep your right leg straight and the left foot on the floor then bend the left leg and lean forward by moving y...

Страница 13: ...12 Cosco India Ltd 2 8 Roop Nagar Delhi 110 007 B23900 C 0801 141F...

Отзывы: