9
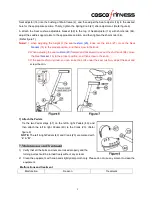
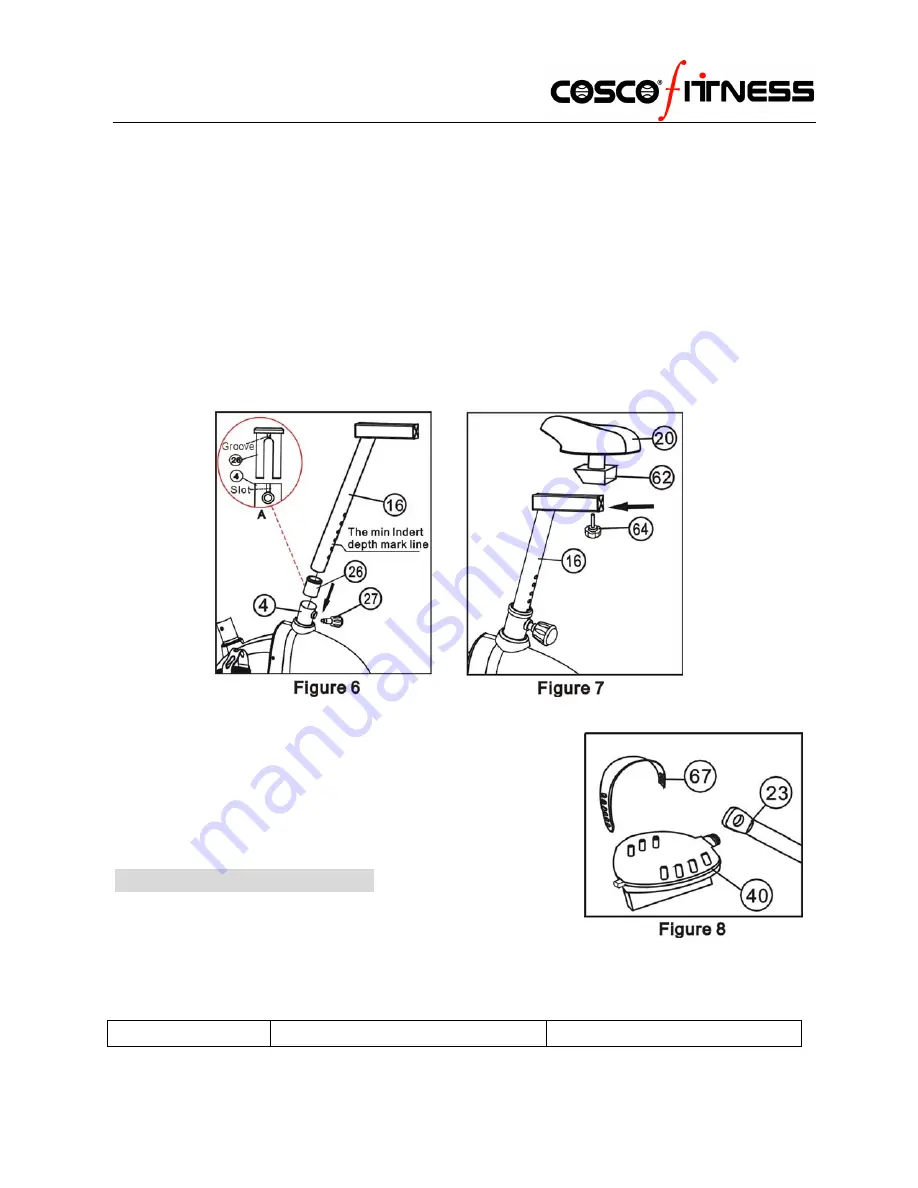
Seat adjustor (16) into the bushing of Main frame (4), and then adjust the Seat adjustor (16) to the desired
hole for the appropriate position. Thirdly, tighten the Spring Knob (27) after adjustment. (Refer figure 6)
b. attach the Seat cushion adjustable bracket (62) to the top of Seat Adjustor (16) with short knob (64),
adjust the saddle support plate to the appropriate position, and then tighten the short knob (64).
(Refer figure 7)
Noted:
1. when adjusting the height of the seat
cushion (20)
, loose out the knob (27), move the Seat
bracket
(16) to the proper position, and then screw in the knob;
2. When adjusting the seat
cushion (20)
forward and backward, loose out the short knob (64), move
the Seat
bracket
(16) to the proper position, and then screw in the knob;
3. If the seat cushion inclined, you can loose the bolts under the seat cushion, adjust the seat and
screw them in.
7) Attach the Pedals
Tie the two Pedal strips (67) on the left & right Pedals (40), and
then attach the left & right Pedals (40) to the Crank (23). (Refer
figure 8)
NOTE:
The left & right Pedals (40)
and Crank (23) are marked with
“
L
” & “
R
”.
7. Maintenance and Treatment
1) Verify that all the bolts and nuts are locked properly and the
turning parts should be turned freely without any scream.
2) Clean the equipment with soap and slightly damp cloth only. Please do not use any solvent to clean the
equipment.
Malfunctions and treatment
Malfunction Reason
Treatment


