7
A. Door/Window Sensor:
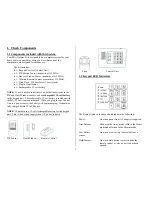
When you open up the sensor, the jumper pins are located just
below the word “MODE” on the circuit board. On the door/wire
sensor, there may also be a second set of jumper pins. They are
labeled LED ON and LED OFF. This jumper setting allows for the
LED to not light up when the sensor is activated or in an alarm state.
They come set in the LED ON position. The actual position of the
jumper pins may be slightly different from the following diagram.
B. PIR Motion Sensor:
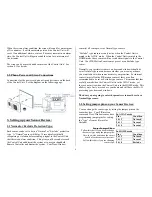
When you open up the sensor, the jumper pins are located just
below the word “MODE” on the circuit board. The actual position
of the jumper pins may be slightly different from the following
diagram.
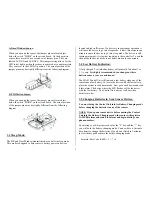
3.3 Sleep Mode:
The PIR and Door/Window transmitters have a built-in sleep mode.
This mode is designed to help conserve battery power on devices
located in high traffic areas. If a device is in continuous operation it
will cause the device to go into sleep mode. It takes three trips in one
minute to cause the device to go into sleep mode. The device is still
sensing movement, it is just not reporting to the controller. To exit the
sleep mode the device needs to not detect motion for one minute.
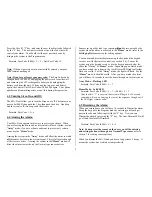
3.4 Low Battery Indication:
A fully charged 9 volt alkaline battery will generally last about 1 to
1 ½ years. It is highly recommended you change out these
batteries once a year at a minimum!
The MA-D Control Unit will indicate a low battery when one of the
sensors has a low battery. To locate the device with the low battery,
place the system in the disarm mode. Now go to each device and send
it into alarm. The device where the LED flashes will be the device
with the low battery. The Control Unit does not call-out when
batteries are low.
3.5 Changing Batteries in Your Sensor Devices:
You must bring the Control Unit into its Battery-Changing mode
before changing the batteries in any of the sensors.
NOTE: If you open a sensor device before putting the Control
Unit into the Battery-Changing mode, the sensor will register a
TAMPER alarm and sound the alarm and begin dialing your
phone numbers.
By entering your 4-digit pass code plus the “#” key and the “*” key
you will be in the battery-changing mode. You now have a 3-minute
time frame to change the batteries. If you do not finish in 3-minutes
just set the keypad back into the battery-changing mode.
Formula: Pass Code (0000) + # + * + #


