100
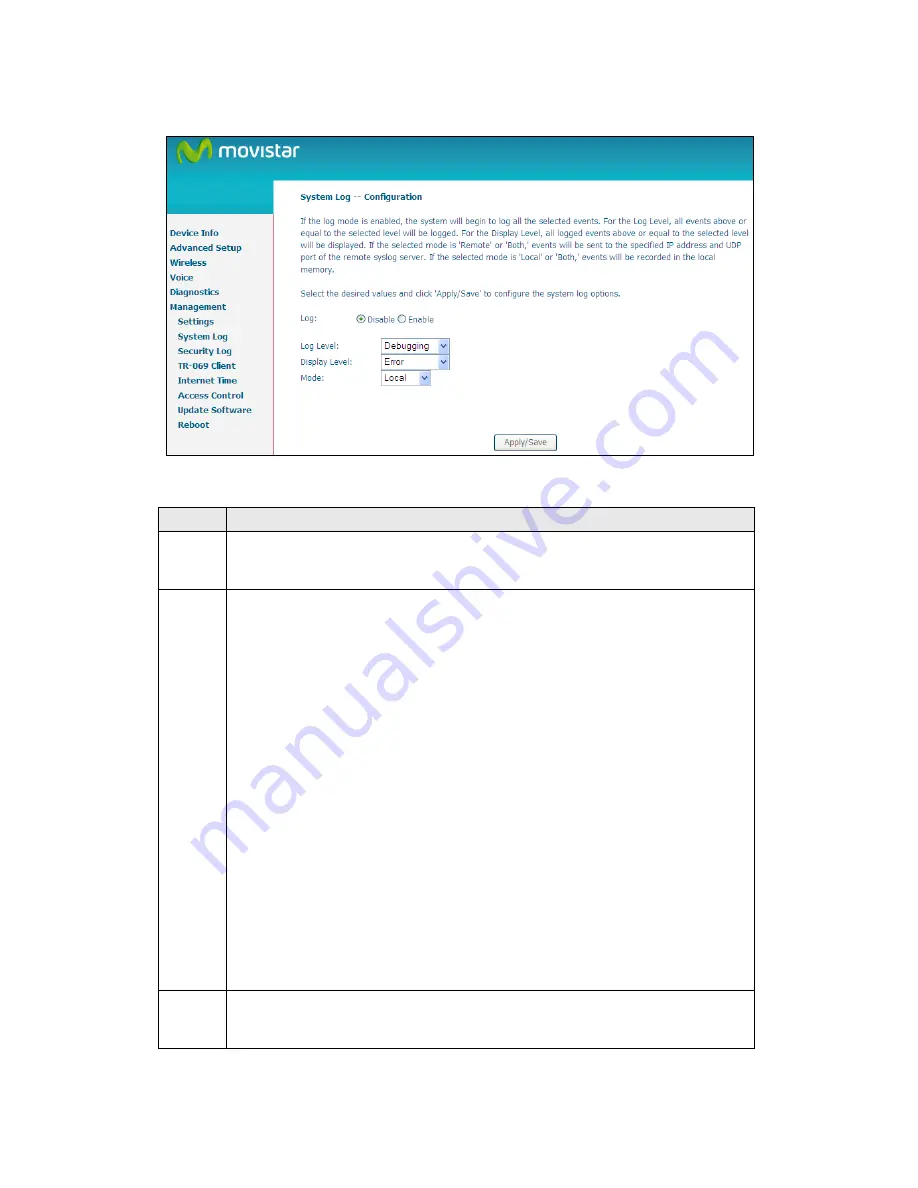
STEP 2: Select desired options and click Apply/Save.
Consult the table below for detailed descriptions of each system log option.
Option Description
Log
Indicates whether the system is currently recording events. The user
can enable or disable event logging. By default, it is disabled. To
enable it, select the Enable radio button and then click Apply/Save.
Log
Level
Allows you to configure the event level and filter out unwanted events
below this level. The events ranging from the highest critical level
“Emergency” down to this configured level will be recorded to the log
buffer on the VG-8050 SDRAM. When the log buffer is full, the newer
event will wrap up to the top of the log buffer and overwrite the old event.
By default, the log level is “Debugging”, which is the lowest critical level.
The log levels are defined as follows:
Emergency = system is unusable
Alert = action must be taken immediately
Critical = critical conditions
Error = Error conditions
Warning = normal but significant condition
Notice= normal but insignificant condition
Informational= provides information for reference
Debugging = debug-level messages
Emergency is the most serious event level, whereas Debugging is the
least important. For instance, if the log level is set to Debugging, all the
events from the lowest Debugging level to the most critical level
Emergency level will be recorded. If the log level is set to Error, only
Error and the level above will be logged.
Display
Level
Allows the user to select the logged events and displays on the View
System Log window for events of this level and above to the highest
Emergency level.
Содержание VG-8050
Страница 1: ...VG 8050 Wireless Router Access Point User Manual Version 1 1 January 12 2013 261097 011 ...
Страница 7: ...6 1 2 Application The following diagram depicts the application of the VG 8050 ...
Страница 16: ...15 ...
Страница 30: ...29 5 3 1 IPv6 Autoconfig ...
Страница 45: ...44 A maximum of 100 entries can be added to the URL Filter list ...
Страница 52: ...51 5 9 UPnP Select the checkbox provided and click Apply Save to enable UPnP protocol ...
Страница 64: ...63 Enter a certificate name and click Apply to import the CA certificate ...
Страница 86: ...85 7 1 SIP Basic Setting 7 1 1 Global Parameters A common parameter setting ...
Страница 87: ...86 7 1 2 Service Provider This screen contains basic SIP configuration settings ...
Страница 90: ...89 7 2 2 Service Provider Configure your settings based on your service provider ...
Страница 118: ...117 ...
Страница 119: ...118 Step 3 When the screen refreshes click the ConfigAP button ...
Страница 120: ...119 Step 4 Open the Network folder in Vista and look for the BroadcomAP icon ...
Страница 124: ...123 To add a WAN connection go to G2 WAN Connections ...


