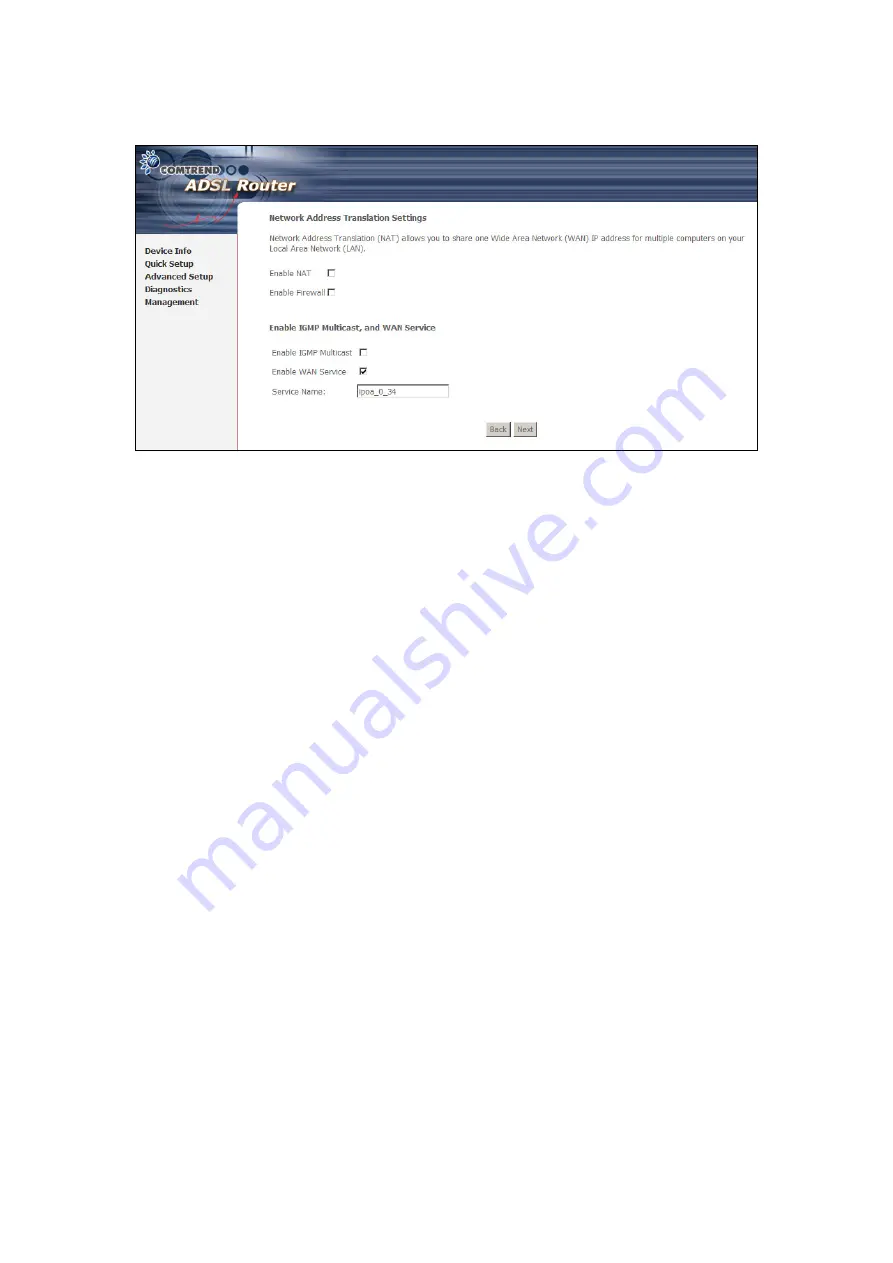
Step 2:
Click
Next
. The following screen appears.
Enable NAT checkbox
If the LAN is configured with a private IP address, the user should select this
checkbox. The NAT submenu will be displayed on the advanced setup menu after
reboot. The user can then configure NAT-related features after the system comes
up. If a private IP address is not used on the LAN side (i.e. the LAN side is using
a public IP), this checkbox should be de-selected. When the system comes back
after reboot, the NAT submenu will not be displayed on the left main menu. The
default setting for MER is disabled.
Enable Firewall checkbox
If the firewall checkbox is selected, the security submenu will be displayed on the
advanced setup menu after reboot. The user can then configure firewall features
after the system comes up. If firewall is not used, this checkbox should be de-
selected to free up system resources for better performance. When system
comes back after reboot, the Security submenu will not be displayed on the left
main menu. The default setting for MER is disabled.
Enable IGMP Multicast:
Tick the checkbox to enable IGMP multicast (proxy).
IGMP (Internet Group Membership Protocol) is a protocol used by IP hosts to
report their multicast group memberships to any immediately neighboring
multicast routers.
Enable WAN Service:
Tick the checkbox to enable the WAN (ADSL) service. If
this item is not selected, you will not be able to use the ADSL service.
Service Name:
This is User-defined.
Step 3:
Click
Next
to display the following screen. The Device Setup screen
allows the user to configure the LAN interface IP address and subnet
mask of the ADSL router. Select
Enable DHCP server
and enter
Start/End IP address and DHCP lease time to assign dynamic IP
addresses, DNS server and default gateway to other LAN devices.
30
Содержание CT-5611TC
Страница 1: ...CT 5611TC ADSL2 Combo Router User s Manual Version A1 0 July 21 2008 261070 010...
Страница 15: ...STEP 7 Click the Finish button when the window displays as below 14...
Страница 16: ...STEP 8 Installation is complete You can now use the USB connection 15...
Страница 40: ...39...
Страница 42: ...5 4 ARP Click ARP to display the ARP information 5 5 DHCP Click DHCP to display the DHCP information 41...
Страница 65: ...64...


