62
5.6.2 MAC Filtering
NOTE:
This option is only available in bridge mode. Other modes use
to perform a similar function.
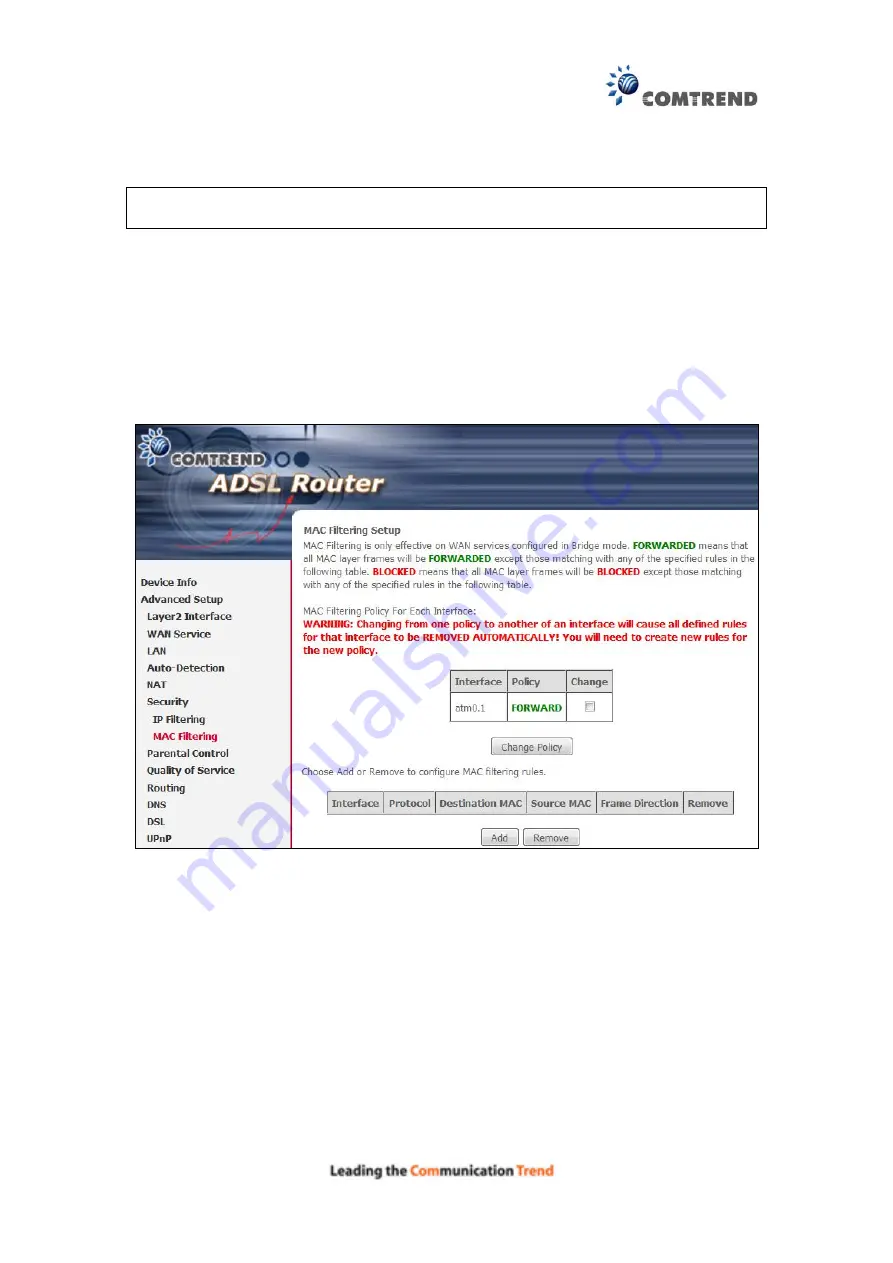
Each network device has a unique 48-bit MAC address. This can be used to filter
(block or forward) packets based on the originating device. MAC filtering policy and
rules for the AR-5381u can be set according to the following procedure.
The MAC Filtering Global Policy is defined as follows.
FORWARDED
means that all
MAC layer frames will be
FORWARDED
except those matching the MAC filter rules.
BLOCKED
means that all MAC layer frames will be
BLOCKED
except those
matching the MAC filter rules. The default MAC Filtering Global policy is
FORWARDED
. It can be
changed by clicking the
Change Policy
button.
Choose
Add
or
Remove
to configure MAC filtering rules. The following screen will
appear when you click
Add
. Create a filter to identify the MAC layer frames by
specifying at least one condition below. If multiple conditions are specified, all of
them must be met. Click
Save/Apply
to save and activate the filter rule.
Содержание AR-5381u
Страница 1: ...AR 5381u ADSL2 WLAN Router User Manual 261056 074 Version A2 3 May 9 2016...
Страница 8: ...7 APPENDIX D CONNECTION SETUP 149 APPENDIX E PRINTER SERVER 199...
Страница 18: ...17 STEP 3 After successfully logging in for the first time you will reach this screen...
Страница 24: ...23 4 2 4 xDSL Statistics The xDSL Statistics screen displays information corresponding to the xDSL type ADSL...
Страница 33: ...32 4 7 IGMP Proxy Displays a list of IGMP Proxy entries...
Страница 106: ...105 Enter a certificate name and click Apply to import the CA certificate...
Страница 122: ...121 6 6 Site Survey The graph displays wireless APs found in your neighborhood by channel...
Страница 123: ...122...
Страница 125: ...124 6 8 WiFi Button This page allows you to enable or disable the WiFi Button...
Страница 138: ...137 NOTE Passwords can be up to 16 characters in length...
Страница 159: ...158 The settings shown above are described below...
Страница 179: ...178 Click Next to continue or click Back to return to the previous step...
Страница 184: ...183 Click Next to continue or click Back to return to the previous step...
Страница 201: ...200 STEP 2 Click the Windows start button Then select Control Panel...
Страница 202: ...201 STEP 3 Select Devices and Printers STEP 4 Select Add a printer...


