117
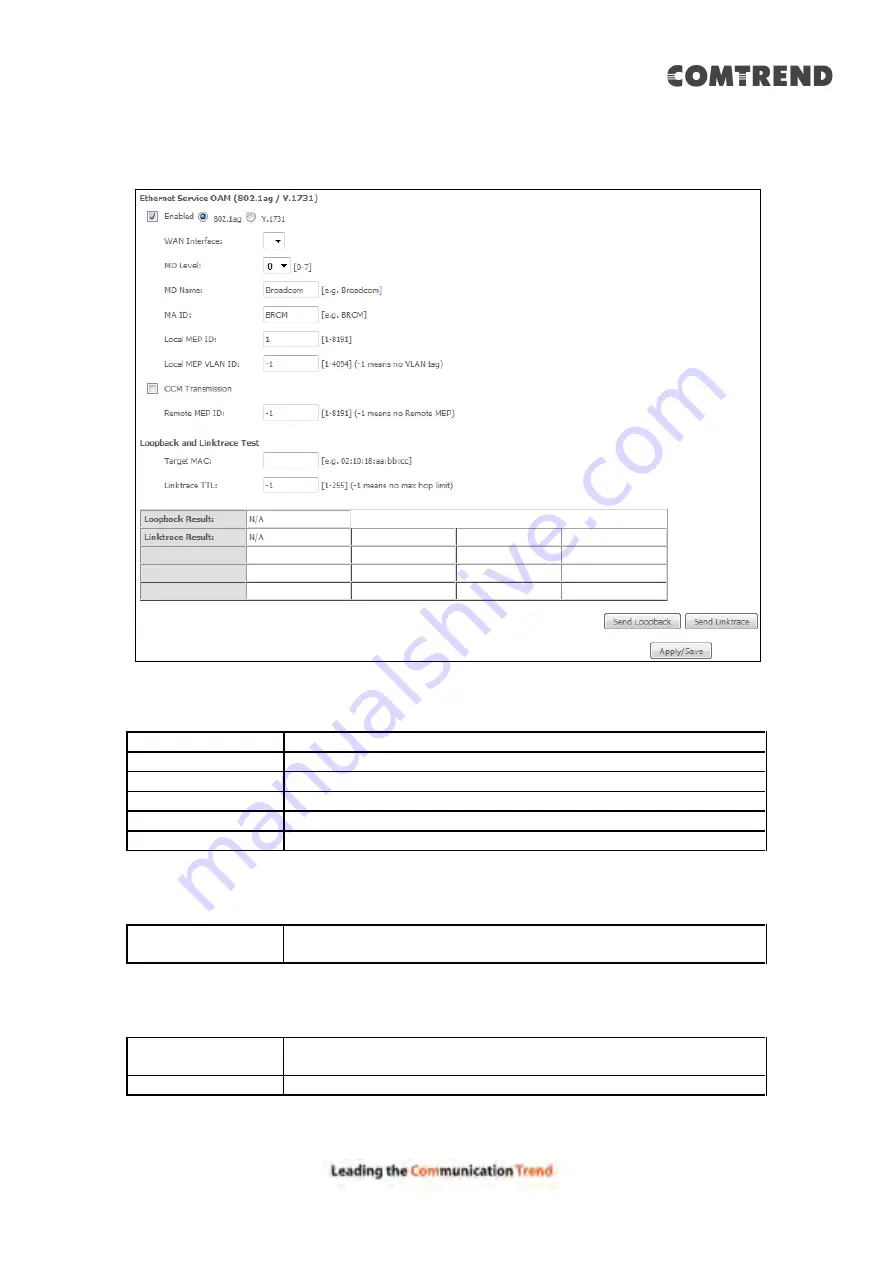
To enable Ethernet Service OAM (802.1ag/Y1731), click Enabled to display the full
configuration list.
Click
Apply/Save
to implement new configuration settings.
WAN Interface
Select from the list of WAN Interfaces to send OAM packets
MD Level
Maintenance Domain Level
MD Name
Maintenance Domain name
MA ID
Maintenance Association Identifier
Local MEP ID
Local Maintenance association End Point Identifier
Local MEP VLAN ID
VLAN IP used for Local Maintenance End point
Click CCM Transmission to enable CPE sending Continuity Check Message (CCM)
continuously.
Remote MEP ID
Maintenance association End Point Identifier for the remote
receiver
To perform Loopback/Linktrace OAM test, enter the Target MAC of the destination
and click “Send Loopback” or “Send Linktrace” button.
Target MAC
MAC Address of the destination to send OAM
loopback/linktrace packet
Linktrace TTL
Time to Live value for the loopback/linktrace packet
Содержание AR-5319
Страница 1: ...AR 5319 ADSL2 WLAN Router User Manual 261056 079 Version A1 1 March 6 2017...
Страница 40: ...39 4 11 2 Site Survey The graph displays wireless APs found in your neighborhood by channel...
Страница 56: ...55 5 3 3 UPnP Select the checkbox provided and click Apply Save to enable UPnP protocol...
Страница 67: ...66 Enter the PPP username password given by your service provider for PPP service detection...
Страница 79: ...78 6 3 2 Wlan Queue Displays the list of available wireless queues for WMM and wireless data transmit priority...
Страница 111: ...110 Enter the MAC address in the box provided and click Apply Save...
Страница 132: ...131 Note Passwords may be as long as 16 characters but must not contain a space Click Save Apply to continue...
Страница 149: ...148 To add a WAN connection go to E2 WAN Connections...
Страница 156: ...155 10 IPoA IPv6 Not Supported The subsections that follow continue the WAN service setup procedure...
Страница 185: ...184 Click Next to continue or click Back to return to the previous step...
Страница 203: ...202 STEP 2 Click the Windows start button Then select Control Panel...
Страница 204: ...203 STEP 3 Select Devices and Printers STEP 4 Select Add a printer...


