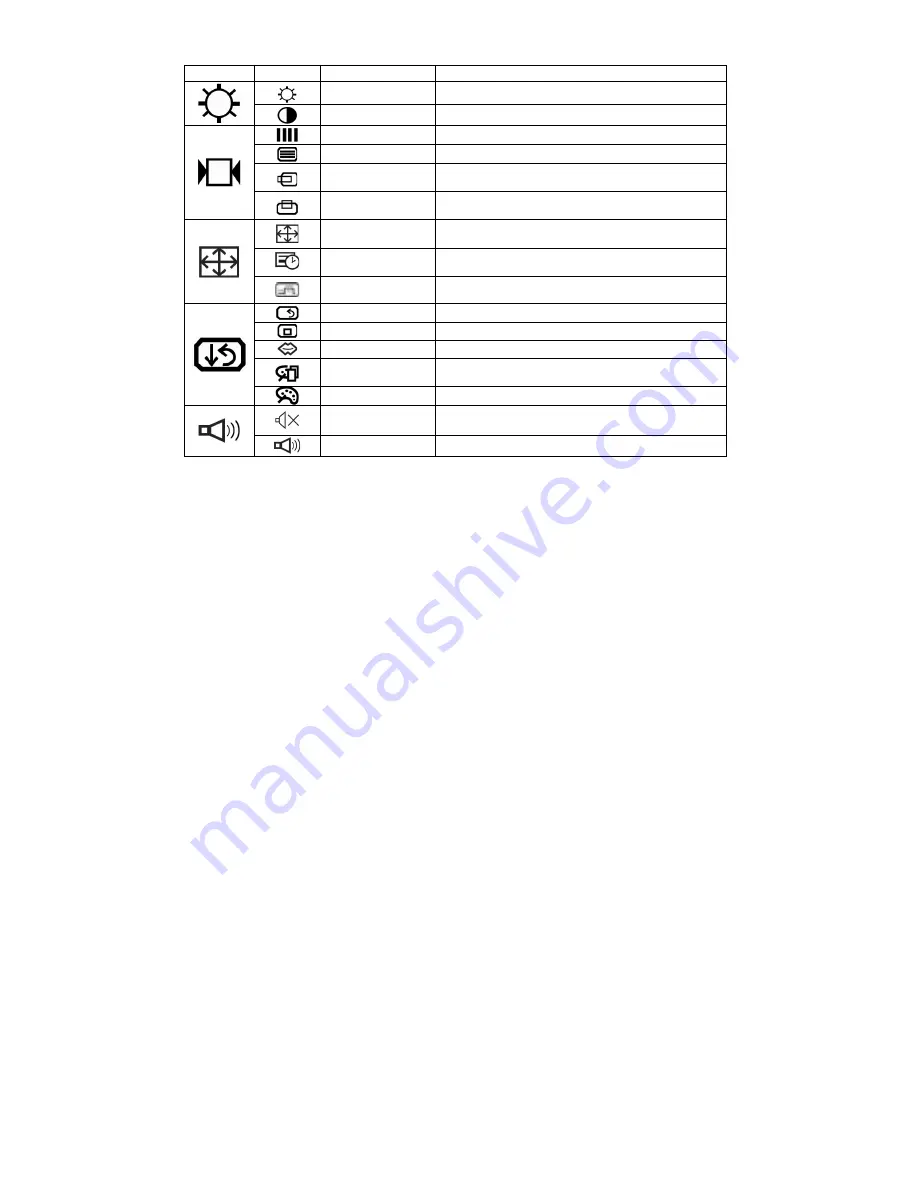
Compucon A590ST Скачать руководство пользователя страница 7

Menu Table

Main Menu Sub Menu

Function Name

Function


BRIGHTNESS

Adjusts the level of brightness and darkness


CONTRAST

Adjusts the RGB color pattern set of the contrast

CLOCK

Adjusts the number of pixels from source video

CLOCK PHASE

Adjusts the phase relative to video H-sync signal

HORIZONTAL

POSITION

Moves the screen horizontally (left/right)

VERTICAL

POSITION

Moves the screen vertically (up/down)

AUTO SETUP

To auto adjust press the “+” button

AUTO ADJUST

Automatically adjusts the clock, phase, H/V position
values for the most optimal settings

AUTO BALANCE

Automatically adjust the R,G,B to a suitable color in
display.

ALL RESET

Return to factory preset value

OSD POSITION

Changes the OSD position

LANGUAGE

(optional)

Press “+” and “-” to choose OSD language

DISPLAY MODE

“-” Represents the TEXT mode
“+” Represents the GRAPHIC mode

COLOR

STANDARD: Factory preset color

MUTE

Disable or enable sound

VOLUME

Adjust the volume of built-in speaker

Содержание A590ST

Страница 1: ...ING THE MONITOR 1 OPERATING THE MONITOR 3 HOW TO USE THE OSD ON SCREEN DISPLAY 4 THE ADJUSTMENT OF MONITOR S SCREEN DISPLAY 4 ADJUSTING THE VIEWING ANGLE 5 MENU TABLE 6 FOR YOUR SAFETY 7 SPECIAL NOTES...

Страница 2: ...space for your LCD Monitor and computer You need a stable level and clean surface near a wall outlet 1 Set the LCD Monitor box in an upright position and open from the top of the box before removing t...

Страница 3: ...the panel when assembling the LCD monitor 4 Connect signal cable s Audio cable and DC adapter connector to your Monitor Make sure the cable heads are securely connected 5 Assemble the plastic cable c...

Страница 4: ...tness and sharpness by following the instructions Buttons Functions EXIT Button Exit the OSD On Screen Display Arrow key Press to bring up the On Screen Display and select main menu items Arrow key Pr...

Страница 5: ...nd manual adjustment Manual adjustment a Power ON the LCD monitor and computer b Adjust according to the aforementioned Operating Procedure and Menu Table to adjust the screen to your favorable screen...

Страница 6: ...s simultaneously and CONTROL LOCK screen will appear Press button to release the CONTROL LOCK The CONTROL LOCK screen will disappear automatically d Volume control directly push and button to turn up...

Страница 7: ...N Moves the screen vertically up down AUTO SETUP To auto adjust press the button AUTO ADJUST Automatically adjusts the clock phase H V position values for the most optimal settings AUTO BALANCE Automa...

Страница 8: ...e spilt or splashed onto the monitor may cause fire or electric shock BAD WEATHER CONDITIONS It is advisable not to operate the monitor during heavy thunderstorms as intermittent breaks in power may c...

Страница 9: ...ckaging Cleaning WARNING If you dropped any material or liquid such as water onto the monitor when cleaning unplug the power cable immediately and contact your dealer or the nearest service center Alw...

Страница 10: ...amber If the signal timing of the computer is within the spec Display is too dark or too bright If the video output level of the computer is within the spec Display is not in the center If the signal...

Страница 11: ...shielded signal cord and power cord supplied with this unit The Federal Communication Commission warns that changes or modifications of the unit not expressly approved by the party responsible for co...

Отзывы: