Compucon A590ST Скачать руководство пользователя страница 5

Operating Procedure

1.  Power on the LCD monitor.
2.  Press “ ” or “  “ to pop up OSD menu.
3.  Press “ ” to select main menu item.
4.  Press “  “ to select sub menu item.
5.  Press “+” and “-“ buttons to adjust.

  Press the EXIT button when finish adjusting

How to Use the OSD (On Screen Display)

OSD function allows the user to easily adjust the display to the desired quality.
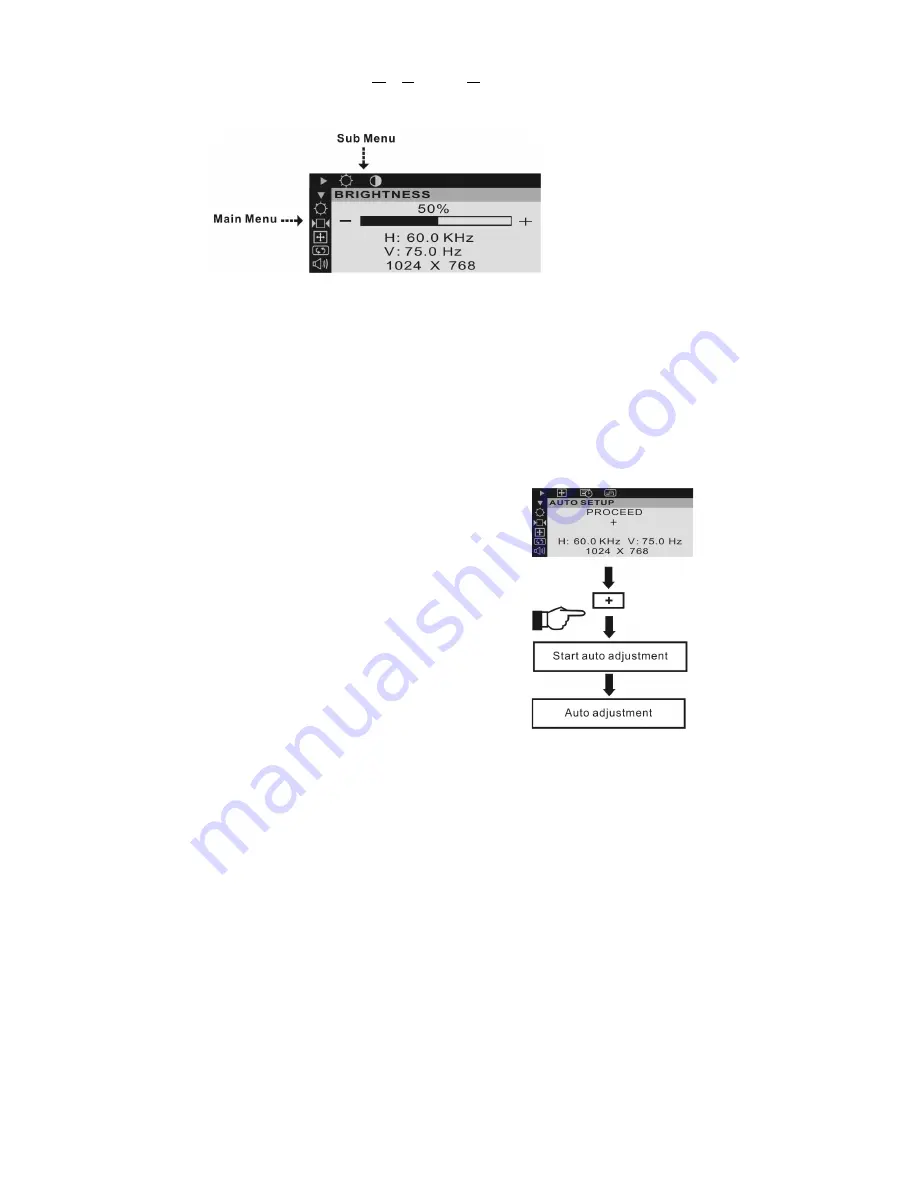
Structure of OSD

The Adjustment of Monitor’s Screen Display

There are two ways to adjust the monitor’s screen, i.e. auto adjustment and manual adjustment.

Manual adjustment

a) 

Power ON the LCD monitor and computer.

b) 

Adjust according to the aforementioned “Operating Procedure” and “Menu Table” to adjust the
screen to your favorable screen display.

OSD Adjustment Lock

This function is used to prevent changing the adjusted status by mistake. All the adjusting items
except “BRIGHTNESS” will be locked.

Auto adjustment

1. 

Power ON the LCD monitor and computer.

2. 

Select “AUTO SETUP” of OSD screens by
pressing the“ ” button to “AUTO SETUP”.

3. 

Press “+” button while displaying “AUTO
SETUP” screen.


The auto adjustment is started. “AUTO
SETUP” will be displayed during auto
adjustment. It takes about 10 seconds to
finish adjustment.

Содержание A590ST

Страница 1: ...ING THE MONITOR 1 OPERATING THE MONITOR 3 HOW TO USE THE OSD ON SCREEN DISPLAY 4 THE ADJUSTMENT OF MONITOR S SCREEN DISPLAY 4 ADJUSTING THE VIEWING ANGLE 5 MENU TABLE 6 FOR YOUR SAFETY 7 SPECIAL NOTES...

Страница 2: ...space for your LCD Monitor and computer You need a stable level and clean surface near a wall outlet 1 Set the LCD Monitor box in an upright position and open from the top of the box before removing t...

Страница 3: ...the panel when assembling the LCD monitor 4 Connect signal cable s Audio cable and DC adapter connector to your Monitor Make sure the cable heads are securely connected 5 Assemble the plastic cable c...

Страница 4: ...tness and sharpness by following the instructions Buttons Functions EXIT Button Exit the OSD On Screen Display Arrow key Press to bring up the On Screen Display and select main menu items Arrow key Pr...

Страница 5: ...nd manual adjustment Manual adjustment a Power ON the LCD monitor and computer b Adjust according to the aforementioned Operating Procedure and Menu Table to adjust the screen to your favorable screen...

Страница 6: ...s simultaneously and CONTROL LOCK screen will appear Press button to release the CONTROL LOCK The CONTROL LOCK screen will disappear automatically d Volume control directly push and button to turn up...

Страница 7: ...N Moves the screen vertically up down AUTO SETUP To auto adjust press the button AUTO ADJUST Automatically adjusts the clock phase H V position values for the most optimal settings AUTO BALANCE Automa...

Страница 8: ...e spilt or splashed onto the monitor may cause fire or electric shock BAD WEATHER CONDITIONS It is advisable not to operate the monitor during heavy thunderstorms as intermittent breaks in power may c...

Страница 9: ...ckaging Cleaning WARNING If you dropped any material or liquid such as water onto the monitor when cleaning unplug the power cable immediately and contact your dealer or the nearest service center Alw...

Страница 10: ...amber If the signal timing of the computer is within the spec Display is too dark or too bright If the video output level of the computer is within the spec Display is not in the center If the signal...

Страница 11: ...shielded signal cord and power cord supplied with this unit The Federal Communication Commission warns that changes or modifications of the unit not expressly approved by the party responsible for co...

Отзывы: