


Troubleshooting Procedures
If the LCD monitor fails to function correctly, please follow the following steps for a possible solution.
1.
Perform the adjustments according to
Operating the Monitor
.
2.
Refer to the following items if you cannot find a proper item listed in the
Operating the Monitor
or if the problem remains.
3.
If the problem you have experienced is not described below or you cannot correct the problem,
stop using the monitor and contact your dealer or the nearest service center for further
assistance.
PROBLEM
CHECK TO SEE
No Display.
If the power cord is firmly plugged in the socket.
If the power switch is turned on.
a) Power indicator
does not light up.
If the AC socket is OK. Please check using another piece of equipment.
If the blank screen saver is active, touch the keyboard or mouse.
Increase the CONTRAST and/or BRIGHTNESS.
If the computer is ON.
If the signal cable is properly connected.
b) Power indicator
is green.
If the signal timing of the computer is within the spec of the monitor.
If the monitor is on power management mode, touch the keyboard or the mouse.
If the computer is ON.
If the signal cable is properly connected.
c) Power indicator
is amber.
If the signal timing of the computer is within the spec.
Display is too
dark or too bright.
If the video output level of the computer is within the spec.
Display is not in
the center.
If the signal timing of the computer is within the spec.
If the power voltage is within the spec.
Display is
shaking.
If the signal timing of the computer is within the spec.
If the signal cable is properly connected.
If the signal timing of the computer is within the spec.
Display is not
synchronized.
If the video output level of the computer is within the spec.
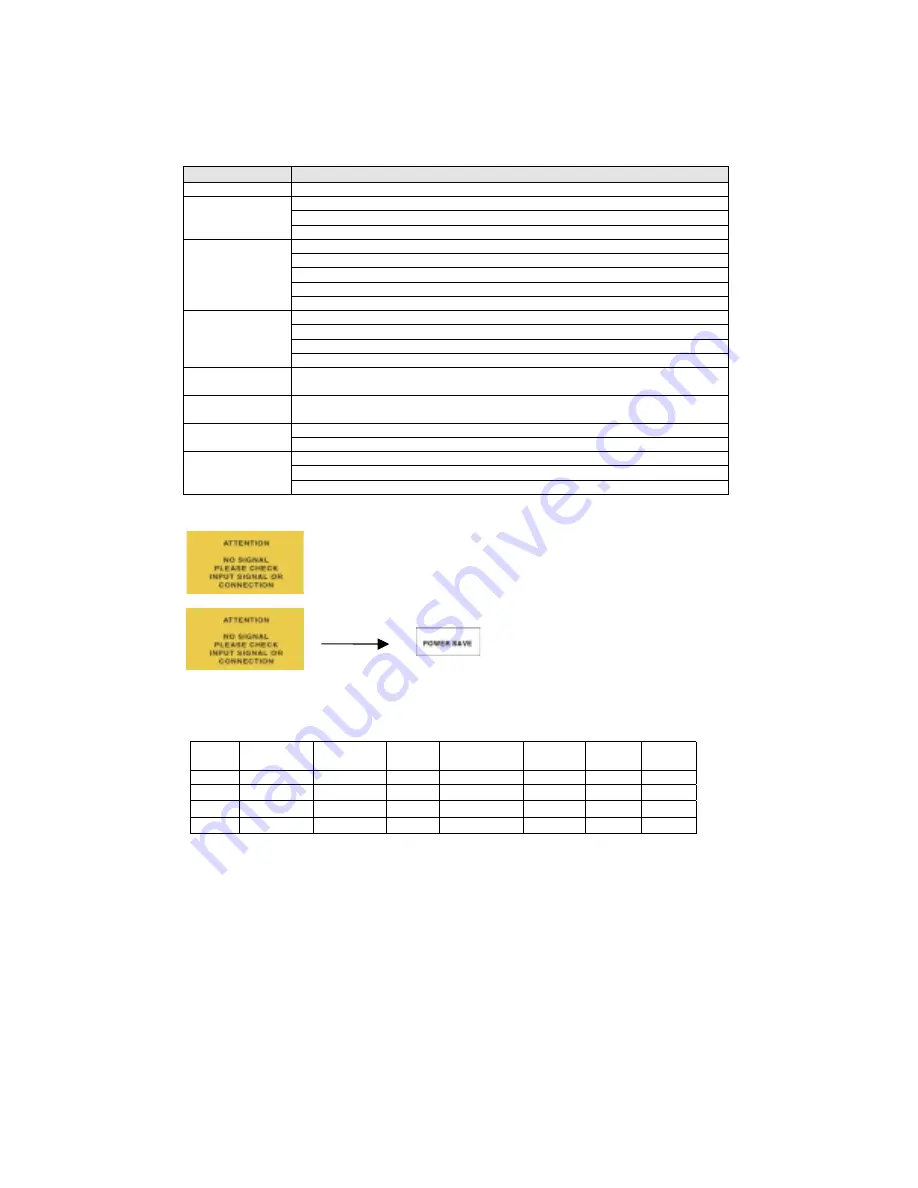
4.
When
“A
TTENTION
”
is displayed:
After 5 seconds
Power Management
The LCD Monitor complies with the VESA DPMS (version 1.0p) power management proposal. The
VESA DPMS proposal provides four phases of power saving modes by detecting the horizontal or
vertical sync signal.
Item
DPMS Mode
Display
Power
LED
Power
Consumption
Recovery
Time
H-sync
V-sync
1
On
Normal
Green
Normal
---
On
On
2
Stand By
No Display
Amber
5W
3 sec
< 10 KHz
On
3
Suspend
No Display
Amber
5W
3 sec
On
< 10 Hz
4
Off
No Display
Amber
5W
3 sec
< 10 KHz < 10 Hz
a. “P
OWER
M
ANAGEMENT
” is set to “OFF”
(1) Check if the signal cable is connected correctly to the computer.
(2) Check if the cable is broken.
b. “P
OWER
M
ANAGEMENT
” is set to “ON”
(1) Check the signal cable is connected.
(2) Check the cable line is broken.
(3) Check the “P
OWER
M
ANAGEMENT
”
function is operated correctly.
of Display


