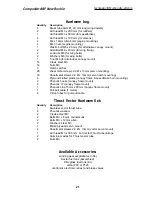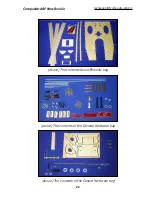
Cockpit Frame and Canopy
The all-new moulded fibreglass canopy frame has already been trimmed at the factory, and you
only need to complete the canopy frame fixing system, and trim and glue in the clear canopy.
Everyone has their own favourite method of holding the cockpit in place for flight, and this is your
choice. However we have included all the hardware needed for several different methods. You
can use a plywood tongue at the front, and an M6 plastic bolt and Tee-nut, or a hatch-catch, at
the back as on the original Rookie - and these parts are included.
We prefer to use a pair of phenolic hooks (facing backwards) glued into the side rails of the
canopy frame, which locate into slots in the fuselage about 25mm (1”) from the back. Tape the
frame firmly and accurately in place, and start the slots with a cutting disc. Remove the frame
and adjust the slots in the fuselage for a tight fit on the phenolic hooks. Lengthen the slots in the
fuselage
only
towards the front of the plane by about 20mm. Adjust slots with a fine flat file. Trial
fit the hooks - we suggest that you fit and glue one at a time to get them perfect. Make the slots
in the fuselage a bit wider at the front ends to make it easier to locate the finished cockpit. (see
photos P43). The phenolic hook glue joints to the canopy frame are reinforced with the small
milled plywood parts with the slots in them (see photo P40, 41 and 42), and the slots in the fuse-
lage are adjusted for perfect fit using the ‘U’ shaped phenolic parts underneath the side rails so
that the hook holds the canopy down firmly.
As the canopy frame is quite long we have also included a small strip of phenolic sheet, from
which you can cut a couple of small tongues and glue into the canopy frame to locate the sides
perfectly into matching slots in the fuselage side rails. The photos should explain it adequately.
It’s your choice of fixing methods at the front of the frame. You can use the M6 plastic bolt and
the T-nut or, as shown here, the hatch catch which is included in the hardware pack. Cut the slot
in the fuselage and glue to catch in place with the fuselage upside-down - working thru’ the
nosegear wheel cutout. Make sure to prepare the fibreglass and catch surfaces well with coarse
sandpaper and glue in with one drop thick CA. Check position and then ‘trap’ the catch in place
with thick epoxy and milled fibres. Drill a matching hole in the front lip of canopy frame, a bit small
at first, and open up slowly with a small round file until a perfect fit (photo P37). If necessary you
can reinforce/extend the front lip of the canopy frame downwards a little with a scrap piece of
phenolic or plywood as shown (P38), to give a stronger area for the catch to go into.
Fitting clear canopies is always a little bit tricky, but this is the method we use: Sand the inside
edges of the fibreglass canopy frame (and especially the fibreglass joining tapes) carefully with
rough sandpaper, to ensure a perfect fit of the canopy inside. Lay the clear canopy on top of the
frame, and mark the rough shape with a felt pen or wax crayon. Cut the outer border of the clear
canopy with sharp scissors, about 12mm (1/2”) too big all around. When the canopy fits inside
the frame roughly, mark the final cut line on the clear plastic. Then cut to exact shape with a 6 -
8 mm overlap all around. Do this in a warm room so that you don’t split the clear canopy.
Make several hand-holds with paper masking tape (see photo) to make holding and positioning
the canopy easy. Push the canopy up tightly inside the back of the frame and fix the bottom 2
back corners with one small drop of slow CA each (ZAP-O or Plasti-ZAP recommended).
Note:
Do NOT use any CA accelerator/kicker - you will immediately ‘fog’ the clear canopy!
Tape the front of the canopy to the frame temporarily. Mount the canopy frame to the fuselage
and tape the back of the canopy frame tightly to the fuselage. Using the masking tape handles
to pull the canopy outwards firmly against the frame, working from the back towards the front,
Composite-ARF New Rookie
15


