NBLB2 Service Manual
Table 2-2 POWER LED
Power supply status
POWER LED
System Power On (LED is solid blue).
blue Solid on
System Suspended
Blue blinking
System Power Off.
Off
To check the power supply status, install a battery pack and connect an AC adaptor
to the DC-IN port on the computer and to a power supply.
If the Battery LED is not lit, go to Procedure 2
3.2 Procedure 2 Adaptor / battery replacement
A faulty adaptor may not supply power or may not charge the battery.
Perform Check 1.
Check 1 Connect a new AC adaptor. If the problem is not resolved, go to Check 2.
Check 2 Insert a new battery. If the problem is still not resolved, go to Procedure 3.
3.3 Procedure 3 Power supply connection check
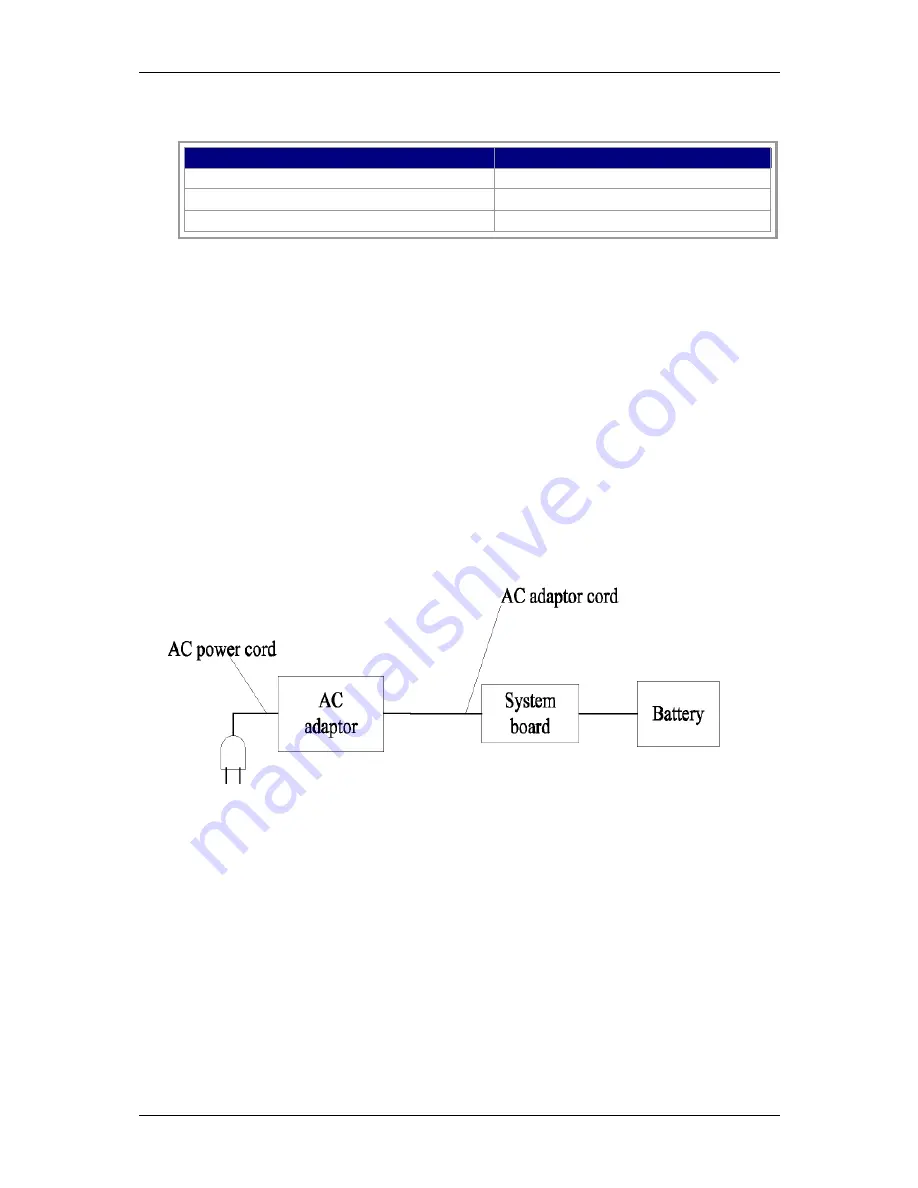
The power supply wiring diagram is shown below:
Any of the connectors may be disconnected. Perform Check 1.
Check 1
Disconnect the AC power cord from wall outlet. Check the power cable for breaks.
If the power cord is damaged, connect a new AC power cord.
If there is no damage, go to Check 2.
Check 2
Make sure the AC adaptor cord and AC power cord are firmly plugged into the DC-IN
socket, AC adaptor inlet and wall outlet.
If these cables are connected correctly, go to Check 3.
Содержание NBLB2
Страница 1: ...NBLB2 Service Manual...
Страница 6: ......
Страница 7: ...1 Chapter 1 System Description Specification...
Страница 12: ...NBLB2 Service Manual 6 Chapter 2 Software Specification...
Страница 66: ...NBLB2 Service Manual 60 Chapter 3 Hardware...
Страница 69: ...NBLB2 Service Manual 63 Chapter 4 DC DC Converter...
Страница 74: ...NBLB2 Service Manual 68 VOLTAGE IDENTIFICATION CODES...
Страница 75: ...NBLB2 Service Manual 69...
Страница 76: ...NBLB2 Service Manual 70...
Страница 83: ...NBLB2 Service Manual 77 Chapter 5 Disassembly Guide...
Страница 89: ...NBLB2 Service Manual 83 4 Grasp the module and pull it out...
Страница 97: ...NBLB2 Service Manual 91 3 Them remove LVDS cable and microphone cable speaker cable 4 Remove the LCD module...
Страница 100: ...NBLB2 Service Manual 6 Gently lift out the display Remove eight screws securing the hinges to the display...
Страница 103: ...NBLB2 Service Manual 97 3 Lift off the logic upper...
Страница 111: ...NBLB2 Service Manual 97 3 Lift off the logic upper...
Страница 118: ...NBLB2 Service Manual Chapter 6 Testing and Troubleshooting...
Страница 121: ...NBLB2 Service Manual 107 Figure 6 1 Troubleshooting flowchart 1 2...
Страница 122: ...NBLB2 Service Manual Figure 6 1 Troubleshooting flowchart 2 2...
Страница 124: ...NBLB2 Service Manual 3 Power Supply Troubleshooting Figure 6 2 Power Supply Troubleshooting Process...
Страница 129: ...NBLB2 Service Manual 115 4 Display Troubleshooting Figure 6 3 Display troubleshooting process...
Страница 132: ...5 Keyboard Troubleshooting Figure 6 4 Keyboard troubleshooting process...
Страница 134: ...6 External USB Devices Troubleshooting Figure 6 5 External USB device troubleshooting process...
Страница 136: ...7 CRT troubleshooting Figure 6 6 CRT troubleshooting process...
Страница 138: ...8 HDMI troubleshooting Figure 6 7 HDMI troubleshooting process...
Страница 140: ...9 Touch Pad Troubleshooting Figure 6 8 Touch Pad troubleshooting process...
Страница 142: ...10 Speaker Troubleshooting Figure 6 9 Speaker troubleshooting process...
Страница 144: ...11 CD ROM DVD Troubleshooting Figure 6 10 CD ROM DVD drive troubleshooting process...
Страница 146: ...12 Wireless LAN Troubleshooting Figure 6 11 Wireless LAN troubleshooting process...
Страница 148: ...The system board may be damaged Replace it with a new one following the instructions in Chapter...


