52
4.7.2 System Log
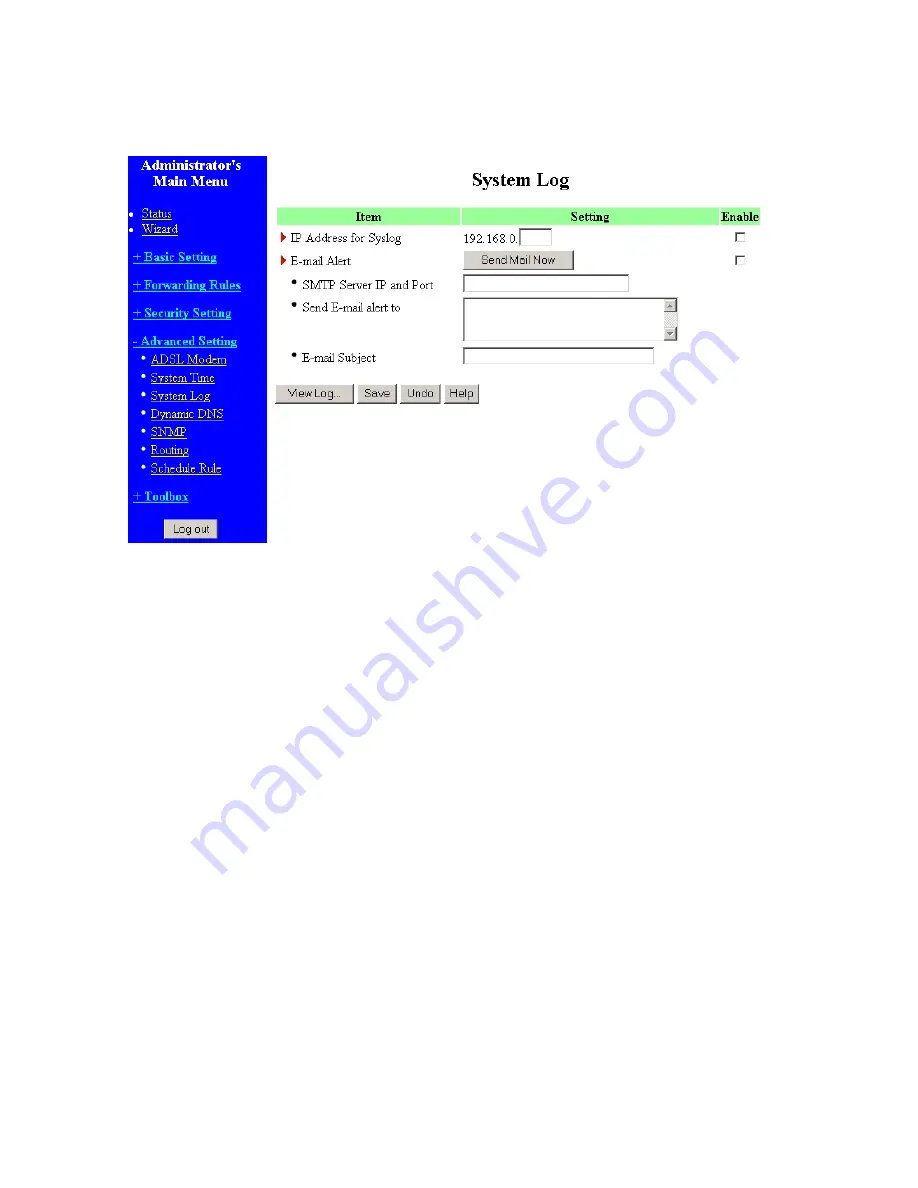
This page support two methods to export system logs to specific destination by means of syslog (UDP)
and SMTP (TCP). The items you have to setup including:
IP Address for Syslog
Host IP of destination where logs will be sent.
Check
Enable
to enable this function.
E-mail Alert Enable
Check if you want to enable Email alert (send syslog via email).
SMTP Server IP and Port
Input the SMTP server IP and port, which are contacted ':'. If you do not specify port number, the
default value is 25.
For example, "mail.your_url.com" or "192.168.1.100:26".
Send E-mail alert to
The recipients who will receive these logs. You can assign more than 1 recipient, using ';' or ',' to
separate these email addresses.
E-mail Subject
The subject of email alert. This setting is optional.
Username and Password
Содержание WRM54
Страница 17: ...17 4 4 Basic Setting 4 4 1 Primary Setup WAN Type Press Change...
Страница 23: ...23 4 4 1 5 PPP over ATM RFC 2364 Press More...
Страница 33: ...33 4 6 Security Settings 4 6 1 Packet Filter...
Страница 50: ...50 4 7 Advanced Settings 4 7 1 System Time...
Страница 61: ...61 4 8 Toolbox 4 8 1 System Log You can View system log by clicking the View Log button...
Страница 71: ...71 7 Apply your settings...
Страница 73: ...73 1 Start from the Red Hat System Setting Printing 2 Click Add Forward...
Страница 74: ...74 3 Enter the Pinter Name Comments then forward 4 Select LPD protocol and then forward...
Страница 80: ...80 b Don t input any value in the Gateway tab c Choose Disable DNS in the DNS Configuration tab...
Страница 84: ...84 Double click Administrative Tools...
Страница 85: ...85 Local Security Policy Settings Double click Local Security Policy...
Страница 88: ...88 click Add button...
Страница 89: ...89 Enter a name for example xp router and deselect Use Add Wizard check box Click Add button...
Страница 91: ...91 Click OK button Then click OK button on the IP Filter List page...
Страница 93: ...93 select Custom button Select Data integrity and encryption ESP Configure Integrity algorithm MD5...
Страница 94: ...94 Configure Encryption algorithm DES Configure Generate a new key every 10000 seconds Click OK button...
Страница 95: ...95 select Authentication Methods page click Add button...
Страница 97: ...97 configure The tunnel endpoint is specified by this IP address 192 168 1 254 Select Connection Type...
Страница 99: ...99 click Add button...
Страница 100: ...100 Enter a name such as router xp and unselect Use Add Wizard check box Click Add button...
Страница 102: ...102 Click OK button Then click OK button on IP Filter List window...
Страница 103: ...103 select Filter Action tab select Require Security then click Edit button...
Страница 104: ...104 select Negotiate security Select Session key Perfect Forward Secrecy PFS click Edit button...
Страница 105: ...105 select Custom button...
Страница 107: ...107 select Authentication Methods page click Add button...
Страница 109: ...109 Configure The tunnel endpoint is specified by this IP address 192 168 1 1 Select Connection Type...
Страница 110: ...110 select All network connections...
Страница 111: ...111 Configure IKE properties Select General Click Advanced...
Страница 114: ...114 VPN Settings VPN Enable Max number of tunnels 2 ID 1 Tunnel Name 1 Method IKE Press More...
Страница 121: ...121 Figure 2 Enable IEEE 802 1X access control...
Страница 123: ...123 Figure 4 Certificate information on PC1 Figure 5 Authenticating...


