41
4.6.4 MAC Address Control
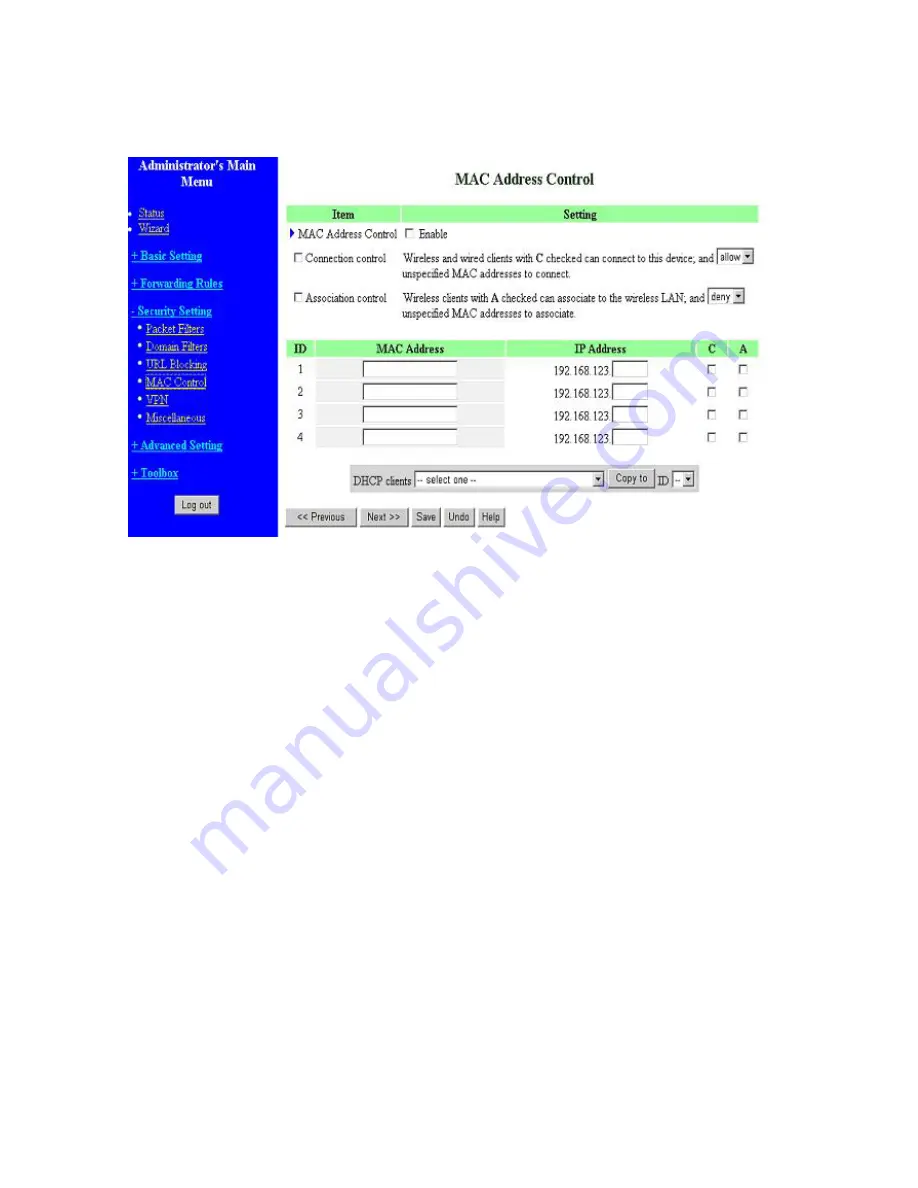
MAC Address Control allows you to assign different access right for different users and to assign a
specific IP address to a certain MAC address.
MAC Address Control
Check “Enable” to enable the “MAC Address Control”. All of the settings
in this page will take effect only when “Enable” is checked.
Connection control
Check "Connection control" to enable the controlling of which wired and
wireless clients can connect to this device. If a client is denied to connect
to this device, it means the client can't access to the Internet either.
Choose "allow" or "deny" to allow or deny the clients, whose MAC
addresses are not in the "Control table" (please see below), to connect to
this device.
Association control
Check "Association control" to enable the
Controlling of which wireless client can
associate to the wireless LAN. If a client is
denied to associate to the wireless LAN, it
means the client can't send or receive any data
via this device. Choose "allow" or "deny" to
allow or deny the clients, whose MAC
addresses are not in the "Control table", to
associate to the wireless LAN.
Control table
Содержание WRM54
Страница 17: ...17 4 4 Basic Setting 4 4 1 Primary Setup WAN Type Press Change...
Страница 23: ...23 4 4 1 5 PPP over ATM RFC 2364 Press More...
Страница 33: ...33 4 6 Security Settings 4 6 1 Packet Filter...
Страница 50: ...50 4 7 Advanced Settings 4 7 1 System Time...
Страница 61: ...61 4 8 Toolbox 4 8 1 System Log You can View system log by clicking the View Log button...
Страница 71: ...71 7 Apply your settings...
Страница 73: ...73 1 Start from the Red Hat System Setting Printing 2 Click Add Forward...
Страница 74: ...74 3 Enter the Pinter Name Comments then forward 4 Select LPD protocol and then forward...
Страница 80: ...80 b Don t input any value in the Gateway tab c Choose Disable DNS in the DNS Configuration tab...
Страница 84: ...84 Double click Administrative Tools...
Страница 85: ...85 Local Security Policy Settings Double click Local Security Policy...
Страница 88: ...88 click Add button...
Страница 89: ...89 Enter a name for example xp router and deselect Use Add Wizard check box Click Add button...
Страница 91: ...91 Click OK button Then click OK button on the IP Filter List page...
Страница 93: ...93 select Custom button Select Data integrity and encryption ESP Configure Integrity algorithm MD5...
Страница 94: ...94 Configure Encryption algorithm DES Configure Generate a new key every 10000 seconds Click OK button...
Страница 95: ...95 select Authentication Methods page click Add button...
Страница 97: ...97 configure The tunnel endpoint is specified by this IP address 192 168 1 254 Select Connection Type...
Страница 99: ...99 click Add button...
Страница 100: ...100 Enter a name such as router xp and unselect Use Add Wizard check box Click Add button...
Страница 102: ...102 Click OK button Then click OK button on IP Filter List window...
Страница 103: ...103 select Filter Action tab select Require Security then click Edit button...
Страница 104: ...104 select Negotiate security Select Session key Perfect Forward Secrecy PFS click Edit button...
Страница 105: ...105 select Custom button...
Страница 107: ...107 select Authentication Methods page click Add button...
Страница 109: ...109 Configure The tunnel endpoint is specified by this IP address 192 168 1 1 Select Connection Type...
Страница 110: ...110 select All network connections...
Страница 111: ...111 Configure IKE properties Select General Click Advanced...
Страница 114: ...114 VPN Settings VPN Enable Max number of tunnels 2 ID 1 Tunnel Name 1 Method IKE Press More...
Страница 121: ...121 Figure 2 Enable IEEE 802 1X access control...
Страница 123: ...123 Figure 4 Certificate information on PC1 Figure 5 Authenticating...


