57
19.3 Cleaning the Sample Block
Occasionally it may be necessary to gain access to the sample block to allow broken capillary tubes or
other debris to be removed.
Please ensure that the sample block is cooled to room temperature and the instrument’s
electrical power supply is disconnected before commencing the following procedure.
1. Locate the provided tweezers from the sample storage compartment; use the tweezers to remove
the broken tube if possible.
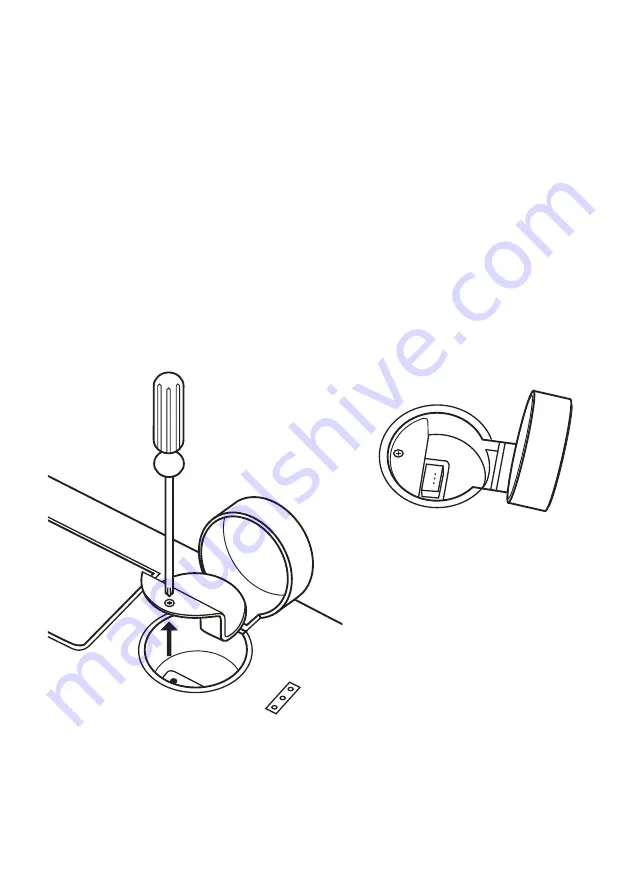
2. If more access is required use an appropriately sized Phillips screwdriver to undo the retaining
screw, located within the sample compartment.
Note:
The screw is self-retaining and will remain within the protective cover even when fully
loosened.
3. Once the screw has been loosened, remove the protective cover.
4. The ceramic tube guide will then be accessible and can be removed and cleaned as necessary.
5. Reassembly is the reverse of the above. Take care to replace the ceramic tube guide in the correct
orientation, with the cut out section facing front, towards the screen.
Removing the retaining screw and protective cover to access the ceramic tube guide.
The cut-out section of the ceramic tube guide should face towards the front of the unit.


