background image

19


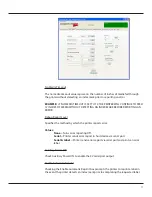
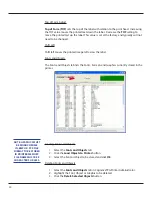
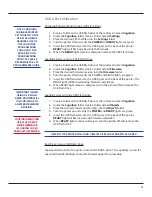
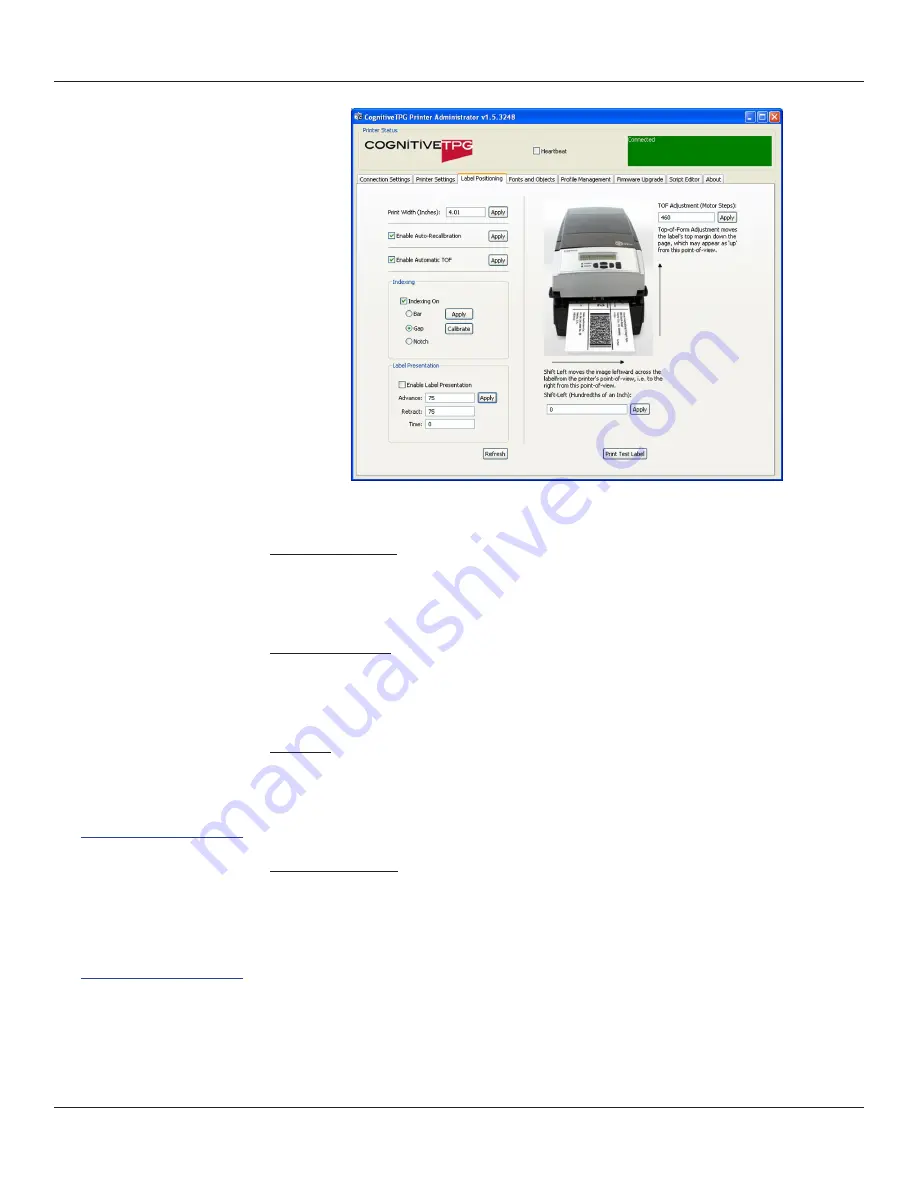
Auto Recalibration

Check and 

Apply Enable Auto Recalibration

 and the printer will automatically 

attempt to recalibrate in the event an index mark is not detected.

Auto Top Of Form

Check and 

Apply Enable Automatic TOF

 and the printer will feed a label when the 

printer is turned ON or the printhead is latched.

Indexing

Indexing indicates to the printer the index type of the media being used.  The 

Indexing On

 check box must be checked when using Bar, Gap, or Notch style 

indexing.  Uncheck the 

Indexing On

 box when using continuous media.

Label Presentation

Label presentation advances media out of the printer after printing a label and then 

retracts the media prior to printing the next label.

• 

Advance

 = Distance the media advances after printing a label.

• 

Retract 

= Distance the media retracts prior to printing a label.

• 

Time

 = Amount of time in seconds the label remains presented prior to 

retracting.

NOTE: WHEN TIME IS 

SET TO 0 FOR LABEL 

PRESENTATION, THE 

LABEL WILL REMAIN 

ADVANCED UNTIL 

THE NEXT LABEL IS 

PRINTED.

Содержание DLXi

Страница 1: ...DLXi Desktop Label Printer DLX UG00000 Rev C 10 14 USER GUIDE POWER READY Built to Last Designed to Connect...

Страница 2: ...and does not represent a commitment on the part of CognitiveTPG No part of this document may be reproduced for any reason or in any form including electronic storage and retrieval without the expresse...

Страница 3: ...g Thermal Transfer Ribbon 11 Self Testing 13 Chapter 3 Installing CognitiveTPG Printer Administrator and Print Drivers 14 Downloading CognitiveTPG Printer Administrator 14 CognitiveTPG Printer Adminis...

Страница 4: ...information on how to install the printer and includes all necessary user support information Package Contents The DLXi box will contain the following parts 1 DLXi Printer 1 Quick Start Guide 1 Auto R...

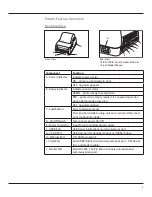
Страница 5: ...ing unit on to initiate self test and print configuration label D On Off Switch Turns printer power On Off E Power Connector Input for auto ranging power supply F USB B Port USB Device bidirectional c...

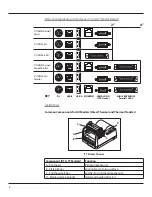
Страница 6: ...A Printhead Printing mechanism B Platen Roller Friction feed printing surface C Printhead Latches Latches for printhead mechanism D Media Guide Spindle Holds and guides label roll 2 4 2 USB Ethernet...

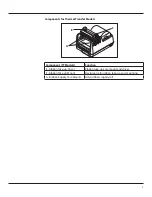
Страница 7: ...fer Models Component TT Models Function E Ribbon Take up Driver Ribbon take up core mount and driver F Ribbon Take up Mount Flexible arm for ribbon take up core mounting G Ribbon Supply Core Mounts Ho...

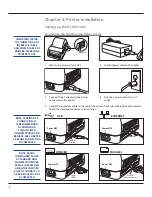
Страница 8: ...AC adapter to the power connector on the printer USB B Device Power OFF IMPORTANT PRIOR TO CONNECTING ANY INTERFACE CABLE AND POWER CABLE TO PRINTER MAKE SURE PRINTER IS OFF Power OFF Serial DB9 Power...

Страница 9: ...tart Menu and right click the new printer Choose Printer Properties and print a test page The printer should be successfully installed To change any Bluetooth configurations please refer to the CPL Pr...

Страница 10: ...ORE INFORMATION ON COGNITIVETPG APPROVED SUPPLIES CONTACT US AT 800 732 8950 OR AT COGNITIVETPG COM 1 Unpack and prepare outward wound or inward wound media for installation into printer 2 Use paper g...

Страница 11: ...Thermal Transfer Ribbon NOTE THIS STEP IS FOR THERMAL TRANSFER TT DLXI PRINTERS USE ONLY COGNITIVETPG APPROVE THERMAL RIBBON FOR MORE INFORMATION ON COGNITIVETPG APPROVED SUPPLIES CALL 800 732 8950 O...

Страница 12: ...e ribbon take up core 6 Align the notch on the left side of the ribbon take up core with the left ribbon take up driver Lower Printhead Do Not Latch Printhead Mechanism Click 8 Latch both sides of the...

Страница 13: ...n printing begins and printer will conduct a self test and print a configuration label 3 Power OFF printer to end hexadecimal dump mode 4 Power ON printer for normal operation OFF ON NOTE AFTER PRINTI...

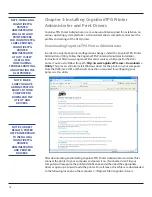
Страница 14: ...t USB Ser COM or Ethernet connection is required for configuring your printer via this utility After downloading and installing CognitiveTPG Printer Administrator and driver files connect the printer...

Страница 15: ...ter Connection radio dial 2 Select the appropriate printer from the Printer Name drop down menu 3 Click Connect NOTE FOR SERIAL CONNECTION THE DLXI DEFAULT BAUD RATE IS 9600 NOTE WHEN PRINTER IS PROPE...

Страница 16: ...with DHLP enabled your server will assign an IP Address to the printer 3 Input the printer s RTEL port number Ethernet Connection Parameters IP Address Net Mask Gateway DHCP LPD RTEL RTEL Port Etherne...

Страница 17: ...g Report Level Specifies the method by which the printer reports error Values None Turns error reporting Off Serial Printer sends error report to host device via serial port Serial Label Printer sends...

Страница 18: ...or cPL You may also manually select EcPL or ZcPL command languages NOTE THE DLXi DOES NOT SUPPORT TPCL COMMAND LANGUAGE Thermal Mode Select direct thermal or thermal transfer based on the model of DL...

Страница 19: ...xing On check box must be checked when using Bar Gap or Notch style indexing Uncheck the Indexing On box when using continuous media Label Presentation Label presentation advances media out of the pri...

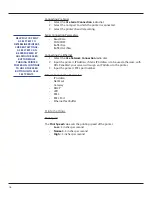
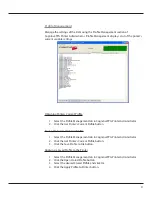
Страница 20: ...ts The Fonts and Objects tab lists the Fonts Formats and Graphics currently stored in the printer Loading Fonts and Objects 1 Select the Fonts and Objects tab 2 Click the Load Objects to Printer butto...

Страница 21: ...inistrator 2 Click the Get Printer s Current Profile button Saving the Current Printer s Profile 1 Select the Profile Management tab in CognitiveTPG Printer Administrator 2 Click the Get Printer s Cur...

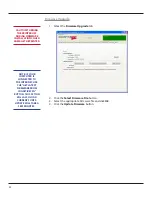
Страница 22: ...rmware file and click Ok 4 Click the Update Firmware button CAUTION TURNING THE PRINTER OFF DURING FIRMWARE INSTALLATION COULD DAMAGE THE PRINTER NOTE IF YOUR COMPUTER IS CONNECTED TO THE INTERNET USE...

Страница 23: ...CPL please refer to the CPL Programmers guide located on the CognitiveTPG Web site www CognitiveTPG com Sample Test Script in CPL 0 100 195 1 VARIABLE WIDTH 200 TEXT 3 5 15 PRINTER TEST END For a simp...

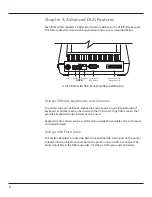
Страница 24: ...USB scanners that provide a keyboard wedge interface can be used Keyboards and scanners can be used for menu navigation and data entry with menus and stored formats Using a USB Flash Drive This secti...

Страница 25: ...green turn the printer off and remove the USB Flash Drive Loading Formats Using a USB Flash Drive 1 Create a folder on the USB flash drive at the root level named Cognitive 2 Inside the Cognitive fold...

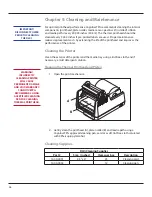
Страница 26: ...the media tray using a lint free cloth and if necessary a mild detergent solution Cleaning the Thermal Printhead and Platen 1 Open the print mechanism 2 Gently clean the printhead A platen roller B a...

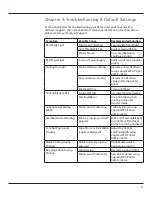
Страница 27: ...ss value within the printer driver Printhead Dirty Clean printhead Printing Blank Labels Incorrect Media Use direct thermal media Missing Ribbon Use print ribbon when printing to thermal transfer medi...

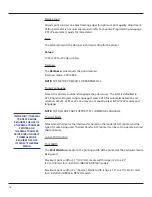
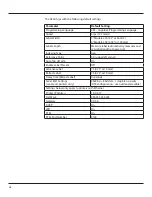
Страница 28: ...ower up Indexing Type Gap Reference Point 0 0 upper left corner Auto Top of Form On Enable Label Present Off Advance Label 75 0 75 or 19 mm Retract Label 75 0 75 or 19 mm Delay Time Retract Label 0 se...

Отзывы: