VTX-WM1 Installation Guide v1.1
5
Installation
Preamble:
The process of installing web monitor cards
into VTX amplifiers is straightforward. If cards
are being fitted to multiple amplifiers installed
in one or more equipment racks, each rack will
need to be provided with internal CAT5 wiring
and an Ethernet switch. The Installation section
of the manual describes in turn: i) fitting and
testing cards in the amplifiers; ii) networking
principles and iii) overall system configuration.
Installing the VTX-WM1 card
1. Turn off the VTX amplifiers into which
the cards are to be fitted and unplug their
power cables. If the amplifiers are fitted in
a rack enclosure, disconnect all rear cables
from one amplifier at a time, and remove
it from the rack. Place the amplifier on a
flat surface.
2. Remove the amplifier’s top panel. Retain the
screws (eight) and the transformer bolt.
3. Locate the rear panel blanking plate, undo
the two screws securing it and remove
the plate. Retain the screws.
CHANNEL 2
CHANNEL 1
CHANNEL 3
CHANNEL 4
CH3
CH4
CH2
SPEAKER OUTPUTS
0V
C
H1
0V
C
H2
0V
CH3
0V
CH4
ON
OFF
ON
OFF
ON
OFF
BRIDGE
1-2
ON
OFF
BRIDGE
3-4
4 OHMS - MIN
BRIDGE
3-4
BRIDGE
1-2
POWER ~ 40-60Hz
10%
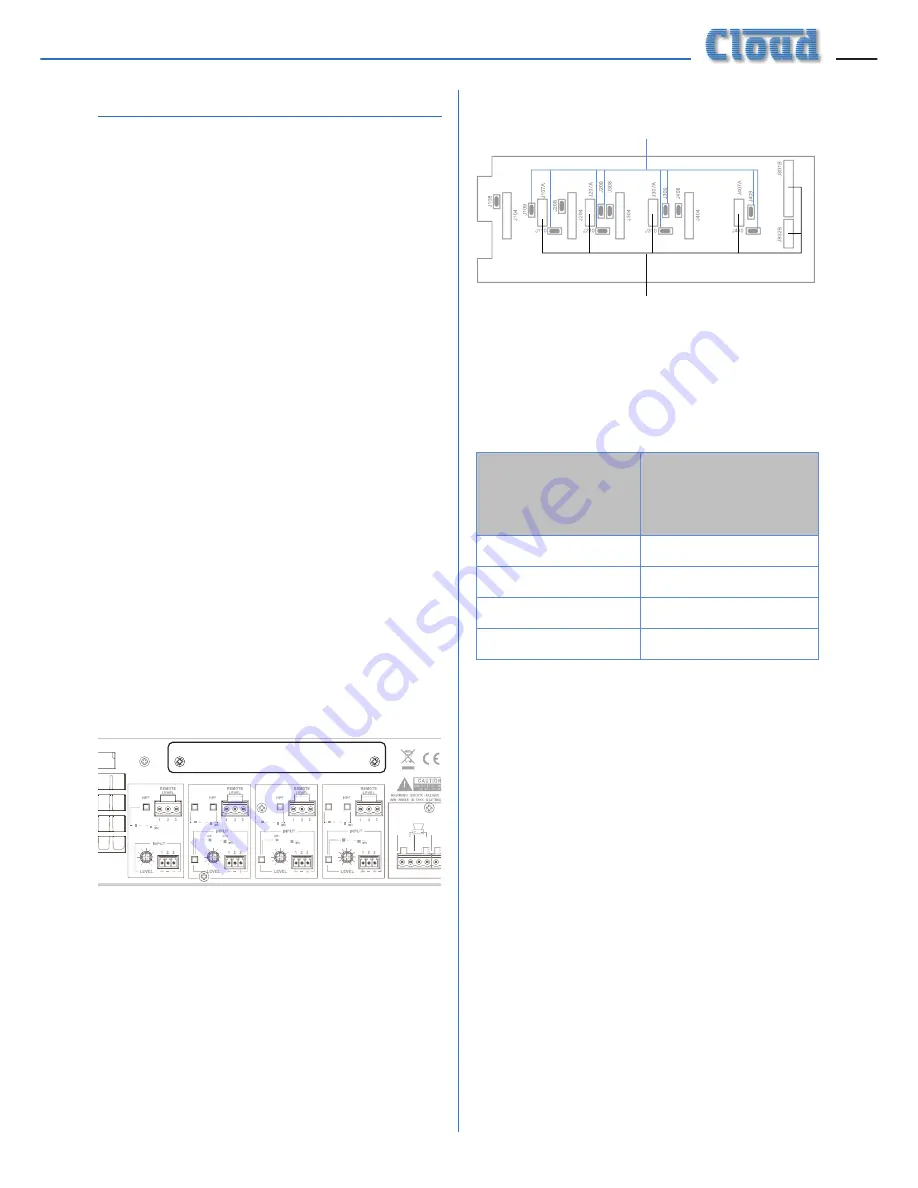
4. On the amplifier’s upper rear PCB
(Remote Vol PCB, PC331012), locate the
jumpers J109, J209, J309, J409, J110, J210,
J310 and J410. All of these (total 8) should
be removed. (Refer to pages12 &13 of the
amplifier manual for full details of amplifier
jumper locations.)
Remove these jumpers
VTX-WM1 card connectors
5. Plug in the four screened cables
terminating in 3-pin connectors as follows:
VTX-WM1
CARD
CONNECTOR
UPPER REAR
PCB
CONNECTOR
J107B
J107A
J207B
J207A
J307B
J307A
J407B
J407A
6. Connect all the flying leads before locating
the card in place. First, plug the two
7-way ribbon cables (from J805A and
J806A on the VTX-WM1 card) to J805B
and J806B respectively on the amplifier’s
main (lower) PCB. These are located just
in front of the four large capacitors; the
ribbon from J805A should be plugged into
J805B (the left of the pair, looking from
the rear) and that from J806A to J806B.
7. The remainder of the VTX-WM1 card’s
flying leads connect to the amplifier’s
upper rear PCB. Plug the 14-way and
6-way ribbon cables at the right-hand end
of the VTX-WM1 card (from J801A and
J802A respectively) into Molex headers
J801B and J802B on the upper rear PCB.
Содержание VTX-WM1
Страница 1: ...VTX WM1 Web Monitor Card Installation and User Manual...
Страница 2: ...VTX WM1 Installation Guide v1 1 2...


