14
Based on Software Version 1.31.1. Content subject to change without notice. Check www.clintonelectronics.com for the most current manual.
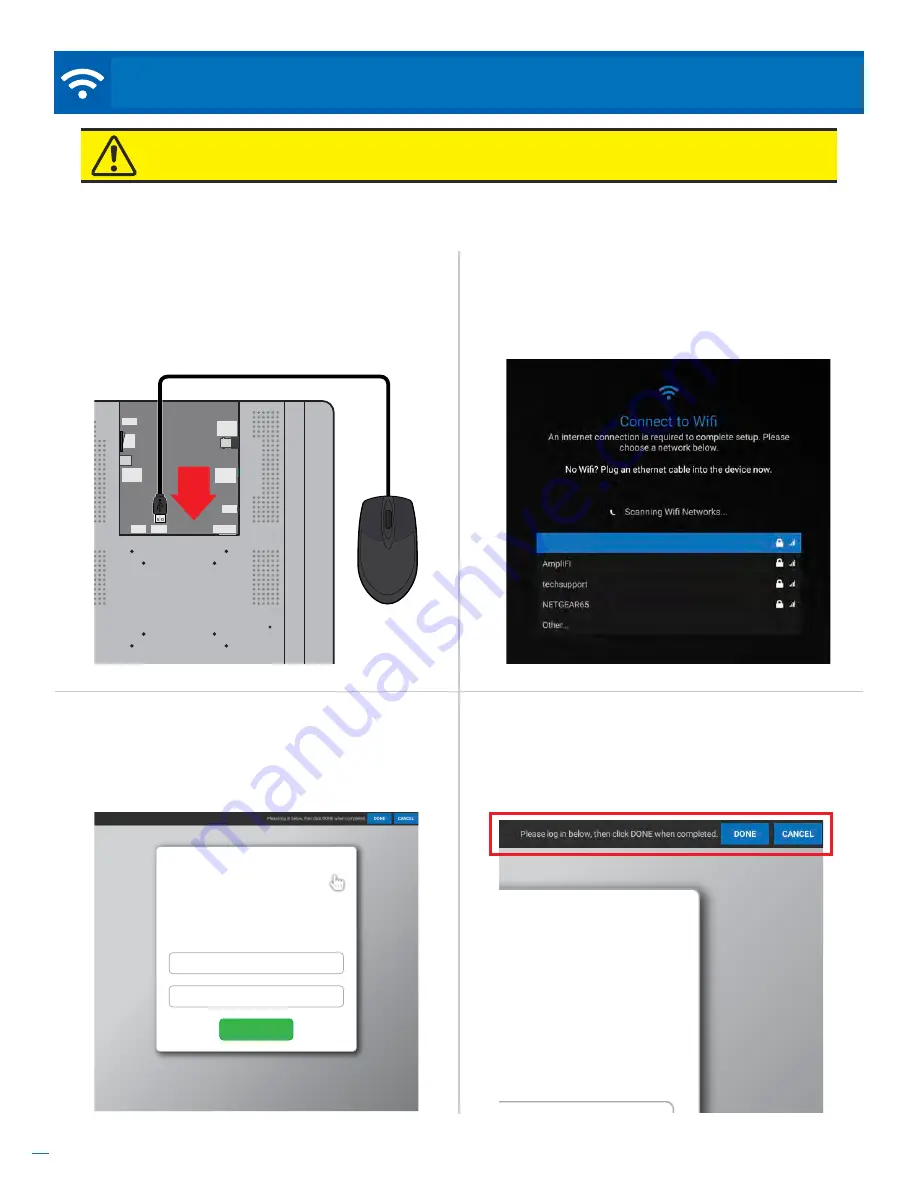
Step 3.
Once the PVM has established a connection
to the network, it should automatically detect the
presence of a Captive Portal and redirect to that
screen.
*Captive Portal login screens will vary.
Step 1.
Connect a USB mouse to one of the USB ports
on the back of the Connect PVM. Confirm that you can
see the mouse cursor on the screen.
*USB mouse not
included with Connect PVM.
Step 4.
This screen should display a black bar at the
top with the instructions: “Please log in below, then
click DONE when completed.” Below this area will
be the web page consisting of any steps the captive
portal requires for signing in.
Step 2.
Connect to the desired wifi network. This may
be done during on-boarding or later via the Network
settings menu (Press
Menu
on the remote, then select
Network
and
Wifi Networks
).
Connect PVMs support connecting to the internet via a wifi network which employs a Captive Portal. This can be helpful
for use when testing or evaluating the Connect PVM.
Wifi Access
Enter your
username
and
password
to connect
to the wireless network.
username
password
Log in
CAMERA
OSD
ON
OFF
DC24V
3. ALARM OUT
4. GND
1. ALARM1
2. GND
NETWORK
USB
USB
ANALOG
OUTPUT
EX-SDI
OUTPUT
ATTENTION:
Captive Portals are only recommended for short-term testing and/or product evaluation
as Captive Portals often require periodic re-authentication. A USB mouse is required for these steps.
NETWORK /
Captive Portal
Wifi Access
Enter your
username
and
password
to connect
to the wireless network.
johnsmith01
************
Log in
Guest Network


