


11
10
Basic Steps for Successful Programming
- Name of the room (e.g. Lounge)
- Description of load to be controlled (e.g. Lamp)
- Part No. of unit (e.g.: RFSA-61B, ...)
- Address of unit (e.g.: 0099D9, ...)
(The Installation Form is supplied on page 42 of this manual or can be
downloaded from www.clickinels.com).
Once the installation form is completed steps 3 to 7 can be carried out.
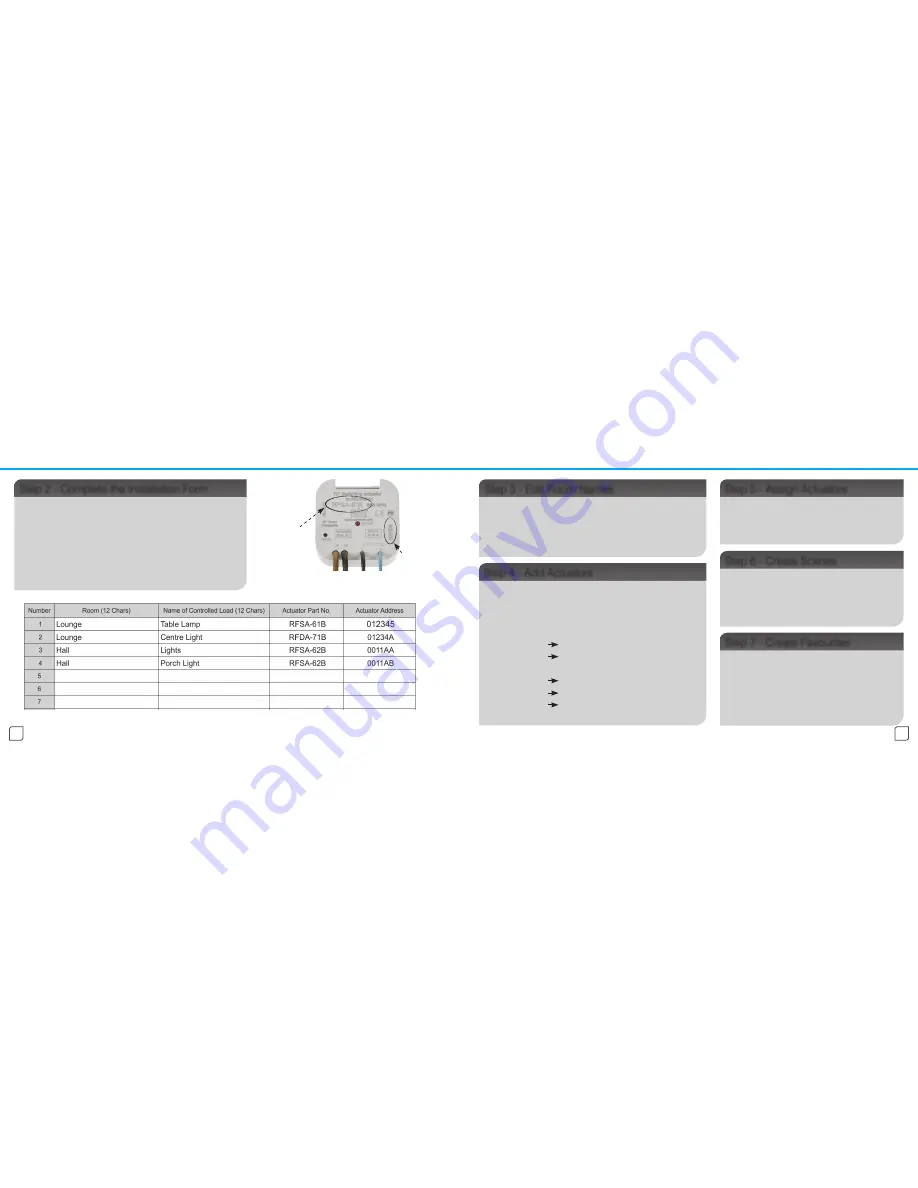
Step 2 - Complete the Installation Form
Step 3 - Edit Room Names
Assign each actuator to the correct room.
The actuator cannot be controlled until it
has been assigned.
Step 5 - Assign Actuators
Once all the actuators have been added and
assigned, up to 10 scenes can be created.
Add up to 10 actuators in to a single scene
with each actuator having its own command.
Step 6 - Create Scenes
The 10 most commonly used actuators and
scenes can be selected in to the favourites/
(quick control menu).
The favourites appear on the initial screen,
and activated with just a couple of clicks.
Step 7 - Create Favourites
Rename the rooms for the locations where the
actuators are installed.
When assigning the actuators this will ensure they are
added to the correct room.
Step 4 - Add Actuators
Input the actuator part number with the address in to
the RF Pilot.
The actuator part number may not be listed in full, the
cross references will help determine the correct one:
RFSA-61B
RFSA-6x (6 functions)
RFSA-62B
RFSA-6x (6 functions) enter both
channels with addresses separately. Same with RFSA-66M.
RFDA-71B
RFDA-71 (7 functions)
RFJA-12B/230V
RFJA-12B
RFJA-12B/24VDC RFJA-12B
Part No.
E.g.: RFSA-61B
Address
E.g.: 0099D9
Basic Steps for Successful Programming
Please ensure the completed installation form is retained for future reference.
Содержание RF PiLOT
Страница 24: ...Notes Notes...


