background image

Page 6 


2.2  Toxic Dust Poisoning 

For operator safety clothing Type1 and Type 2, according to EN ISO 14877: 2002 (D) the following 

applies: 

Recent research by the Occupational Safety and Health Administration (OSHA) has discovered poten-

tial risks of lead poisoning to unprotected abrasive blasting operators and other personnel who may be 

exposed to lead-containing dust in the abrasive blasting vicinity. 

This lead poisoned dust is primarily a result of removing lead containing paint. 

Danger for life and health can also be caused by colours which contain heavy metal, asbestos or other 

toxic material dust. Lead poisoning can cause death. The maximum ground level concentration is de-

clared by TRGS 900 to 0,1 mg/m3. 

For that reason it is very important that the Blasting Contractor determines which kind of paint he has 

to remove. If necessary he has to use then a helmet or an additional Air Respirator which is admitted 

for the use with one of those materials. 

The blasthood Apollo 600CE, can be used in any combination with operator safety clothing Typ 3 

according to EN ISO 14877: 2002 (D) without any restriction in an ambient with such toxics. 

2.3  Ear Protection 

Always use properly fitted ear plugs when using this equipment. 

3  Description 

The main components for the minimal version from a respirator are as follows: 


 Helmet with cape attachment strap, suspension and adapted cape 


 Breathing air-hose (length: approx. 1000mm) 


 Breathing air-supply hose (length: 5m) with quick-fitting pipe union (female) 


 Air control valve with belt 


 Hood 

4  Preparation 

Please control respective prepare the following components: 

(1) Adjust Helmet Suspen-

sion.


  Trim helmet suspension by adjusting screw to your head and adjust 

chin strap to correct length (see also 7.2).


(2) Check that the lens sys-

tem is in place. 

  Inner lens (Replacement see 8.1) 

  Outer lens (Replacement see 8.2) 

  Perforated cover lenses (Replacement see 8.2) 

The respirator assembly must never be used without the fixed inner 
lens, outer lens and the cover lenses!


(3) Air Supply Hose.


  Use the quick fitting pipe union to attach the air supply hose to the air 

control valve. 

Содержание Apollo 600 CE

Страница 1: ...International GmbH Carl Zeiss Stra e 21 Tel 49 0 8062 90080 83052 Bruckm hl Mail info clemco de Germany Web www clemco international com O W N E R S M A N U A L RESPIRATOR MODEL APOLLO 600 CE CLEMCO...

Страница 2: ...ATION 8 7 ADJUSTMENTS 9 7 1 Control Valve part no 100074 9 7 2 Adjustment of Suspension 10 8 MAINTENANCE PROGRAM REPLACEMENT PARTS 10 8 1 Replacing Inner Lens 11 8 2 Replacing Outer Lens and Perforate...

Страница 3: ...5 Collar 14 9 6 Sweatband Suspension 14 9 7 Helmet Assembly 14 9 8 Lenses 14 10 STORAGE 14 10 1 Daily Storage 14 10 2 Long Duration Storage 14 11 SPARE PARTS 14 11 1 Helmet 14 11 2 Air Control Valve...

Страница 4: ...ns and limitations 2 1 General Description The Apollo 600 CE was specially developed and approved for blasting MSHA NIOSH and EN 271 The following Cautions and Limitations have to be followed The supp...

Страница 5: ...Page 5 In the moment of highest breathing air requirement during the highest work rate a sub pressure in the helmet can appear...

Страница 6: ...materials The blasthood Apollo 600CE can be used in any combination with operator safety clothing Typ 3 according to EN ISO 14877 2002 D without any restriction in an ambient with such toxics 2 3 Ear...

Страница 7: ...t been tested for gas and particulate contamination Do not use piston type oil bath compressors for breathing air These compressors may produce dangerous levels of carbon monoxide The presence of unac...

Страница 8: ...re that the volume indicator is on function which means that the flag is pulled in otherwise the flag falls down As supply hoses between the air filter and the control valve you may use only CE approv...

Страница 9: ...low shirt collars or other matter to interfere with the fit the cuff provides around the user s neck Pull the cape down to fully extend it and connect the straps on each side under the arms Put the be...

Страница 10: ...length by moving the buckle 4 Reattach cape See 8 4 The suspension maintains a fixed distance between the head and the helmet The suspension must be properly installed and adjusted to provide the prot...

Страница 11: ...ver Lenses Up to five cover lenses may be installed at one time For maximum visibility we recommend to install only so many lenses to last during a work period Preparing lenses in the following manner...

Страница 12: ...f the suspension 8 4 Cape When the cape becomes soiled or requires replacement it can easily be removed as follows 1 Detach cape Open buckle by pressing the small lever and pull out belt Remove cape 2...

Страница 13: ...nstrap look to it that the bevelled side shows to the centre of the helmet 9 Service Maintenance and Cleaning Follow washing instructions described in this section Do not use any caustic chemicals or...

Страница 14: ...any liability 9 8 Lenses Inner and outer lenses should be replaced when pitted or scratched However mild detergent and water can be used to clean them Volatile solutions such as alcohol gasoline or am...

Страница 15: ...uspension A 600 2J1 23821 I Clip A 600 head suspension 4 units head suspension necessarily 2L 23801 D A 600 cape attachment Pos Part No Model 2L3 23803 D A 600 draw latch window frame 2L4 24245 D Scre...

Страница 16: ...mm air hose 54 01030 D Hose connection 55 100042 Air control valve complete with belt 56 100421 5m Air Supply Hose 9mm with safety coupling and socket CE approved 100406 10m Air Supply Hose 9mm with s...

Страница 17: ...Page 17 Picture 4 Single components of Apollo 600 CE A Nylon cape for A 600 p n 23815D B Leather cape for A 600 p n 24310D...

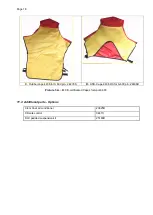
Страница 18: ...r A 600 p n 24405D D ASS Cape 4436 RA for A 600 p n 24406D Picture 5 A D CE certificated Capes for Apollo 600 11 4 Additional parts Options Clem Cool air conditioner 23825D Climate control 04411I DLX...

Отзывы: