


External Sync
For times when the ProfCam is connected with other cameras to the same monitor, it may be convenient to take
advantage of the sync option on the ProfCam. This works best when there are two or more cameras connected
to the same video monitor, and you are continually switching between sources (i.e. between the ProfCam and
other cameras). Normally when the source is changed, the picture will flicker or run for a second or two before
being seen properly. Connecting the cameras together via the external synch port and a synch generator will
eliminate that flicker.
Packing The Camera For Storage Or Transportation
The carrying case provided with the ProfCam has been designed for maximum protection of the camera while
minimizing space and awkwardness for transportation. It is extremely important that the camera be packed properly
to avoid damaging both the electronics and the casing of the camera.
Care and Cleaning
• Do not attempt to take the camera apart. There are no user-serviceable components inside.
• Do not spill liquids onto the camera.
• Avoid touching the lens. For smears or smudges, clear any dust with a blower and wipe stains with a glass
cleaner and clean cloth.
• Do not use glass cleaner to clean the LCD screen! Any ammonia-based products will turn the glass cover
foggy and result in unsatisfactory images. For best results, use a damp cloth or paper towel.
• To clean exterior of camera, wipe with a clean damp cloth. Do not use any abrasive chemicals.
• Use both hands whenever adjusting the flexible neck on the camera. This will avoid any unnecessary strain
on the base of the camera and will help keep the camera from tipping over unexpectedly.
Operating And Storage Conditions
Do not store or operate the ProfCam under the following conditions:
• Above 40ºC (104ºF) or below 0ºC (32ºF)
• High humidity environments
• Dusty environments
• In inclement weather
• Under severe vibration
• In direct sunlight or other bright lights
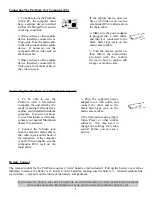
1. Loosen the thumbscrew at
the base of the camera neck by
turning it counter-clockwise.
2. Collapse the neck by lifting
up the locking sleeve, then
wrap the neck around the base
of the camera.
3. Curve each of the flexible
'top' lights so they are in place
over the top of the camera
neck.
4. Slide the camera into the
main compartment in the carry
case with the jacks in the rear
of the base facing down.
5. Place the light base back into
its protective sleeve. T h e n
slide the light base into the nar-
row compartment along the
side of the carry case.
6. Wrap all cables, and place in
the remaining compartment.
8