


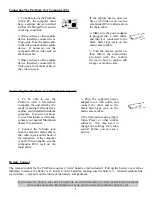


Focus
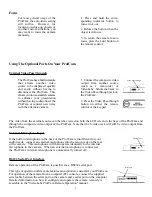
Using The Optional Ports On Your ProfCam
External Video Pass Through
The video from the external source can then be viewed on both the LCD screen in the base of the ProfCam and
through the composite video output of the ProfCam. Note that the S-video jack will still be video output from
the ProfCam
External Microphone Input
If the built-in microphone in the base of the ProfCam is insufficient for your
audio needs, connect an external microphone into the mic-in jack on the rear
of the camera. This microphone will then operate identically to the internal
microphone in the camera. When an external microphone is connected,
the ProfCam's internal microphone is automatically turned off .
RS232 Serial Port Interface
Remote operation of the ProfCam is possible via a RS232 serial port.
This type of operation offers more features and options to customize your ProfCam.
For operation of the camera from a computer (PC) console, connect the supplied
serial cable between the serial port on the camera and a serial port on the computer.
Detailed information on how to configure and operate the camera remotely is
available in the "VideoLabs ProfCam Remote Operation" manual.
serial port
The ProfCam has a built in feature
that allows another video
source to be displayed quickly
and easily without having to
disconnect the ProfCam. This
allows you to use smaller cameras
to enhance your presentation
without having to disconnect the
ProfCam or connect new wires
with the alternate camera.
1. Connect the composite video
output from another source
(such as a camcorder or
VideoLabs’ ScholasticCam) to
the Video Pass-through jack on
the ProfCam.
2. Press the Video Pass-through
button on either the remote
control or the keypad.
Video Pass-through
For most general usage of the
ProfCam, the auto-focus setting
will suffice. However, for
focusing on close-up objects or
in other custom situations, you
may want to focus the camera
manually.
1. Press and hold the corre-
sponding indicator button to
focus in or out.
2. Release the button when the
object is in focus.
3. To return the camera to auto
focus, press the 'auto' button on
the remote control.
External mic
7