


Turning The Camera On
Once the proper connections have been made, remove the lens cover from the
camera module. Press the power button on the camera keypad or remote control.
Allow a few seconds for the camera to warm up and set itself
accurately. If the picture is not seen, or is not properly in focus, refer to the
"Troubleshooting" section of this manual.
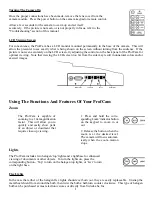
LCD Viewing Screen
For convenience, the ProfCam has a LCD monitor mounted permanently in the base of the camera. This will
allow the presenter to see exactly what is being shown on the screen without turning from the audience. If the
picture is not seen accurately on the LCD screen, try adjusting the controls on the back panel of the ProfCam for
optimal viewing. Note that viewing the LCD screen too far from the side may result in unnatural colors and/or
skewed images.
Using The Functions And Features Of Your ProfCam
Zoom
Lights
The ProfCam includes two halogen 'top' lights and a lightbase for enhanced
viewing of documents or other objects. To turn the lights on, press the
corresponding button - 'Top' to turn on the halogen top lights, or 'Lwr' to turn
on the light base.
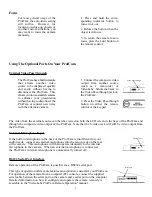
Flex Lights
In the case that either of the halogen flex lights should ever burn out, they are easily replaceable. Unsnap the
metal heat shield from around the bulb, then twist the bulb a half-turn counter clockwise. This type of halogen
bulb can be purchased at most electronic stores or directly from VideoLabs, Inc.
brightness
contrast
color
backlight
The ProfCam is capable of
zooming to a 14x magnification
factor. This will allow you to
quickly and easily show parts
of an object or document that
require close-up viewing.
1. Press and hold the corre-
sponding 'zoom' indicator button
on the keypad to zoom in or
out.
2. Release the button when the
zoom is at the desired level.
The camera will focus automat-
i c a l l y when the zoom motion
stops.
5