background image

54  |   

Nord Wave User Manual v1.1

Global Gain
this can set a global increase or attenuation of the am-

plitude of the entire Sample Instrument. any individual 

amplitude differences between the samples will not be 

altered. Set the value expressed in dB:s in the value box, 

confirming this by pressing enter, or with the increment/

decrement buttons. 

range: -8.9 to + 8.9 dB

Sample Gain
this allows you to change the amplitude on each indi-

vidual sample. the amplitude after a gain change will be 

indicated with the horizontal line in the Grid. Set the value 

expressed in dB:s in the value box, confirming this by press-

ing enter, or with the increment/decrement buttons. 

range: -8.9 to + 8.9 dB

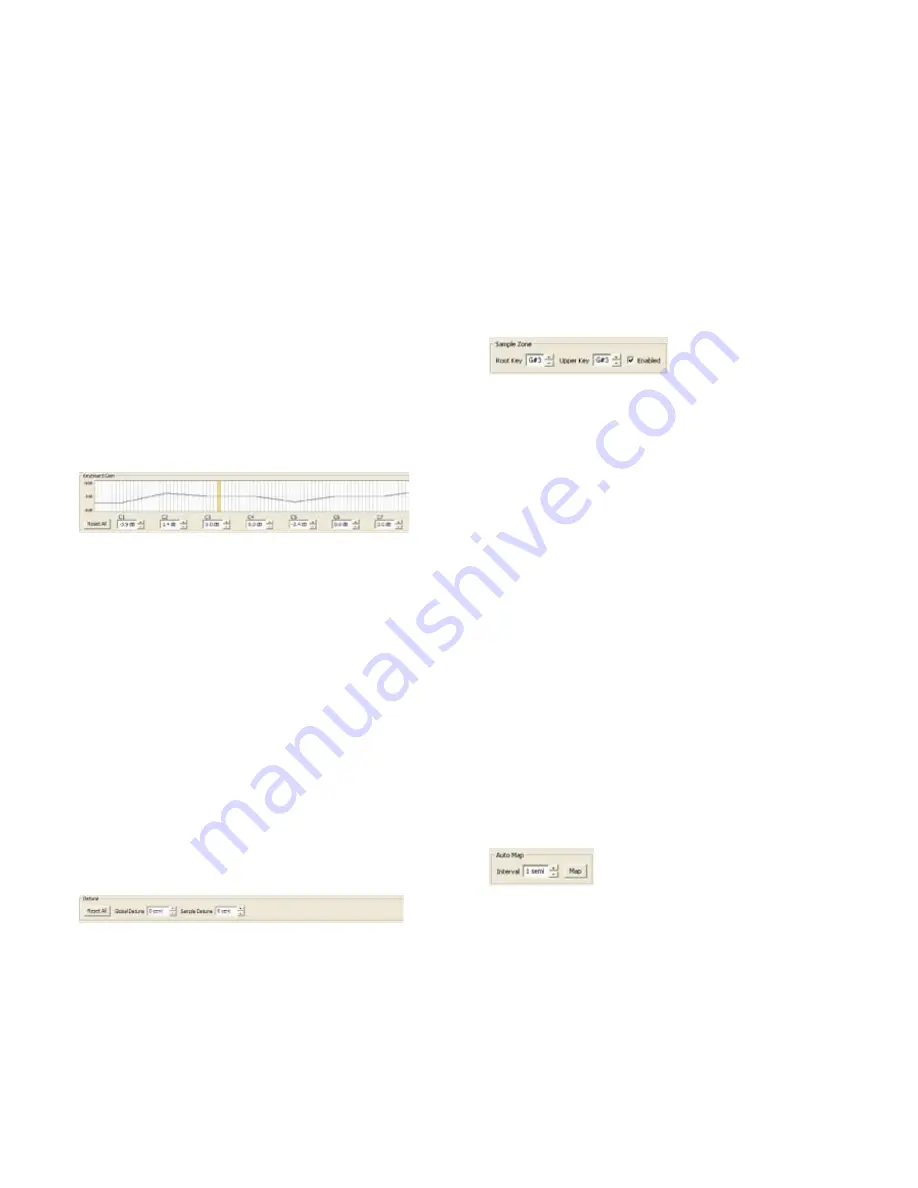
Keyboard Gain graph 

this will reflect any changes that you make with the Key-

board Gain controls. these settings will affect the entire 

Sample Instrument, and can be used to apply various ad-

justments that will change the amplitude across the range 

of the keyboard. If for example the lower range in the 

Sample Instrument is too loud, you can apply an attenu-

ation that begins at a chosen octave. the sample in focus 

will be indicated as a yellow slice. 

Reset All
this will reset any settings that you have made using the 

octave gain controls.

Octave gain controls
allows you to apply a gain change to a range, which will 

start at the preset keys C1, C2, C3 etc. 
C4 represents the middle C on the Nord Wave, when the 

octave Shift control is set to 0. Set the value expressed in 

dB:s in the value box, confirming this by pressing enter, or 

with the increment/decrement buttons. 

ranges: -8.9 to + 8.9 dB

Detune

You can change the overall tuning of the samples, either on 

a global scale or for any individual samples. this provides 

you with the means to fix any problems with samples that 

are out of tune, or to adjust an entire Sample Instrument. 

the unit is in cents, 100 cent is the range between two 

semitones. 

Reset All
this will reset any changes that you have made using the 

detune controls.

Global Detune
Sets the overall tuning of the Sample Instrument. Enter 

the value expressed in cents in the value box, confirming 

this by pressing enter, or with the increment/decrement 

buttons. 

range: -50 to 50 cents

Sample Detune
this allows you to detune the sample in focus in the 

Sample Instrument. Set the value expressed in cents in the 

value box, confirming this by pressing enter, or with the 

increment/decrement buttons. Each and every sample in 

the Project can be detuned.
range: -50 to 50 cents

Sample Zone

these controls makes it very easy to change the focused 

sample’s root Key and Upper Key, in order to edit the 

assignment. the focused sample will be highlighted in 

yellow, and you can quickly select focus by clicking on 

the keys in the Keyboard grid or by scrolling through the 

samples using the horizontal arrow keys on the computer 

keyboard. 

Root Key
Sets a new root Key for the focused sample. there can only 

be one sample assigned to each root Key, the value will 

automatically skip to the next available note.  

range: F0 to C8

Upper Key
Sets a new Upper Key for the focused sample. the available 

range may be limited by samples that occupy a root Key 

higher up on the keyboard. the Upper Key can not be a key 

that is located lower than the root Key on the keyboard. 

range: F0 to C8

Enabled
this allows you to disable and re-enable the focused 

sample. 

Transpose
Use the buttons to transpose the entire Sample Instrument 

in semi tone steps.

Auto Map

this function can be used to quickly enable and disable 

samples at certain intervals in order to reduce the amount 

of memory used by the Sample Instrument. this is a great 

way to quickly experiment with the Sample Instrument 

without having to delete and/or re-assign samples. 

Interval
Set the interval or range between the samples that will 

be kept enabled. the end result will depend on how the 

original ranges are mapped. Samples will not be moved 

from one key to another, any gaps across the keyboard 

range will be filled by any adjacent samples. a setting of 0 

will disable all the samples.  

range: 0 to 48 semi tones

Map
Map the samples according to the Interval setting.

Содержание Nord Wave

Страница 1: ...Part No 50303 Copyright Clavia DMI AB 2008 Print Edition 1 1 USER MANUAL Software Version 1 0x...

Страница 2: ...r a stand that is recommended by the manufacturer 4 This product either alone or in combination with an amplifier and headphones or speakers may be perfectly capable of producing sound levels that cou...

Страница 3: ...6 Saving a Program 16 Program UP DOWN buttons 16 Rotary Dial 17 Octave Shift buttons 17 Global Octave 17 Panic 17 Mono Mode 17 Mono Mode button 17 Sound Init 17 Glide knob 17 Morph Buttons 17 Assign a...

Страница 4: ...Program management 41 Backup Sample Inst 42 Menu Reference 43 File Menu 43 Instrument Menu 43 Settings Menu 43 Backup Menu 44 Help Menu 44 Tab Reference 44 Common area 44 Audio File AssignTab 46 Sing...

Страница 5: ...nd in a variety of ways The Wave is bi timbral it s two slots are independent of each other making it possible to e g layer two sounds on top of each other The Nord Wave is also a true stereo synthesi...

Страница 6: ...we call the Flash memory The Manager will also act as a librarian util ity for the Program memory area The Nord Wave Manager will assist you in your editing ef forts it contains powerful tools for va...

Страница 7: ...to activate one or both of the Nord Wave synth engines We ll describe the functions in this area in greater detail starting at page 16 Synth area The synth area is where all the action happens Every v...

Страница 8: ...oading a new program but in the System or MIDI menus the Rotary is used to change parameter settings LED dials These dials in the oscillator section have an associated LED display which shows their pa...

Страница 9: ...if the operating system in the synthesizer needs to be updated Computers running Microsoft Windows operating F F systems need a driver for the USB connection to func tion The driver can be found on t...

Страница 10: ...ber by the digits to the right in the LCD Each Program has a name and they are also categorized in 17 different categories If you reach the last or the first Pro 3 gram in a Bank you can switch to the...

Страница 11: ...m the new name and category selection Use the 4 UP DOWN buttons or the Rotary dial to choose the location where you want to store the Program Press the 5 STORE button a third time to confirm your choi...

Страница 12: ...it The EQ is activated as soon as you turn an EQ knob from its 12 o clock position Press the 4 Delay ON button to add a delay to the Wurly You set the level of the delay signal with the AMOUNT knob an...

Страница 13: ...Morph Sources There are three Morph Sources available Note Velocity Velocity This Morph source uses the Note Velocity from the Nord Wave keyboard and from any incoming MIDI messages A key velocity of...

Страница 14: ...original position where the Morph LED will be turned off Morph Mode Morph Mode provides you with a great overview that can simplify setting up and adjusting multiple Morph Destina tions at once Double...

Страница 15: ...Mod Wheel the string sound will be gradually introduced in the layered sound You want more Here is another example Dial up the Persian Santur Program 1 41 1 Play a few notes in the high the middle and...

Страница 16: ...the previous one in the location you selected To cancel the procedure press any button on the panel before you press STORE the second time Saving a Program with a new name and or category Press the 1...

Страница 17: ...sound on the Nord Wave will be silenced Equipment connected via MIDI OUT will not be affected Mono Mode The Nord Wave is a polyphonic instrument with 18 stereo voices If the Mono Mode is activated it...

Страница 18: ...corresponding Morph Source button and operate the Morph Destination knob to its origi nal position where the Morph LED will be turned off Morph Mode Morph Mode provides you with a great overview that...

Страница 19: ...three different Sort modes By default you load a Program by first selecting the Bank with the UP DOWN buttons and then turning the ROTARY The Programs are then displayed and activated in a numerical o...

Страница 20: ...here are two LFOs available with slightly different fea tures Rate knob The Rate knob is used to set the frequency of the LFO Range 0 03 to 523 Hz The LED to the upper right of the RATE knob indicates...

Страница 21: ...he Mod Envelope relates to the current setting of the selected target parameter The maximum modulation amount spans to the intensity set by the Mod eNV AMT knob Attack knob The Attack knob sets the ti...

Страница 22: ...ti cally change as the width of the pulse is altered The narrower the pulse width the more harmon ics will be present If you modulate the Shape value using an LFO you can get very nice synthesized str...

Страница 23: ...mage above shows the structure of a sampled wave Use the LED dial to select a sampled wave The Shape parameter controls the decay time of the OSC2 amplitude envelope when this waveform is selected FM...

Страница 24: ...tors one Carrier and one Modulator is called a 2 operator FM Synthesis indicated as 2 OP in the LCD Note that a single oscillator OSC1 or Osc2 in this scenario actually contains two oscillators FM alg...

Страница 25: ...Oscillator Modulation Osc Mod Oscillator Modulation is about having the waveform pro duced by oscillator 2 modulating oscillator 1 Oscillator 1 will then produce a richer waveform with more harmonics...

Страница 26: ...ion shows what happens when a sawtooth waveform is synchronized to a sine waveform The saw tooth restarts its cycle every time the sine passes zero The image above illustrates the harmonic content of...

Страница 27: ...as son as a key is released A very short release time could produce a click in the end of the sound This is a normal physical phenom enon To eliminate a click just increase the release time slightly...

Страница 28: ...quency Filter Frequency Filter Frequency Filter Resonance Filter Frequency Filter Vocal Envelope range Time Filter Frequency A bandpass filter lets frequencies at the Filter Frequency setting to pass...

Страница 29: ...ries Please refer to the section on Filter Types on the previous pages for more information Filter Resonance Res knob Filter Resonance is used to emphasize frequencies around the Filter Frequency maki...

Страница 30: ...t knob is used for setting the intensity of the change Filter Frequency Filter Frequency Filter Frequency Filter Frequency Filter Frequency The image above illustrates how the ENV AMT knob en ables no...

Страница 31: ...Filter Envelope This is time it will take for the modulation to go from zero to the level set by the Enve lope Amount knob after a key has been pressed Range 0 5 ms to 45 s Decay knob The decay knob...

Страница 32: ...fect to the sound The Delay can operate in mono or in stereo with the delayed sound appearing in an alternating pattern in the left and right audio channel Tempo LED The Tempo LED indicates the time b...

Страница 33: ...between the unprocessed dry and processed wet signal Reverb button The reverb button selects the type of reverb effect Setting Description Room Small reverberation with room ambiance and a fast decay...

Страница 34: ...audio file will also affect how that file behaves in the Nord Wave Manager You should however try to keep a backup of or use copies of the original audio files when you start to assemble the sample c...

Страница 35: ...a Sample Instrument is 91 The Sample Instrument also known as SI in this manu al can be selected in the Nord Wave OSC2 as a waveform and this together with all the other functions in the Synth area be...

Страница 36: ...Nord Wave Manager Windows PC Insert the Nord Wave DVD into the DVD ROM drive 1 Run the Install Nord Wave Manager v1 xx exe and follow the 2 instructions in the setup program The Nord Wave Manager will...

Страница 37: ...on a Project with sample editing mapping and other functions When the Manager finds a Nord Wave this will be indicated at the lower right corner of the Manager window and the Nord Wave tab will open a...

Страница 38: ...nwp files Read more about the file types the Wave and the Manager uses on page 49 By combining the techniques for down and upload ing the Sample Instruments and Programs you are now also able to share...

Страница 39: ...Files Assign tab and click 1 the Add button The Nord Wave can use stereo or mono audio files as sample sources with up to 44 1 kHz sample rate 24 bits resolution Navigate to a folder that contain the...

Страница 40: ...sound begins The Nord Wave Manager will automatically place a starting point when a sample is assigned to a zone This marker can easily be changed if you prefer to have manual control of this functio...

Страница 41: ...Instrument and to download this to the Nord Wave If you haven t saved your Project now would be a good time 1 to do so By saving and giving a Project a name you are also providing the name for the Sam...

Страница 42: ...ard drive The folder hierarchy for the uploaded files will look like this Programs Bank X The necessary folders will be automatically created when you upload a Program to the hard drive To add a previ...

Страница 43: ...t up to a 24 bit 44 1 kHz resolution Exit Ctrl Q Closes the Nord Wave Manager You will be prompted to save any unsaved changes to an open Project Instrument Menu Generate And Download Ctrl G Creates a...

Страница 44: ...at are used to view the mapping to change the focus of the samples to generate a Sample Instrument and to start and stop playback The Keyboard Grid The Keyboard Grid represents the total keyboard rang...

Страница 45: ...of several smaller tasks and the progress of these is displayed with the Progress bars Cancel button Use this button to cancel any ongoing task that the Nord Wave Manager is in the process of perform...

Страница 46: ...ction by clicking on the arrow Add Button Brings up the Add Files dialog where you choose audio files to be added to your project Multiple files can be selected Note A Project uses references to the a...

Страница 47: ...ey of the sample is based on a certain string of characters in the audio file s filename Name This function use a naming convention where the pitch or note name is indicated in the actual file name A...

Страница 48: ...ade in the graph ends Use the increment decrement buttons to adjust the end of the selection Assign button This activates the assignment of the selected audio file using the settings you have entered...

Страница 49: ...loop end marker which will produce audible and perhaps unwanted arti facts in the sound In order to minimize certain loop artifacts a crossfade function can be used This uses audio that is before the...

Страница 50: ...ch together with the position of the loop start marker sets the loop length Make sure that you right click to the right of the loop start it is not possible to position the loop end before the loop st...

Страница 51: ...y artifacts that might occur when you e g play a chord as a result of several loops with identical settings you have the option to apply a variation to the loop length Loop Length Variation Set the va...

Страница 52: ...ate start marker of the sample This alternate start point will be activated when you select the Skip Samp Attack function on the Nord Wave panel When this tab is opened the waveform graph will zoom in...

Страница 53: ...per limit of a zone and move it to a new key Note One zone s Upper Key cannot be pushed on top F F of or above another zone s Root Key The amplitude of any individual sample is indicated with the blac...

Страница 54: ...etune controls Global Detune Sets the overall tuning of the Sample Instrument Enter the value expressed in cents in the value box confirming this by pressing enter or with the increment decrement butt...

Страница 55: ...all the functions in the Wave and save this as a Program Go back to the same original Project and upload the pa rameters from the Wave to the Project save the Project and finally generate and download...

Страница 56: ...the Nord Wave Flash memory The Flash capacity is 180 MB and this is of course allocated dynamically You can have one Sample Instrument that contains one sample that is using up all the memory capacit...

Страница 57: ...n the footer in the Manager window File Types and Names Files associated with the Nord Wave and the Nord Wave Manager use the following extensions nwiproj Nord Wave Project file This is a file contain...

Страница 58: ...the following two options Delete This will delete the Program from the Nord Wave Program memory The space that the deleted Program occupied is not immediately available to other Programs even though...

Страница 59: ...prepare it for some brand new content You will be asked to confirm this action Memory Indicator This will give you a numerical and a visual indication of how the Program memory space is being used Re...

Страница 60: ...ser look at these building blocks Let s first talk about the three that actually create and process sound Oscillator The Oscillator is actually the only thing in a synthesizer that actually produces a...

Страница 61: ...da mental determines the basic pitch of the sound If the fundamental has a frequency of 440Hz we will per ceive the entire sound as having a pitch of 440Hz Other harmonics are then added to the fundam...

Страница 62: ...new period of the waveform each time oscillator 1 does so If oscillator 2 then has a higher frequency than 1 it will get a complex waveform that depends both on its own pitch and on that of the other...

Страница 63: ...in the graph below The 12dB filter let s more of the high frequency pass through which gives the sound a brighter and buzzier character than the 24dB filter does Filter Frequency Resonance 10 Resonanc...

Страница 64: ...level How long this should take depends on the Attack setting If the Attack time is set to 0 the envelope will instantly reach full level If the attack time is higher it will take lon ger If you for e...

Страница 65: ...the FM ampli tude or the pitch of Oscillator 2 to create a different timbre during the attack part of the sounds LFOs An LFO is an oscillator just like the ones that produce the sound in a synthesizer...

Страница 66: ...polarity use this setting with a pedal with closed polarity Control Pedal Type Defaultvalue Roland This function allows you to match the control pedal charac teristics for various manufacturers ROLAND...

Страница 67: ...you to transmit and receive the knobs and buttons from the two slots on sepa rate MIDI channels If the MIDI Channel parameter is set to Bi Timb this Ctrl A channel will be the MIDI channel that Slot...

Страница 68: ...ved if it has been F F edited or it will be excluded from the dump MIDI Receive Bank Press store to erase the selected Program Bank to prepare the Nord Wave to receive a Sysex Dump via MIDI The ac tua...

Страница 69: ...LSB Controller 17 Osc 1 Shape 79 Sound Controller 10 Osc 2 Waveform 31 Undefined Osc 2 Wave FM Selection 93 Effect 3 Depth Osc 2 Misc Selection 118 Undefined Osc 2 Samp Instr Sel 50 LSB Controller 18...

Страница 70: ...Mode Mode Mode Number True Voice Mode Mode Mode Mode Mode 1 Omni On Poly Mode 2 Omni O Mono Mode 3 Omni Off Poly Mode 4 Omni Off Mono O Yes X No Nord Wave Parameter MIDI Controller MIDI Controller Na...

Страница 71: ...Delay with tap tempo function Reverb with 5 algorithms Connections 2 Line Level Audio Outputs Stereo Headphone Output Sustain Pedal Control Pedal USB interface MIDI in out Dimensions and weight 870 x...

Страница 72: ...ad and in the studio during the 1970 s by Led Zeppelin Pink Floyd Genesis Yes Deep Purple Aerosmith Wings David Bowie Kraftwerk and others During later years it has been used by Oasis Primal Scream Ra...

Страница 73: ...ing the 1990 s when numerous bands and artists like Red Hot Chili Pep pers Lenny Kravitz Oasis Radiohead Air Monster Magnet REM and Manic Street Preachers After 2000 the Mellotron is gaining even more...

Страница 74: ...400 String Section I M400 String Section II M400 8Voice Choir Radiohead Genesis Chili Peppers Tangerine Dream etc M400 4Voice Female Choir M400 4Voice Male Choir M400 Mixed Custom Choir M400 Male Solo...

Страница 75: ...ob Reverb 33 E Enabled box 46 Envelope Amount Filter 31 Envelope Filter 30 Equalizer 32 Exit 43 Expanded View 57 58 Expression pedal 9 F Fade Out 50 Feedback 24 File format 43 File Menu 43 Filter 28 F...

Страница 76: ...ms 10 Progress bars 45 Pulse 22 R Range Begin 48 Range End 48 Reference 43 Release knob Amp Env 27 Release knob Filter 31 Remap button 47 Remove Button 46 Reset All 53 54 Res knob 29 Restore 44 Reverb...

Отзывы: