background image


Page 12 of 41 

This section of the manual should be read in 
conjunction with the relevant Installation and 
Operation Data Sheets. If there is any doubt about an 
installation, contact should be made with Clarke 
Customer Support giving exact details of the 
problem. 
 
All installations should be clean, free of any debris 
and dry.  Care should be taken to ensure that there is 
easy access to the engine for maintenance and repair. 
The safety of personnel who may be in the area of the 
engine when it is running is of paramount importance 
when designing the installation layout. 
 

1)


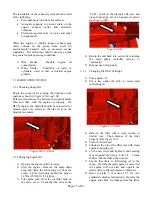
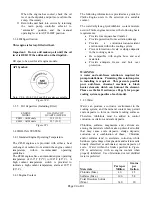
Secure pump set to foundation and complete 
installation in accordance with pump 
manufacturer’s instructions. Perform engine 
to pump coupling alignment. Lubricate Falk 
coupling with supplied grease or driveshaft 
universal joints with NLGI grade #1 or #2 
grease at the (3) Zerk fittings. (Refer to 
section 2.4 for specific alignment 
instructions). 

2)


Engine with Heat Exchanger Cooling: Install 
the heat exchanger discharge pipe. The 
discharge pipe should be no smaller than the 
outlet connection on the heat exchanger. 
Discharge water piping should be installed in 
accordance with applicable codes. All 
plumbing connecting to the heat exchanger 
must be secured to minimize movement by 
the engine. Cooling loop water pressure to 
the heat exchanger must not exceed the limit 
that is stated on the heat exchanger supplied 
with the engine. 

3)


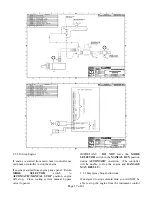
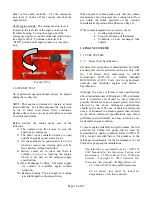
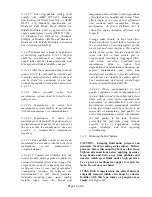
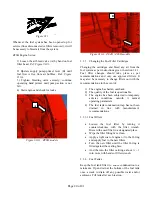
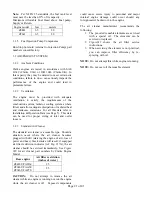
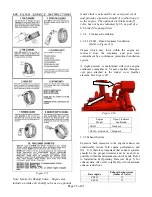
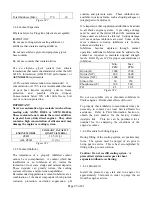
Install all engine cooling system draincocks 
and plugs. 


Qty 


Description 


Location 

1/8” Draincock

Heater Inlet Tube

4)


Engine is typically provided with premixed 
coolant installed.  If engine is not provided 
with coolant or there is a need to top off, fill 
engine cooling system with premixed 50% 
water / 50% coolant solution. Use only 
coolants meeting ASTM-D6210 
specifications for heavy-duty diesel engines.  
Never use light-duty or automotive coolants 
in the engine that are stated as ASTM-D3306 
only.  Refer to 

Figure #23

 in section 3.4.3 

for cooling system capacity.  Refer to section 
3.4.5 filling procedure. 

5)


Engine is shipped with oil 

installed

. For 

make-up oil specifications refer to section 
3.3 Lubrication System.   

6)


Connect fuel supply and return line to fuel 
supply tank plumbing. Reference the Fuel 
System section of the Installation and 
Operation Data (see Page 5), for piping size, 
maximum allowable fuel pump suction, and 
maximum allowable fuel head requirements. 
Fill supply tank with 

ONLY 

#2 diesel fuel 

(ASTM D-975) or BS 2869 Class A2 “Red” 
diesel fuel, bleed supply system of air and 
check for leaks.  

CAUTION:

 Biodiesel fuel 

is not recommended or stand-by equipment 
that can have minimal fuel consumption 
(such as standby generators, fire protection, 
etc.) For standby applications use only 
petroleum based diesel fuel with DEUTZ 
approved conditioners/additives. For fuel 
conditioners/additives check with your local 
DEUTZ dealer, or Clarke. Fuel supply level 
must meet applicable code requirements. Do 
not use a copper based or galvanized material 
for any component of a diesel fuel system. 
The fuel will chemically react with the zinc 
resulting in clogged fuel filters and injector 
systems. 

7)


Remove protective covering on air cleaner 
element. 

8)


Connect jacket water heater (if supplied) to 
AC power source. Connect the supplied 
heater connection wire directly to a customer 
supplied electrical junction box. The 
electrical supply requirements are indicated 
on the connection box. Connect to the heater 
directly to the junction box at the end of the 
heater only. 

Supply wiring should never be 

routed through the engine gauge panel

Severe damage to critical engine control 
components could result. Energize heater 
only after step #4 is completed.   

9)


Connect exhaust system to flexible 
connection on the engine. The exhaust 
system plumbing must be supported by the 
building structure and not the engine. The 
exhaust flexible connection is provided only 
for the purpose of thermal expansion and 
vibration isolation, not for misalignment or 
directional change. 

10)


Make electrical DC connections between the 
engine gauge panel terminal strip (if 
supplied) and the controller per the controller 
manufacturer’s instructions. Refer to the 

Содержание ZE

Страница 1: ...IRE PUMP APPLICATIONS Clarke UK Ltd Clarke Fire Protection Products Inc Unit 1 Grange Works 100 Progress Place Lomond Road Cincinnati OH 45246 Coatbridge U S A ML5 2NN United Kingdom TELE 44 0 1236 429946 FAX 44 0 1236 427274 TELE 1 513 771 2200 Ext 427 FAX 1 513 771 5375 www clarkefire com ...

Страница 2: ...e 15 2 5 1 1 Optional Pneumatic Starting System 16 2 5 2 To Stop Engine 17 2 5 3 Emergency Stop Instructions 17 2 6 WEEKLY TEST 18 3 0 ENGINE SYSTEMS 18 3 1 FUEL SYSTEM 18 3 1 1 Diesel Fuel Specification 18 3 1 2 Bleeding the Fuel System 19 3 1 3 Changing Fuel Filter Cartridge 20 3 1 3 1 Fuel Filters 20 3 1 4 Fuel Tanks 20 3 1 5 Fuel Injection Pump Components 21 3 2 AIR EXHAUST SYSTEM 21 3 2 1 Amb...

Страница 3: ...Backflow Preventers 28 3 4 7 7 Raw Water Outlet Temperature 28 3 4 8 Flow Paths of Engine Cooling System 28 3 4 9 Important Service Notice 29 3 4 9 1 Water Pump Cavitation 29 3 5 ELECTRICAL SYSTEM 29 3 5 1 Wiring Diagrams 29 3 5 2 Checking Drive Belt Tension and Adjustment 30 3 5 3 Speed Switch 30 3 5 4 Magnetic Pick Up 30 3 5 5 Mechanical Engine Control and Alarm Board MECAB Speed Switch Troubles...

Страница 4: ...owing languages Spanish French German Italian NOTE The information contained in this book is intended to assist operating personnel by providing information on the characteristics of the purchased equipment It does not relieve the user of their responsibility of using accepted practices in the installation operation and maintenance of the equipment NOTE CLARKE FPPG Reserves the right to update the...

Страница 5: ...ed in accordance with the guidelines stated in this manual Periodic running checks to ensure functionality should be kept to a maximum of hour per week 1 1 IDENTIFICATION NAMEPLATE Throughout this manual the terms Engine and Machine are used The term Engine refers solely to the diesel engine driver as supplied by CLARKE The term Machine refers to any piece of equipment with which the engine might ...

Страница 6: ... This engine has components and fluids that reach very high operating temperatures and is provided with moving pulleys and belts Approach with caution It is the responsibility of the builder of the machine using a Clarke engine to optimize the application in terms of maximum end user safety BASIC RULES The following recommendations are given to reduce the risk to persons and property when an engin...

Страница 7: ...ifting lift point should always be over the equipment Center of Gravity Note The engine produces a noise level exceeding 70 dB a When performing the weekly functional test it is recommended that hearing protection be worn by operating personnel CLARKE UK provides the machine manufacturer with a Declaration of Incorporation for the Engine when required a copy of which is enclosed in the manual This...

Страница 8: ...y EMC Generic standards Immunity for industrial environments EN 55011 2016 A1 2017 Industrial scientific and medical equipment Radio frequency disturbance characteristics Limits and methods of measurement A technical file for the product listed above has been compiled in accordance with part B of Annex Vii of the Machinery Directive 2006 42 EC and Annex III of Low Voltage Directive 2014 35 EU The ...

Страница 9: ...e person providing the aid must hold his breath not light flames turn on lights or activate electric bells or telephones so as to avoid explosions Take the victim to a ventilated area or into the open air placing him on his side if he is unconscious CAUSTIC BURNS 1 Caustic burns to the skin are caused by acid escaping from the batteries remove the clothes wash with running water being careful not ...

Страница 10: ...Voltage Air Filter Installation 2 0 INSTALLATION OPERATION 2 1 TYPICAL INSTALLATION A typical Fire Pump installation is shown in Figures 6 6A 1 Pump Engine set 2 Main Pump Controller 3 Pump discharge 4 Air louver 5 Entrance door with air louver 6 Exhaust silencer 7 Exhaust system supports 8 Exhaust outlet pipe 9 Concrete base 10 Exhaust flexible connection joint pipe 11 Air Discharge Duct from Rad...

Страница 11: ...ative fuel container as a fuel source using a fuel conditioner mixture of C02686 or C02687 with ONLY Diesel 2 fuel or Red diesel fuel ASTM D 975 or BS2869 Class A2 Refer to Section 3 1 1 for Fuel Specification 7 Disconnect the coupling or drive shaft from the pump 8 Start and run the engine at a slow speed for 1 2 minutes being careful not to exceed the normal operating temperature 9 Drain the oil...

Страница 12: ...ity Refer to section 3 4 5 filling procedure 5 Engine is shipped with oil installed For make up oil specifications refer to section 3 3 Lubrication System 6 Connect fuel supply and return line to fuel supply tank plumbing Reference the Fuel System section of the Installation and Operation Data see Page 5 for piping size maximum allowable fuel pump suction and maximum allowable fuel head requiremen...

Страница 13: ...e torque all driveshaft connection bolts to the values given in the following table MODELS DRIVE SHAFT BOLT SIZE MATERIA L GRADE TIGHTENING TORQUE ft lbs N m ZE4H CDS20 S1 1 2 20 Grade 8 Hi Tensile 75 82 102 112 ZF6H SC81A or CDS50 SC 7 16 20 Grade 8 Hi Tensile 50 55 68 75 See Note 2 Note 1 It is recommended that a medium strength threadlocker Loctite 243 blue be used in the assembly and torquing ...

Страница 14: ... the furthermost point on the bearing bore diameter The measurement must be Measurement Driveshaft 70 5 1 mm CDS20 S1 112 5 1 mm SC81A CDS50 SC Figure 7c D With the driveshaft in the same orientation as the previous step Step C check the Vertical alignment of the shafts 1 Measure from the mating surface of the pump companion hub of the drive shaft to point J as shown in figure 7d Point J is the sa...

Страница 15: ...mp controller become inoperable the engine can be manually started and stopped from the engine gauge panel For manual starting and stopping of an engine with a gauge panel IMPORTANT Main pump controller selector should be in the OFF position when starting from engine gauge panel Be sure to return selector on main pump controller and engine gauge panel to AUTOMATIC after completing manual run Posit...

Страница 16: ...ure Gauge IMPORTANT Main pump controller selector should be in the OFF position when starting from engine gauge panel Be sure to return selector on main pump controller and engine gauge panel to AUTOMATIC after completing manual run 2 5 1 1 Optional Pneumatic Starting System Some engines may be provided with an optional pneumatic starting system to crank the engine from a pressurized receiver tank...

Страница 17: ...OMATIC MANUAL STOP position engine will stop Close cooling system manual by pass valve if opened IMPORTANT DO NOT leave the MODE SELECTOR switch in the MANUAL RUN position during AUTOMATIC operation The controller will be unable to stop the engine and DAMAGE MAY RESULT 2 5 3 Emergency Stop Instructions If energized to stop solenoid fails you will NOT be able to stop the engine from the instrument ...

Страница 18: ...thin the limits specified on the relevant Installation Operation Data Sheet see Page 5 If the coolant temperature is excessive check a Cooling loop strainers b Proper functioning of thermostat c Condition of heat exchanger tube bundle 3 0 ENGINE SYSTEMS 3 1 FUEL SYSTEM 3 1 1 Diesel Fuel Specification All diesel fire pump drivers manufactured by Clarke are designed tested and warranted for use only...

Страница 19: ...blends and temperature all contribute to the degradation of the fuel as it is handled and stored These effects begin at the time of fuel refinement and continue until consumption Proper maintenance of stored distillate fuel is critical for engine operation efficiency and longevity Storage tanks should be kept water free Water contributes to steel tank corrosion and the development of microbiologic...

Страница 20: ...necessary to change filters out with the recommendations in the event of 1 The engine has had an overhaul 2 The quality of the fuel is questionable 3 The engine has been subjected to temporary adverse conditions outwith it normal operating parameters 4 The fuel tank condensation trap has not been drained in line with manufacturer s recommendations 3 1 3 1 Fuel Filters Loosen the fuel filter by tur...

Страница 21: ...and outlet louvers 3 2 3 Standard Air Cleaner The standard air cleaner is a reusable type Should a situation occur where the air cleaner becomes plugged with dirt starving the engine of air loss of power and heavy black smoke will result if equipped air filter restriction indicator ref Fig 17A the air cleaner should be serviced immediately See Figure 39 for air cleaner part numbers by Clarke Engin...

Страница 22: ...essurized ventilation system A slight pressure is maintained within the engine crankcase compartment Vapors expelled through a vent pipe attached to the rocker cover breather element Ref Figure 16 Figure 16 Engine Model Open Crankcase Ventilation ZE4H Standard ZF6H all models Standard 3 2 5 Exhaust System Excessive back pressures to the engine exhaust can considerably reduce both engine performanc...

Страница 23: ...s warm 2 Stop the engine Remove the sump drain plug and drain the lubricating oil from the sump Fit the drain plug tighten the plug to 34 Nm 25 1lbf ft 3 5 kgf m 3 Fill engine with oil at the oil filler neck on the valve cover Check that the oil is at the FULL mark on the dipstick with new and clean lubricating oil of an approved grade see Figure 19D Figure 19D 4 Return the unit back into service ...

Страница 24: ...uirements Provide for adequate heat transfer Provide protection from cavitation damage Provide a corrosion erosion resistant environment within the cooling system Prevent formation of scale or sludge deposits in the cooling system Be compatible with engine hose and seal materials Provide adequate freeze and boil over protection WARNING A water and anti freeze solution is required for pump installa...

Страница 25: ...orrosion protection cavitation suppression pH controls and prevents scale These inhibitors are available in various forms such as liquid packages or integral parts of anti freeze It is imperative that supplemental inhibitors be added to all Clarke engine systems A pre charge dosage must be used at the initial fill and the maintenance dosage used at each service interval Serious damage will occur u...

Страница 26: ...rgized to open anytime the engine is called upon to run from either the fire pump controller or from the engine instrument panel NOTE VT type pump applications do not require a solenoid valve in the Automatic flow line NOTE With the Mechanical Engine and Alarm Control Board See section 3 5 5 the solenoid valve will open 15 seconds after engine shutdown and will stay open for 60 seconds This allows...

Страница 27: ...Automatic flow line open set minimum flow by using the adjusting screw at the top of the pressure regulator If proper cooling water flow rate is established then no fire pump controller alarm will be triggered to indicate clogged raw water strainer low raw water flow NOTE To increase flow turn the adjusting screw clockwise and to reduce flow turn the adjusting screw counterclockwise Do not exceed ...

Страница 28: ...ll continue to diminish which will eventually starve the engine of adequate cooling water flow which will lead to engine overheat and catastrophic engine failure When this occurs you have no fire protection Clarke recommends that after the initial engine commissioning and also prior to each weekly exercise of the engine fire pump set both strainers be removed and cleaned and then re installed befo...

Страница 29: ...or damage replace as necessary Reassemble and refill coolant according to the Installation and Operations Instruction Manual 4 Run the engine to verify normal operating temperature 3 4 9 1 Cavitation Cavitation is a condition that occurs when bubbles form in the coolant flow in the low pressure areas of the cooling system and implode as they pass to the higher pressure areas of the system This can...

Страница 30: ...ections before placing engine back in service The OVERSPEED RESET must be manually lifted for two 2 seconds to reset NOTE This reset operation must be completed to allow a restart If not the engine will not start thru the main pump controller or manually OVERSPEED VERIFICATION Hold the OVERSPEED VERIFICATION switch in the up position This will provide the main pump controller with an overspeed sig...

Страница 31: ...ircuit 312 as a means to alert the user outside of the engine room NOTE When first applying battery power to the engine or after activating the overspeed reset switch the OVERSPEED SHUTDOWN lamp and red LED on the speed switch will flash several times This is an INITIALIZATION PATTERN and is normal This will be referred to in the following troubleshooting section Figure 29 Figure 30 MECAB speed sw...

Страница 32: ...erature thermistor Five 5 blinks on instrument panel Oil pressure switch or Engine speed sensor magnetic pick up malfunction Status lamps will flash five times continuously on the Clarke instrument panel and a Low Engine Coolant Temperature alarm will be sent to the fire pump controller via circuit 312 Cause Oil pressure switch failure or magnetic pick up failure Corrective Actions Oil Pressure sw...

Страница 33: ... to the left Wait for 30 seconds and controller alarm will activate Set white DIP switch slider to OFF right when simulation is complete Alarm 4 Low Engine Coolant Temperature With the engine not running set the Low Engine Coolant Temperature DIP switch to ON see Figure 36 Use a fine pick or small screwdriver and slide the white slider to the right Controller alarm will activate immediately Set wh...

Страница 34: ...g Clarke During Start Up Inspection or when placing reconditioned units into service some minor speed adjustment may be required It is recommended that this adjustment be performed by the authorized Service Dealer representative To adjust the speed of the engine A Start the engine by following the To Start Engine Procedure in this manual B Let the engine warm up Loosen the jam nut s Figure 37 C Wh...

Страница 35: ...n the engine to Automatic position Advise the appropriate personnel the engine has been returned to the Automatic 5 0 TROUBLE SHOOTING Consult Clarke Service Dealer or Factory Service dealers can be located by going to our website www clarkefire com For trouble shooting pertaining to the flashing of the OVERSPEED SHUTDOWN lamp see section 3 5 5 6 0 PARTS INFORMATION 6 1 SPARE PARTS To ensure best ...

Страница 36: ...PPLIER and its subsidiaries and hold them harmless against and from any and all claims damages costs and expenses with respect to any loss of or damage to property and any injury to or death of any person arising out of or attributable to any use application into other machines systems or sale of the Products 3RD PARTY S RIGHT SUPPLIER shall in no event warrant the any use application into other m...

Страница 37: ...parts on non equivalent in quality and design to genuine SUPPLIER service parts 7 Any defect and or functional Difficulty of Engines due to the parts replacement with non genuine SUPPLIER service parts on non equivalent in quality and design to genuine SUPPLIER service parts 8 Any defect and or functional Difficulty of Engines due to repair adjustment service or parts replacement by any personnel ...

Страница 38: ... The removed parts must be kept in proper condition to prevent additional damage or corrosion Warranty compensation may be charged back if the removed parts are not properly kept lost or not returned to SUPPLIER as per request If requested by SUPPLIER the removed parts shall be shipped to SUPPLIER with charges borne by SUPPLIER RECEIVING INSPECTION AND STORAGE OF THE ENGINES BUYER shall inspect ea...

Страница 39: ...ding Engines SETTLEMENT OF DISPUTES This agreement shall be construed in accordance with the German laws All disputes controversies differences or claims arising out of or related to this Agreement which cannot be settled amicably by negotiation between the parties hereto shall be referred to and settled by arbitration in Germany in accordance with the Arbitration Rules of the International Chambe...

Страница 40: ... Cleaner 10 21 35 38 41 Fuel 11 13 19 20 35 41 Lubricating Oil 11 23 35 41 Fuel Specifications 12 18 Fuel System Operation 18 Bleeding 19 Pump Injection 21 Service 21 25 29 34 35 39 G Governor Speed Adjustment 33 34 35 H Heaters Engine 5 11 13 24 29 30 35 Subject Page I Installation Data Installation Instructions 11 L Lube Oil Recommendations 23 Lubricating Oil Volume 23 Lubricating System 23 M Ma...

Страница 41: ...r Filter C03249 C03749 Alternator 118 3854 12V OR 118 3618 24V 118 3638 12V OR 118 3626 24V Fuel Injection Pump 211 2405 211 2860 Heat Exchanger C052988 C052988 Starter Motor 12V 118 3712 118 0928 Starter Motor 24V 118 3716 118 0999 Switch Oil Pressure C071884 C071884 Switch Speed C071963 C071963 Switch Coolant Temperature C071607 C071607 Thermistor C071607 C071607 Turbocharger 429 8301 425 9313 T...

Отзывы: