SPINDLE TURNINGS
1.
PLOTTING THE SHAPE
Once the basic cuts have been mastered, you
are ready to turn out finished work.
The first step is to prepare a plan for the proposed
turning. This can be laid out on a suitable sheet
of paper, and should be to full size.
Next, prepare the turning stock by squaring it
up to the size of the largest square or round
section in your plan. The stock can be cut to
the exact length of the proposed turning, but in
most cases it is best to leave the stock a little
long at one or both ends to allow for trimming.
2.
DUPLICATE TURNINGS
Identical turnings require great accuracy when
plotting the work and doing the various cuts.
Many methods have been devised to assist in
perfecting the work.
2.1 Use of Patterns
Professional workers generally use a pattern or
layout board.
This is a thin piece of wood or cardboard on
which is drawn a full-size half section of the
turning. The contour of the finished surface is
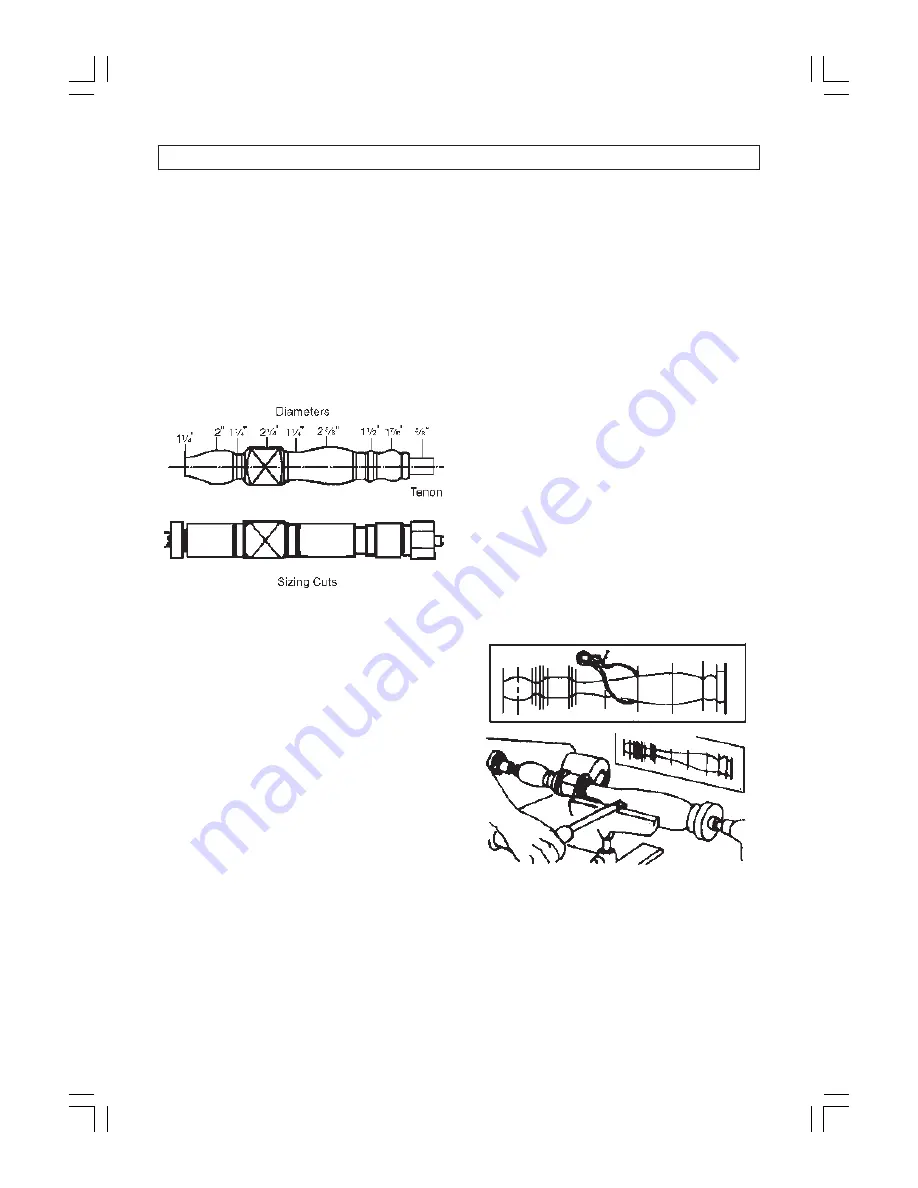
drawn first, then the diameters at various critical
points are drawn to scale as vertical lines
intersect the contour line.
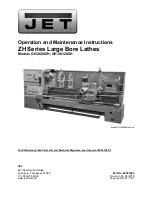
By placing the pattern against the roughed-out-
cylinder, you can quickly mark the various points
of the critical diameters.
To make each sizing cut, use outside callipers
and set these by actually measuring the length
of the vertical line on the pattern which
represents the diameter desired. Then make the
sizing cut, down to the proper diameter by using
the callipers to determine when the cut is
finished.
After making the sizing cuts, hang the pattern
behind the lathe where it will serve as a guide
for completion of the workpiece.
Mount the stock in the lathe, and rough it off to
a maximum size cylinder. Now project your plan
on to the turning by marking the various critical
dimensions along the length of the spindle in
pencil. These dimensions can be laid out with
an ordinary ruler, or by using a template. Make
the pencil marks about 12mm long, they will be
visible when the work is revolved under power,
and can be quickly traced around the spindle
by touching each line with the pencil.
After marking, use the parting tool to make sizing
cuts at all of the important shoulders. When
learning, you will find it best to make sizing cuts
to accurately plot the various diameters, but
experienced workers can do with a few such
cuts at the important shoulders.
Plan each sizing cut so that it is in waste stock,
and make each deep enough so that there will
be just enough wood left under the cut for the
finishing process.
Once the sizing cuts have been run in, rough-
out the excess wood with a gouge, then
proceed with the finishing process by making
the various types of cuts required.
26
Fig. 47
2.2 Using a Template and a Diameter Board
When many identical turnings are to be
produced, it is convenient to have a prepared
template. This can be made of thin wood or
cardboard, and is cut on a band saw or scroll
saw to have the exact contour of the finished
Fig. 48


