iDP3550/3551 Service Manual
10
CITIZEN
(3) Assembling the Auto Cutter (See Fig. 1)
1)
Securely insert the claws of the hook L and hook R into the square holes on the printer mecha-
nism.
2)
Securely mount the cutter BK R on the auto cutter unit with the supplied screw (M2.6
×
6).
3)
Temporarily mount the cutter BK L on the auto cutter unit with the supplied screw (M2.6
×
6).
Insert the projections "A" and "B" of the cutter BK L and R into the round holes on the printer
mechanism to mount the auto cutter unit.
Engage both ends of the lock lever with the notches
"C" and "D" of the hook L and R, and then s ecurely tighten the screw to fix the cutter BK L.
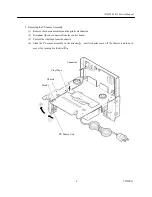
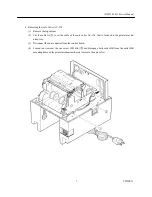
(4) How to Open the Auto Cutter (See Fig . 2.)
Push the handle and open the auto cutter.
3.2
Reassembly Procedure
Reassemble each part in the reverse order of the disassembly procedure described in Section 3.1.
Handle
Fig. 2
Содержание iDP-3550
Страница 1: ...Service Manual DOT MATRIX PRINTER MODEL iDP3550 3551 Rev 3 00 Revised on Jan 25 2002...
Страница 23: ...iDP3550 3551 Service Manual 19 CITIZEN 5 2 Disassembly Drawing Disassembly Drawing 1...
Страница 24: ...iDP3550 3551 Service Manual 20 CITIZEN Disassembly Drawing 2...
Страница 33: ...iDP3550 3551 Service Manual 29 CITIZEN 5 4 3 Power PCB Assy 3535 03 120V...
Страница 34: ...iDP3550 3551 Service Manual 30 CITIZEN 5 4 4 Power PCB Assy 3535 03 230V...
Страница 39: ...iDP3550 3551 Service Manual 35 CITIZEN 6 2 3 Power PCB Assy 3535 03 120V...
Страница 40: ...iDP3550 3551 Service Manual 36 CITIZEN 6 2 4 Power PCB Assy 3535 03 230V...
Страница 41: ...iDP3550 3551 Service Manual 37 CITIZEN 7 OUTER DIMENSION 7 1 iDP3550 Unit mm...
Страница 42: ...iDP3550 3551 Service Manual 38 CITIZEN 7 2 iDP3551 Unit mm...


