background image

60 Version: 

BB 

Document Number: G-SIP3D-RUC 

C

ONFIGURING  

P

ORTICO  

TVA 

USING  THE 

C

ONSOLE 

MI

I

NSTALLATION AND 

C

ONFIGURATION  

G

UIDE 

12 

AND 

24 P

ORT 

P

ORTICO 

TVA


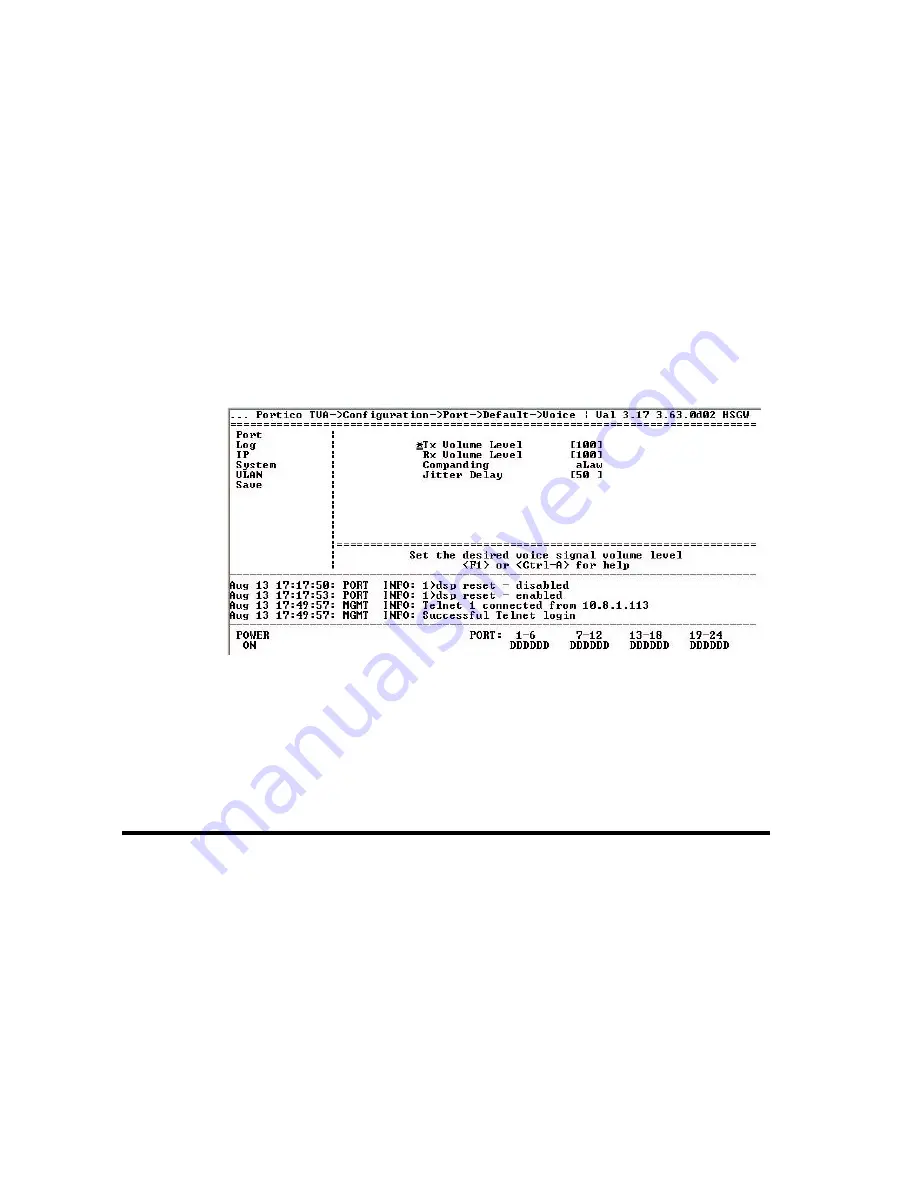
Configuring the Default Voice Settings 

The voice setting  is used  to  adjust  the  Transmit (

Tx

) and Receive (

Rx

) voice 

levels. Normally this would be used to assist with the reduction  of echo in 
the voice path which may occur in certain  installed  environments. Both the 
Transmit level and the Receive level default  to  100% and  the  field range  is 
25% 
- 150%. 


Path

Configuration -> Port -> Default -> Voice 


ƒ


Decreasing the level below 100% will result in lower transmit and 
receive voice levels on all ports. 


ƒ


Increasing the level above 100% will result in higher transmit and 
receive voice levels on all ports. 


Figure 29: Configure Default Voice Settings


1.   

Select 

Configuration

, then 

Port

Default 

and finally 

Voice 

from the 

menu  system. 


2.   

Enter new values for either  the 

Tx Volume Level 

or 

Rx Volume Level

Default is 100. For Toshiba, set the  Rx Volume Level to 120. 


Configuring Individual Ports


All ports do not have to follow the default port settings. They can be specified 
individually if required, by selecting 

Configuration

, then 

Port

Ports

, then the 

range of ports  and finally the port number  from the menu system. 

Path

Configuration -> Port -> Ports 

x-y   

-> Port 

N


Содержание Portico TVA Series

Страница 1: ... PORTICO TVA INSTALLATION AND CONFIGURATION GUIDE i 12 and 24 Port PorticoTM TVATM Installation and Configuration Guide Release 6 01 0 Includes P Phone Central Office version Document Number G SIP3D RUC Version BB 1 ...

Страница 2: ...12 AND 24 PORT PORTICO TVA INSTALLATION AND CONFIGURATION GUIDE Version AH Document Number G SIP3D RUC ii ...

Страница 3: ...in some information or make some changes that could be difficult when on site Note there is a separate document containing appendices to this guide including Technical Specifications Regulatory and Compliance Support Specifications Standards and Features and various more advanced features Sections before Main Contents About this guide iii Sections before Main Contents iii Important Information iv ...

Страница 4: ...itel makes no representations or warranties whether expressed or implied as to the accuracy or completeness of these materials and shall not be liable for any loss or damage suffered or incurred as a result of reliance upon or use of them Information in this publication is subject to change without notice Citel reserves the right without prior notice to change the equipment designs or documentatio...

Страница 5: ...ed or console based interface ALL CAPS Key names CTRL TAB DEL and keyboard buttons that you press For example Make your choice from the dropdown menu and press ENTER Blue Italic Cross references to other places in the document For example See How To Update on page 17 Single words within a sentence without page numbers are references to entries in the glossary For example The ISP provides the IP te...

Страница 6: ...el Mail Citel Technologies Inc 221 Commerce Drive Amherst New York 14228 USA Citel Technologies UK Ltd Loughborough Innovation Centre Holywell Park Loughborough LE11 3AQ United Kingdom Email support citel com Web www citel com Telephone 1 877 248 3587 USA and Canada select the support option 1 206 957 6270 International ...

Страница 7: ...o TVA12P 12 port Pphone analog H SIP3PZ RUC12 Portico TVA12P 12 port Pphone analog with 1 FXO port H SIP3PY RUC12 Portico TVA12P 12 port Pphone analog with 2 FXO ports H SIP3P RUC24 Portico TVA24P 24 port Pphone analog H SIP3PZ RUC24 Portico TVA24P 24 port Pphone analog with 1 FXO port H SIP3PY RUC24 Portico TVA24P 24 port Pphone analog with 2 FXO ports H SIP3A RUC12 Portico TVA12A 12 port analog ...

Страница 8: ...warnings and instructions including those marked on the product Keep these instructions with the equipment Do not install this product near water For example in a wet basement location Do not install this product or associated wiring during a lightning storm Do not overload wall outlets as this can result in the risk of fire or electrical shock Do not attach the power supply cord to building surfa...

Страница 9: ...ephone jack in wet locations unless the jack is specifically designed for wet locations Do not touch un insulated telephone wires or terminals unless the telephone line has been disconnected at the network interface Any connection of TVA ports to an outside plant lead an off premise application or any other exposed plant application may result in one or more of the following fire shock hazard defe...

Страница 10: ...rise This disconnect device could be an isolating switch or circuit breaker for instance installed as part of the equipment rack Overcurrent protective devices An external overcurrent protective device should be included in the end installation in order to protect the connecting supply wiring The maximum rating of the overcurrent protective device fitted external to the equipment should be 3 5A ty...

Страница 11: ...point out 7 3 INSTALLING PORTICO TVA 8 Physical installation 8 Ports and LEDs 9 Telephony Interface RJ 21x 11 Loop Line Lengths digital and P Phone 11 RJ 21x Connector Wiring 11 Analog FXO Ports 12 4 Connecting to a Portico TVA 14 Console MI 14 Direct serial connection 14 Hints for Making a Successful Connection 16 Telnet connection 16 Using the Console MI 16 Command Keys 18 Web MI 19 Connecting t...

Страница 12: ...Simultaneously 40 Basing your Settings on Existing Configuration 41 Entering and Applying the Settings 42 Configuration Settings 42 Configuring the Lines for an Individual Port 44 Basic Configuration 45 Advanced Configuration 47 Configuring the Handset 48 PortConfiguration 49 End user GUI 49 Default Display 49 Features 50 KeyMappings 51 BusyLamp Field BLF Overview 53 Configuration for BLF 54 Confi...

Страница 13: ...ng the Web MI 79 Optimize the Flash File 79 Backup the Configuration Files 80 Check the amount of free space 80 Upgrade the Software 81 Restore the Configuration Files 81 11 Troubleshooting 83 System Information 84 From the Web MI 84 From the Console MI 84 Logging 85 Viewing the Log File in the Web MI 85 Viewing the Log FIle in the Console MI 85 Viewing the Log File in the Console MI 87 Clearing t...

Страница 14: ...12 AND 24 PORT PORTICO TVA INSTALLATION AND CONFIGURATION GUIDE Version BB Document Number G SIP3D RUC xiv ...

Страница 15: ...nnectors Depending on the model you have purchased Portico TVA supports A maximum of 12 or 24 ports Digital handsets D product numbers analog handsets A product numbers or a mixture of P Phone and analog handsets P product numbers 0 1 or 2 FXO ports for connection to analog telephone PSTN lines See Product Numbers on page v for a full list of models associated with this documentation You must not ...

Страница 16: ...ly while connected Portico TVA How does it do that Portico TVA is configured to interface specifically with your Service Provider s Softswitch Each handset is connected to a port on Portico TVA The port is configured for that particular handset and user and features are assigned to the available keys Portico TVA converts the legacy signaling protocol used by the handset into SIP and vice versa Fig...

Страница 17: ...ar Softswitch or telephone is not listed Softswitches Portico TVA currently supports the following Softswitches and IP PBXs Asterisk 1 2 1 4 1 6 Broadsoft R11 1 R13 0 R14 0 Avaya CM 3 0 CR0 13x 00 0 346 0 and SES Server 3 0 build 31 Avaya IP Office Release 6 0 7 0 Cisco Unified Communications Manager CUCM version 5 1 6 1 Genband Metaswitch 4 1 1 MITEL 3300 Release 9 0 Pingtel SIPx Nortel SCS500 NE...

Страница 18: ...ack mounting brackets and fasteners Power supply lead The power supply lead provided depends on whether you have purchased the US or European version of the product RS 232 straight through D type 9 pin DB 9 serial cable CAT 5 straight through LAN cable 6 foot Documentation Installation and Configuration Guide this document SoftSwitch Integration Guide and Phone User Guide These are provided on CD ...

Страница 19: ...ails of previous releases are available in the Product Information Bulletins at www citel com Products Resources PIBs asp More information The Phone User Guide contains brief information about using Softswitch systems and handset default mappings The Softswitch Integration Guide contains instructions for configuring Portico TVA to work with various Softswitch features such as conferencing BLFs and...

Страница 20: ...ico TVA as you may need to extend or move cables You may be able to use the cable that was used to connect the legacy PBX to the punchdown blocks or you may need to obtain a new one See Telephony Interface RJ 21x on page 11 for details A connection to the LAN is available within reach of the provided CAT 5 cable The station wiring for each digital telephone is within the maximum loop length of 160...

Страница 21: ...estrictions of loop length as you may need more Portico TVAs to ensure you do not exceed this All of the items provided in the box with Portico TVA See What s in the box on page 4 for a list The correct power cord for the country of installation UPS and surge protection A copy of the latest version of software for Portico TVA in case you need to upgrade A PC or laptop to connect to Portico TVA to ...

Страница 22: ...nd make sure it is safe to shut down Physical installation Depending on how easy it is to reach the back of the Portico TVA unit after it has been mounted in the rack you may need to attach the cables before fixing the unit in place Do NOT connect the other ends of any of the cables until you are told to do so Please refer to Ports and LEDs on page 9 when following the instructions 1 Place the uni...

Страница 23: ... AUX LAN RJ 45 CAT 5 Ethernet cable Connects Portico TVA to a second LAN 5 WAN1 WAN2 Not used Not used 6 TELEPHONY INTERFACE RJ 21x 50 way extension cable with 25 pair 50 way Amphenol type connectors Wire to a punchdown block and then to the PBX See Telephony Interface RJ 21x on page 11 7 Fan 8 Euromain IEC Cold Connector Power connect to a 100 240 VAC outlet 9 Power switch Table 2 Portico TVA Con...

Страница 24: ... tipped screwdriver or similar tool into the opening and then remove to activate a system cold boot 2 Console The serial port 3 PWR The power indicator See Table 17 on page 83 and See Table 4 on page 16 4 FXO The FXO indicator See Table 17 on page 83 and See Table 4 on page 16 5 Not used in this model 6 Port Status LEDs indicating port status See Table 17 on page 83 and See Table 4 on page 16 Tabl...

Страница 25: ...ble in position when connected Loop Line Lengths digital and P Phone The maximum loop length of 1600ft 500m should not be exceeded for digital phones P Phones may have a loop length of up to 15 000 feet 4 5km Be sure to read the Safety Information section at the top of this document and the particular guidance relating to Central Office installation for P Phones RJ 21x Connector Wiring RJ 21x wiri...

Страница 26: ...Orange 28 White Green 29 White Brown 30 White Slate 31 Red Blue 32 Red Orange 33 Red Green 34 Red Brown 35 Red Slate 36 Black Blue 37 Black Orange 38 Black Green 39 Black Brown 40 Black Slate 41 Yellow Blue 42 Yellow Orange 43 Yellow Green 44 Yellow Brown 45 Yellow Slate 46 Violet Blue 47 Violet Orange 48 Violet Green 49 Violet Brown Tip Tip Tip Tip Tip Tip Tip Tip Tip Tip Tip Tip Tip Tip Tip Tip ...

Страница 27: ...ATION GUIDE Document Number G SIP3D RUC Version BB 13 Removal To remove Portico TVA 1 Power down the unit 2 Disconnect the RJ 21x 50 way extension cable 3 Disconnect any analog FXO connections 4 Remove power and LAN connections from the unit 5 Remove Portico TVA from the rack ...

Страница 28: ...o a full diagnostic and configuration command structure Instructions for the two connection methods are provided in Direct serial connection on page 14 and Telnet connection on page 16 Direct serial connection This section describes connecting to the Console MI using Microsoft HyperTerminal You may use a different terminal application if you are familiar with its use Only use the commands listed a...

Страница 29: ...d green FXO Flashes amber once then off system boot has started Fully booted amber Port Status All flash green once then off then 1 flickers green briefly then 1 to 8 flash green once briefly Fully booted all active ports are green Table 4 LED States System Boot Mode 6 Wait a few seconds and then the Press Enter to start the shell prompt is displayed 7 Press Enter A Password prompt is displayed if...

Страница 30: ...nal The Portico TVA Console password is not set by default We strongly recommend that you set a password for security reasons See About Passwords on page 24 for instructions Make a note of the password and pass it to the system administrator Telnet connection You can connect to Portico TVA using a telnet session You must know the IP address of Portico TVA Using the Console MI The Welcome screen is...

Страница 31: ...ation port 5 The area of the screen where configuration details are entered In this example this is the port information for Portico TVA 6 A short instruction and an indication of where to obtain further help 7 Power indication message 8 Port status messages On the 12 port version of Portico TVA these are UP port enabled phone detected and registered with SIP registrars RF port enabled and no phon...

Страница 32: ...le 5 Command Keys Saving Changes You will be prompted to save any changes if you attempt to log out of the Console MI without saving them You will also be asked to confirm that you want to save changes if you select the Save option You may need to reboot Portico TVA for your changes to take effect Logging Out When you have finished working on the Console MI remember to logout If you have left FTP ...

Страница 33: ...co TVA Web MI uses Java Script and Cascading Style Sheets CSS You must enable Java Script to obtain all the functions described in this document If you disable Cascading Style Sheets the functions will still work although the appearance will differ To connect to the Portico TVA Web MI enter its IP address into your browser You will be asked for a user name and password the default user name is cit...

Страница 34: ...VA Web MI Home Page Every page in the Web MI contains a Home button which will bring you back to this page Many pages also contain a Back button which will return you to the page immediately before the current page Saving Changes Changes that you make to items on the web page are not saved until you Submit them Closing the web interface before submitting your changes will lose them You may need to...

Страница 35: ...12 AND 24 PORT PORTICO TVA CONNECTING TO PORTICO TVA INSTALLATION AND CONFIGURATION GUIDE Document Number G SIP3D RUC Version BB 21 ...

Страница 36: ...cord details of each Portico TVA unit including its basic configuration and how the extensions are allocated to the ports Record wiring details for the telephones specifying the connections to the switch room panels The Setup Wizard When you log in to the Console MI for the first time the Setup Wizard runs automatically If you want to run the Setup Wizard again open the Console MI and select Utili...

Страница 37: ...he list of countries available on your model of Portico TVA may vary from those shown above The name of the country is displayed for you to confirm that you have entered the correct number If it is not correct type n and repeat from step 3 The regional code that corresponds to the country you selected is displayed This is not the same number as the country code IMPORTANT If you do not use the Setu...

Страница 38: ... Type y to reboot After the unit has rebooted the Welcome message is displayed again Optional parameters can be configured various trouble shooting utilities can be accessed minor adjustments can be made to enhance system performance and software upgrades can also be performed About Passwords Administrative Passwords Two different administrative passwords can be set for Portico TVA One is used whe...

Страница 39: ...etype Password to confirm it 4 Click Submit You will receive an Update successful message when the new password has been set Forgotten Web UI Password If you forget your Portico TVA Web UI password it cannot be recovered Contact Citel Support support citel com User Password Each end user has a password for accessing the Web based User Portal The initial password is set by the system administrator ...

Страница 40: ... Flash File on page 79 From the Web UI To reboot Portico TVA select Maintenance from the Home page The REBOOT option is one of the last items on the page Figure 13 Rebooting Portico TVA using the Web UI The System Reboot page Figure 13 shows the status of each of the ports These may be Idle no active calls Active call in progress Not Fitted there is no phone on this port If an Optimize is in progr...

Страница 41: ...ole UI To reboot the system from the Console UI select Utilities System Reboot A warning message is displayed as shown in Figure 15 and you are asked to confirm the reboot type y to continue or n to cancel Figure 15 Rebooting from the Console UI This is a software reboot and will not reset all functionality as would a power cycle hard reboot ...

Страница 42: ... THE WEB MI Once the initial Setup Wizard configuration is completed and Portico TVA has rebooted you must configure the system wide settings and phone ports using the Portico TVA Web MI After making any changes you must either reset Portico TVA or the telephone for your change to take effect depending on the change you have made You will be prompted with the appropriate action ...

Страница 43: ...TVA USING THE WEB MI INSTALLATION AND CONFIGURATION GUIDE Document Number G SIP3D RUC Version BB 29 Administrator Portal The administrator portal is the first page presented to the administrator Figure 16 Portico TVA Administrative Web MI Home Page ...

Страница 44: ...te and time are taken from the SIP server Asterisk or Sylantro only If you select this option you may need to reboot Portico TVA for it to get the date and time from the SIP Server NTP Server the date and time are taken from an NTP Network Time Protocol server You must enter either an IP address or an Fully Qualified Domain Name FQDN if you are using this method 2 Select the Timezone In Timezone P...

Страница 45: ...o a much longer international dialing code To specify dialing rules for Portico TVA click the Dialing Rules option from the Portico TVA Administrative Web MI The Default dialing rule is x If you are in North America you can use the Setup Wizard to configure your dialing rules The wizard asks you a number of questions about the way your telephone system was set up and then creates the rules for you...

Страница 46: ...Editing a Dialing Rule 1 Enter the Match criterion for example 2xxx Matches a four digit number beginning with 2 n11 Matches a North American Service Access Code 211 311 411 511 611 711 811 or 911 2 Enter the Translation rule used to convert the key presses into an alternative sequence For example All digits are copied to the final dialing string 555 2 Adds all digits from the second digit onwards...

Страница 47: ...A CONFIGURING PORTICO TVA USING THE WEB MI INSTALLATION AND CONFIGURATION GUIDE Document Number G SIP3D RUC Version BB 33 Configure Network The Configure Network page has several sections Figure 20 Configure Network Parameters ...

Страница 48: ... String a Community String for Trap operations in your SNMP system the default is trap An application note is available on request with guidance on managing TVAs using popular SNMP management stations e g SNMPc from Castle Rock Computing User Location Service The user location service may be used to send details of the users configured on the various ports of the Portico TVA to a list of master TV...

Страница 49: ... to the end user The default setting for Adaptive Jitter Buffer is on The Adaptive Jitter Buffer can be disabled if it is determined to cause problems Domain Name System DNS This section of the page lists the IP addresses of the DNS servers configured via the console The administrator may select the server selection mode either as Round Robin Default or Priority List For Round Robin each DNS query...

Страница 50: ...P soft switches using SIP Forum s SIPconnect 1 1 standard See www sipforum org sipconnect If a cluster of softswitches support these failover mechanisms TVA will handle a list of available servers in cluster either from receiving a DNS SRV record or from having a list of proxy addresses setup in a Line Configuration TVA will then respond to SIP 480 responses by moving onto the next available serve...

Страница 51: ...gure 16 The Configure Handsets page is displayed as shown in Figure 21 Figure 21 Configure Handsets Page The Configure Handsets page contains the following information Page Feature Description Port Name These are assigned sequentially starting with Port 1 You can optionally assign a different name to help in identifying this port and the telephone attached to it See Port Configuration on page 49 U...

Страница 52: ...us is one of Active Handset connected and off hook or on a call Disabled Port has been disabled in the handset configuration Error Handset type not recognized Idle Handset connected and on hook idle Not Fitted No handset connected to Portico TVA or wrong PBX type handset fitted for example Norstar connected when configured for Meridian Resetting Handset is currently resetting Table 7 Port Status T...

Страница 53: ...a handset use the Configuration Type dropdown as described below See Manual Handset Type Setting on page 39 Reasons to NOT accept the detected phone type If you do not accept the detected phone model phones will still work but with limited service and Portico TVA configuration will not be updated This has several advantages minimal administration required when deploying for the first time phones p...

Страница 54: ... Simultaneously on page 40 Enter details for each port separately See Configuring the Lines for an Individual Port on page 44 If you choose to configure a range of ports you will still have to specify information that is specific to an individual port separately Configuring Multiple Lines Simultaneously For larger installations you may use the Multiple TVA Configuration Tool see separate User Guid...

Страница 55: ... your Settings on Existing Configuration To base your configuration on information that has already been recorded for particular line in the Re use existing line settings section at the top of the page 1 Select the Port and Line that you want to copy 2 Click Re Use Information recorded for that port and line is displayed on screen Review and amend as necessary using the information in Table 9 as a...

Страница 56: ...guring the Lines for an Individual Port on page 4 4 and reboot the port s Configuration Settings The examples of the configuration in this document use IP addresses to identify Portico TVA and other network components Unless otherwise stated you can also use an FQDN fully qualified domain name The configuration settings listed in Table 9 can be set whether you are configuring an individual port or...

Страница 57: ...ress differs to that of the proxy server address Usually proxy and registrar addresses are the same and therefore the registrar server address can be left blank Authorization Realm optional This is provided by your SIP Service Provider Use extension number as username password For authentication Leave username password field blank For authentication Use the following username password for each lin...

Страница 58: ...play For example T N 4U T Time and Date N New Line go to next display line U User normally the DN To display your extension only use Optional Precision to select e g the last 4 digits only 4U P Port PN Port Name D Domain d 1 8 Alternate date formats t 1 2 Alternate time formats Hover mouse over red text on configuration screen to see pop up help Table 9 Port and Line Configuration Settings Configu...

Страница 59: ...he server server example com for example Proxy Server Address The server that will receive requests intended for another server and will act on the behalf of the client as the client proxy to obtain the requested service This may be omitted if the AoR contains the IP address host name or DNS SRV name of the proxy Authorization Update Authorization The other fields in the Authorization section are ...

Страница 60: ...46 Version BB Document Number G SIP3D RUC CONFIGURING PORTICO TVA USING THE WEB MI INSTALLATION AND CONFIGURATION GUIDE 12 AND 24 PORT PORTICO TVA Figure 24 Individual Line Configuration ...

Страница 61: ...hared Line URI Used for Shared Line Appearances e g with Broadsoft Format sip Softswitch address e g sip server example com BLF URI when required For Broadsoft BLF buttons enter the URI that is used to request the status of the buttons Other BLF buttons each request their status separately and do not need anything entered here See BLFs section below for details Monitoring Line By checking this box...

Страница 62: ...itional handset details are set on the Handset Configuration page such as Port Name End User GUI access details Default Display information displayed on your display screen when your phone is idle Display language Set the language used for messages on the phones display English or French Enable phone features and Key Mappings To access the Handset Configuration page for a specific port click the H...

Страница 63: ... Port Configuration The Port Name and Port Enabled state may be configured here End user GUI Check the box to give the end user access to the Web MI User Portal Click Change to set or change the end user Username and or Password For more information on the User Portal See The Web End User GUI on page 77 Default Display The information to be displayed on the handset when it is idle may be configure...

Страница 64: ...runcated due to the size of the particular LCD display screen Setting Ringer Tone Ringer tones can be set here from the phone menu or from the End User Portal For instructions on using the phone menus see the Phone User guide 1 From the Handset Configuration page locate the Features section and click the Ringer Tone dropdown 2 Select a ringer tone from the dropdown menu 3 Click Submit to save the ...

Страница 65: ...th Resource Lists See detail in BLFs section below Conference Allow more than 2 parties to converse on a call Conference Transfer Transfer a caller or add another user to the conversation Disable Call Waiting If the indicator is on and the phone is busy on a call or has a held call an incoming call will be rejected with Busy response Do Not Disturb No incoming calls will ring at the set Feature En...

Страница 66: ... Enters S into the dial string for Short Dial Code mapping Speed Dial Dial a pre defined number using a single key Transfer Transfer a caller to another user Unassigned No feature or line assigned Analog FXO 1 Incoming and outgoing calls can be invoked FXO port Analog FXO 2 Incoming and outgoing calls can be invoked FXO port Analog Pool Only outgoing calls can be invoked on the FXO port Lines 1 50...

Страница 67: ...e same TVA This means that the information available can vary depending on the PBX type e g in some cases a held extension may just be displayed as busy For specific details of Softswitch configuration please refer to your Softswitch in the SoftSwitch Integration Guide Table 12 shows the mapping between dialog and BLF states Dialog State BLF State None or Terminated Idle Early Ringing Confirmed no...

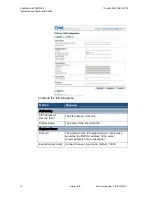
Страница 68: ...m the Portico web interface select Configure Handsets 2 Click on Handset for the port you would like to configure The Handset Configuration page opens 3 Determine which Key Indicator to map and select BLF from the dropdown menu Figure 26 Figure 26 Select BLF from Key and Indicator Dropdown 4 Click Next The Speed Dial BLF Configuration page opens Figure 27 5 Configure each BLF selecting the line an...

Страница 69: ...7 Speed Dial BLF Configuration Page In the above example we are configuring a set that has a Line 1 extension number of 5301 Two BLF buttons have been assigned to monitor extensions 5302 and 5303 6 Press the Submit button to save changes For information on configuring the Asterisk extensions conf file refer to the Portico TVA Softswitch Integration Guide ...

Страница 70: ...not all use the same domain If the domain part is given then the BLF button will be associated with the lines that use that domain This means that when the button is pressed it will only place a call using a line on the same domain and the subscription will be done using the credentials of the first line on the domain If default or default domain is given it must be the first part of the configura...

Страница 71: ...onfiguration text for BLF Broadsoft buttons For Broadsoft BLFs the subscription must be configured an a line as follows Stuff to go here Line Show Advanced BLF URI The full configuration string for a BLF Broadsoft button showing all the optional elements is default domain i idle_dial r ringing_dial b busy_dial h held_dial m match This is the same as for a BLF button except that s subs is replaced ...

Страница 72: ...ou are not on a call Without the t the key will send DTMF if it is used during a call If a put a at the end of a speed dial you may continue to dial further digits There is Context Sensitive help on the Speed Dial BLF Configuration page as follows Speed Dial at Dial Tone The key will call the number entered The or characters will create a toggle key by separating the On and Off strings e g 78 79 w...

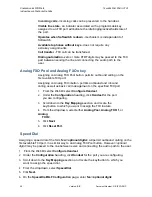
Страница 73: ...efault parameters The settings recorded for the default port are used for all of the Portico TVA ports unless they have been specifically programmed otherwise To specify the default settings select Configuration and then Port and finally Default from the menu system The option to enable or disable all ports is available from this utility the default setting is Yes enabled Line Signaling is only pr...

Страница 74: ...reasing the level below 100 will result in lower transmit and receive voice levels on all ports Increasing the level above 100 will result in higher transmit and receive voice levels on all ports Figure 29 Configure Default Voice Settings 1 Select Configuration then Port Default and finally Voice from the menu system 2 Enter new values for either the Tx Volume Level or Rx Volume Level Default is 1...

Страница 75: ...This is useful when identifying the port for routine administration Usually the port user s name is used for example John Smith This information is not displayed on the digital set The field maximum is 15 characters o The Voice settings are exactly the same as discussed in the previous section Port 1 is used for example purposes only all the remaining ports use the exact same menu structure Line S...

Страница 76: ...same screen Figure 31 The default baud rate is 9600 and the available choices are 38400 19200 9600 4800 2400 Modem init String The Modem init string is the command to configure the modem The initialization string typically Hayes commands configures the modem s options for things like error correction data compression and flow control as well as other parameters The default is ATE0 which turns on e...

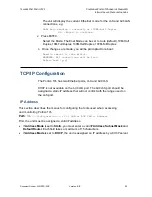
Страница 77: ...ct WARNING All connections will be lost Reboot now y n TCP IP Configuration The Portico TVA has two Ethernet ports LAN and AUX LAN DHCP is not available on the AUX LAN port The AUX LAN port should be assigned a static IP address that will not conflict with the range used on the LAN port IP Address This section describes the menus for configuring the tools used when accessing and monitoring Portico...

Страница 78: ...TCP IP Configuration Static Routes Routing information for IP destinations that do not use the default gateway may be entered as Static Routes There are a total of 10 Static Routes that can be configured Path TVA Configuration IP Static Routes Figure 33 Static Routes List 1 Select the route 2 Assign the IP Address Subnet Mask and Gateway Address for each route ...

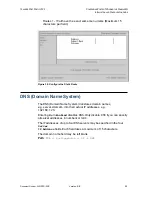
Страница 79: ...e DNS Domain Name System The DNS Domain Name System translates domain names e g server citel com into their actual IP addresses e g 192 168 1 23 Entering No in Enabled disables DNS Only disable DNS if you can specify all server addresses in numberical form The IP addresses of up to four DNS servers may be specified in the four Server IP Address fields Each field takes a maximum of 15 characters Th...

Страница 80: ...lect Configuration VLAN LAN Figure 36 Configure VLAN from the Console MI a In the State field select Enabled or Disabled If the VLAN enable status is enabled all outgoing Ethernet frames have a 4 byte VLAN header added to them 2 Set Priority from 0 to 7 For example you may want to give voice a higher priority than data 3 Set Id from 0 to 4095 to identify a VLAN 4 Save the changes ...

Страница 81: ...alog phone lines to the FXO ports How are the FXO ports configured FXO ports may be configured so that they are accessed via programmable keys on the handsets via speed dials via dialing rules or via the SIP Softswitch All the methods may be used on the same unit The following table summarises the features available to a handset with the different access methods Method Incoming calls Visible line ...

Страница 82: ... and inbound calling as well as basic call management on the specified FXO port 1 From the Web MI select Configure Handset 2 Under the Configuration heading click Handset for the port you are configuring 3 Scroll down to the Key Mappings section and locate the key button to which you want to assign the FXO feature 4 From the dropdown select either Analog Pool Analog FXO 1 or Analog FXO 2 5 Click N...

Страница 83: ...ch are automatically dialled when the FXO port is selected By this means a simple prefix can be mapped to a specified phone number You may want to block FXO for some ports Add those ports to the excluded ports to ensure that they cannot access the FXO ports by dialling the specified prefix Figure 37 Edit Dialing Rule SIP Softswitch The FXO ports can be configured to register with a Softswitch SIP ...

Страница 84: ... following items Option Purpose Addressing SIP Address of Record AoR The SIP address of the line Display Name The name of the line optional Registrar Server Domain The domain of the IP Telephony Server Typical use would be the FQDN or address of the server server example com for example Expiration seconds Connect time out in seconds Default 3600 ...

Страница 85: ... The other fields in the Authorization section are disabled until this box is selected Username The username associated with the line Password The password associated with this line Retype Password Retype the password to make sure no mistakes have been made in typing Proxy Server Server Address The server that will receive requests intended for another server and will act on the behalf of the clie...

Страница 86: ...found a new certificate is generated automatically The default certificate is self signed and identifies the server by the current IP address The ability to create and sign certificates is available on the Web MI Configuring HTTPS From the Web MI home page select Maintenance and then scroll down to the HTTPS Certificates option Figure 38 Figure 38 HTTPS Certificates Create Update a Self Signed Cer...

Страница 87: ...rtification Authority for signing Once it has been signed it can be installed on the Portico TVA and used Figure 40 Generate a Certificate Signing Request Install a Signed Certificate Install the signed certificate on Portico for use in place of the default self signed certificate Figure 41 Install a Signed Certificate Certificate and key files Certificates and keys are stored on Portico in FLASH ...

Страница 88: ...er the first boot then the certificate will be incorrect it will refer to the old IP address Either a new self signed certificate should be generated through the Web User Interface or if a programmatic approach is required the files request pem and cert pem should be deleted via FTP These will be regenerated upon the next reboot Using HTTPS To use HTTPS simply type https in place of http in the ad...

Страница 89: ...ORTICO TVA OTHER CONFIGURATION INSTALLATION AND CONFIGURATION GUIDE Document Number G SIP3D RUC Version BB 75 3 Click Launch Application to open the console MI welcome screen Figure 42 Telnet Launch Application screen ...

Страница 90: ...tings This gives you access to a number of System wide settings that profile the behavior of the system The settings currently available are Disable timeout on administrator web login Enable transfer to busy extension Select short call waiting tone Enable Sylantro configuration items Block playing of Early Media These settings are stored and backed up with the rest of the configuration Figure 42a ...

Страница 91: ...o the phones being switched over to VoIP end users can set up their phones ahead of time End User GUI Username and Password Managing Usernames and Passwords End users will not be able to access the End User GUI unless their System Administrator enables it in the Web MI Path Configure Handsets Handsets End user GUI 1 From the Web MI select Configure Handsets 2 On the Configure Handsets page click t...

Страница 92: ...TVAs to enable end users to locate and log in to their specific Portico TVA One or two Portico TVAs are configured as Master TVAs and contain a list of all usernames and associated Portico TVA units in their network Starting from a Master login page end users are able to reach their Portico TVA Username information is exchanged every five minutes or when a change is made that requires notification...

Страница 93: ... software rendering Portico TVA unusable If this happens please contact support citel com for advice Upgrade Using the Web MI Optimize the Flash File Path Maintenance Flash File System Optimize A warning screen will display the following message This operation will unmount the file system causing configuration changes and phone resets to fail This operation should therefore be avoided during norma...

Страница 94: ...ttings Backup 1 When the File Download dialog opens click Save 2 Browse to the location to save the file and click Save Check the amount of free space Path Maintenance FLASH File System Free bytes ready for use Before you continue with the upgrade process you should check the amount of free space available and make sure it is enough for the new software The free space required is the size of the d...

Страница 95: ...a reboot when prompted Figure 44 The Software Upgrade Status screen Restore the Configuration Files Path Maintenance Configuration Settings Restore 1 Select the Maintenance page and click Restore see Figure 43 The Configuration Restore page displays see Figure 45 Figure 45 Configuration Restore message 2 Click the Browse button to select the file to restore Click Restore Figure 46 Configuration Im...

Страница 96: ...82 Version BB Document Number G SIP3D RUC UPGRADING INSTALLATION AND CONFIGURATION GUIDE 12 AND 24 PORT PORTICO TVA ...

Страница 97: ... has failed FXO Red one or more FXO ports disconnected from line Amber all FXO ports idle Green one or more FXO ports active Port Status On green telephone connected and all lines registered with Softswitch Flashing green telephone connected but at least one line is not registered with the Softswitch check line configuration Off port disabled or no telephone connected check wiring Table 17 LED Sta...

Страница 98: ... example of the type of information you can see Figure 47 Example of the details shown on the System Information page You can also see system information on every screen in the Console MI except for the Welcome screen An example is shown in Figure 8 in the section that describes the Console interface You may be asked for this information if you raise a support call From the Console MI Path Status ...

Страница 99: ...e Web MI The system log messages can be viewed at any time Only HSGW messages are logged to the Web MI Select System Information and then click Log The Message Log page opens with the newest messages at the top This page can be refreshed and cleared Viewing the Log FIle in the Console MI The log or log file is used for troubleshooting and also to monitor Portico TVA ensuring that everything is run...

Страница 100: ...n files MGMT These messages include information on configuration and diagnostic conditions of the unit NET These messages include status information for the ethernet and issues related to network connectivity PORT These messages include status information for all phone ports HSGW Portico TVA logging messages This is the only type of log messages logged in the Web MI Table 18 Log Categories The pos...

Страница 101: ...vigate through the information use the following keys Esc Quit the log file h home Move cursor to start of file e end Move cursor to end of file u up Page up d down Page down F4 Update refresh screen Arrow keys Scroll Table 20 Navigation Keys Clearing the Log Buffer From the Console MI Path TVA Utilities System Clear Log 1 Clear entire log buffer y n If you type n the following message is displaye...

Страница 102: ...e Windows HyperTerminal to capture this information Path TVA Utilities System Dump All The following message is displayed This feature dumps all system information to the screen so your terminal application can capture the text Continue Y N If you type y you will see Set your terminal application to capture text or start logging Hit any key to start the dump If you are using HyperTerminal select T...

Страница 103: ... written to the remote location Enter the address of the device that will be receiving the data in the Host field Field maximum is 15 characters The Default SYS MGMT NET Port and HSGW Priorities are the same as was discussed in Logging on page 85 System Status Information Enet Interface The Enet Interface lists all the information relevant to the NIC Network Interface Card Path TVA Status IP Enet ...

Страница 104: ...ICO TVA Figure 52 Details of the Ethernet interface IP RX Stats This displays the statistics for the received IP packets Path TVA Status IP IP RX Stats Figure 53 Information about received IP packets IP Active Information This displays all the active IP connections including the servers Path TVA Status IP IP Active ...

Страница 105: ...G SIP3D RUC Version BB 91 Figure 54 All active IP connections IP ARP Information This displays the system s ARP Address Resolution Protocol table Path TVA Status IP IP ARP Figure 55 The ARP table IP Routes This displays the system s Route Net Table and Route Host Table Path TVA Status IP IP Routes ...

Страница 106: ... 56 A list of IP routes IP DHCP Information This displays the system s DHCP Dynamic Host Configuration Protocol information Path TVA Status IP IP DHCP Figure 57 Details of the DHCP configuration No information is displayed on this screen if DHCP is not enabled General System Information This displays all core system information ...

Страница 107: ...date time number of ports Port Summary This displays a summary of the port configuration on a per port basis Path TVA Status System Devices Port Summary Figure 59 Summary of the configuration of each port System Status HW Diagnostics This displays the status of the DSP Digital Signal Processor and the PLD Programmable Logic Device Passed or Failed is displayed Path TVA Status System HW Diagnostics...

Страница 108: ...ts sending of the test packets The IP Address field is for the IP address of the remote device normally this would be the communications server The field range is 16 characters A prompt is presented confirming the start of the test Test in progress please wait If successful you will see a message similar to 10 10 1 254 is alive If unsuccessful you will see a message similar to No answer from 10 10...

Страница 109: ... Document Number G SIP3D RUC Version BB 95 Enter n to abort the process Enter y to reset the specified port or all the ports When the unit begins resetting ports a status message is displayed Resetting port 1 Once complete a confirmation message is displayed Ports 1 12 were reset ...

Отзывы: