Step 1
Gather the M6 cage nuts and a flat head screwdriver.
Step 2
Locate the template and refer to the chassis location in the rack and the cage nut locations on the template.
Step 3
Position one of the curled sides of the cage nut on the inside of the square cutout in the rack.
Step 4
Press the cage nut into the cutout and use the screwdriver to pinch the other curled edge inward until the cage nut clicks
into place in the rack.
Cage nuts install on the inside of the rack so that most of the nut is behind the rack's sheet metal.
Note
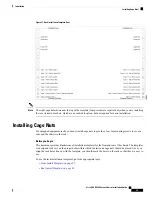
Figure 12: Cage Nut Installation
Step 5
Verify that the cage nut is fully and correctly installed before installing the remaining cage nuts.
Rail Kits
The Cisco UCS X9508 supports two rail kits, Type 1 and Type 2.
Each rail kit consists of two stationary rails that facilitate rack installation of the chassis and stabilize the
chassis in the rack. Each rail extends to fit the depth of the rack. The rails are not a sliding shelf that allow
pulling the chassis out of the rack to gain access to the chassis' sides.
Cisco UCS X9508 Server Chassis Installation Guide
30
Installation
Rail Kits
Содержание UCS X9508
Страница 6: ...Cisco UCS X9508 Server Chassis Installation Guide vi Contents ...
Страница 26: ...Cisco UCS X9508 Server Chassis Installation Guide 18 Overview Interpreting LEDs ...
Страница 31: ...Cisco UCS X9508 Server Chassis Installation Guide 23 Installation Handling the Chassis ...
Страница 64: ...Cisco UCS X9508 Server Chassis Installation Guide 56 Installation Repacking the Chassis ...
Страница 124: ...Cisco UCS X9508 Server Chassis Installation Guide 116 Technical Specifications Switzerland ...


