S e n d d o c u m e n t c o m m e n t s t o u c s - d o c f e e d b a c k @ c i s c o . c o m
22
Cisco UCS B440 High Performance Blade Server Installation and Service Note
OL-22475-01
topicWorking Inside the Blade Server
Installing a CPU or Heat Sink
Before installing a new CPU in a server, verify the following:
•
The CPU is supported for that model server.
•
A BIOS is available that supports the CPU/DIMM and server combination.
•
The service profile for this server in UCS Manager will recognize and allow the new CPU. This is
especially important if you have been using a single processor and install a second processor.
To install a CPU or heat sink, follow these steps:
Step 1
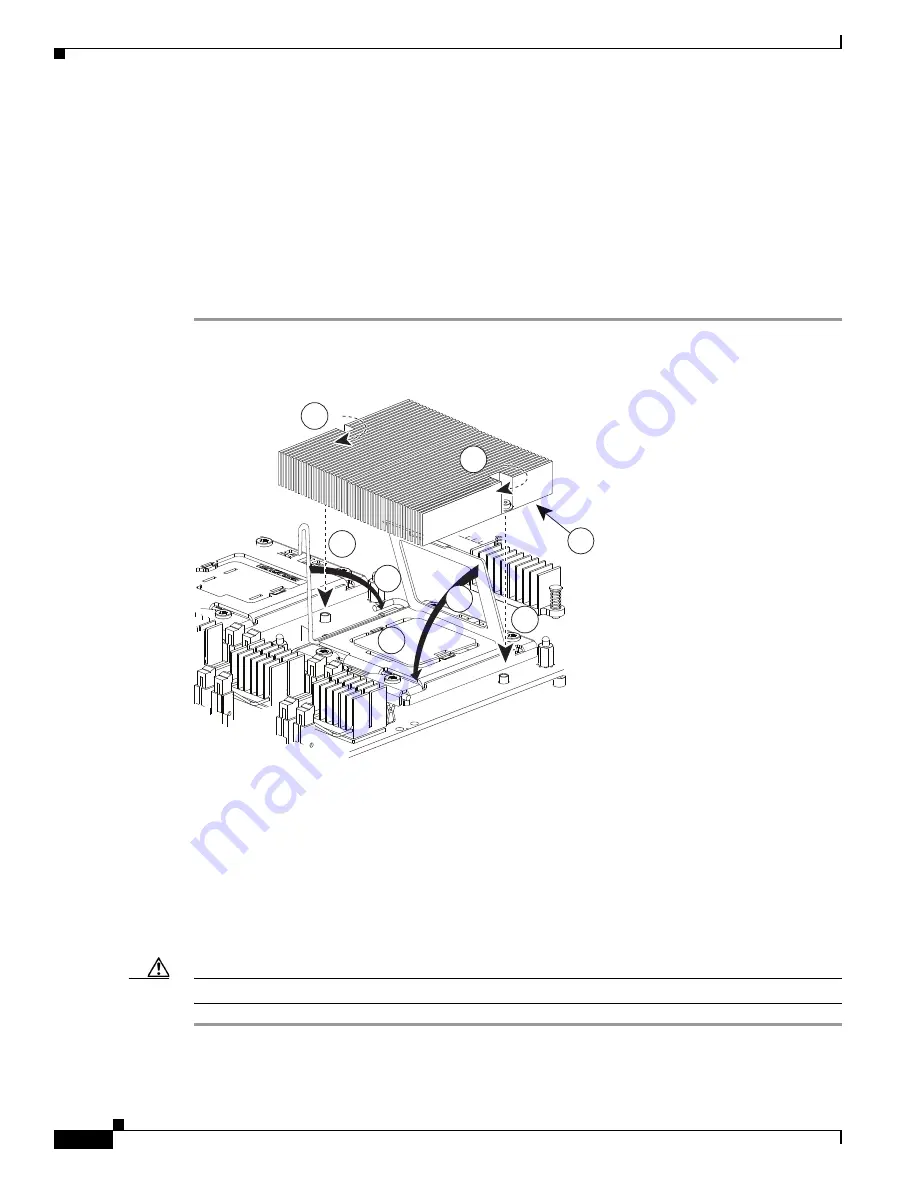
Place the CPU on the base with the notches aligned to the pins on the base. See
Figure 11
, callout 1.
Figure 11
Inserting the CPU and Replacing the Heat Sink
Step 2
Close the socket latch. See
Figure 11
, callout 2.
Step 3
Lock the socket latch into place with the hook. See
Figure 11
, callout 3.
Step 4
Attach the thermal pad (also available as a spare A04-BTHP3=) provided with the replacement CPU or
server to the bottom of the heat sink, then remove the covering film from the side that will adhere to the
CPU.
Step 5
Replace the heat sink. See
Figure 11
, callout 5.
Step 6
Secure the heat sink to the motherboard by tightening the two captive screws hand tight. See
Figure 11
,
callout 6.
Caution
Make sure that the heat sink fins are aligned to run along the length of the blade server (see
Figure 11
).
196874
5
5
1
3
2
4
6
6


