8-15
Cisco ASR 1000 Series Aggregation Services Routers Hardware Installation Guide
OL-13208-09
Chapter 8 Cisco ASR 1002 Router Overview and Installation
Equipment Shelf or Tabletop Installation
Step 2
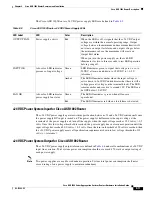
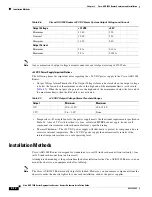
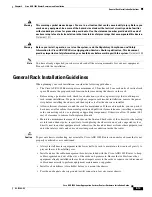
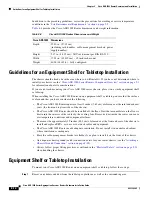
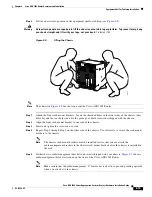
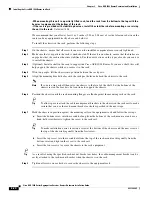
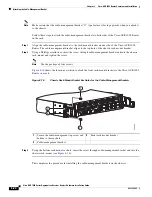
Lift the chassis into position on the equipment shelf or tabletop (see
Figure 8-9
).
Warning
At least two people are required to lift the chassis onto a tabletop or platform. To prevent injury, keep
your back straight and lift with your legs, not your back.
Statement 164
Figure 8-9
Lifting the Chassis
Note
The chassis in
Figure 8-9
does not represent the Cisco ASR 1002 Router.
Step 1
Attach the front rack-mount brackets. Locate the threaded holes in the front sides of the chassis (first
holes beyond the vent holes) and use the package of black screws that shipped with the chassis.
Step 2
Align the front rack-mount bracket to one side of the chassis.
Step 3
Insert and tighten the screws on one side.
Step 4
Repeat Step 2 through Step 3 on the other side of the chassis. Use all screws to secure the rack-mount
brackets to the chassis.
Note
The chassis rack-mount brackets must be installed first so that you can attach the
cable-management brackets to the chassis rack-mount brackets after the chassis is installed in
the rack.
Step 5
Gather the two cable-management brackets and screws shipped with your chassis.
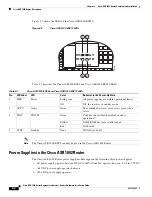
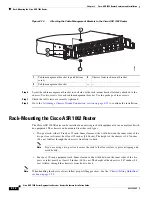
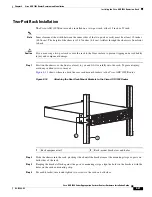
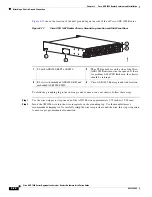
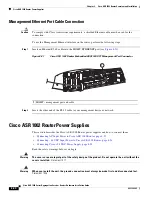
Figure 8-10
shows
cable-management brackets attached on the front of the Cisco ASR 1002 Router.
Note
Make certain that the cable-management ‘U’ feature device has the open end pointing upwards
when you attach it to the chassis
30007
1
3
2
4
0A
PROCESS
OR ONLY
0B
5
6
7
8
PROCESS
OR ONLY
POWER
FAULT
MISWIRE
POWER
FAULT
MISWIRE
CISCO
10000
L
IN
K
TX
RX
F
AIL
GIGABIT ETHERNET
CISCO
10000
C
A
R
R
IE
R
A
L
A
R
M
L
O
O
P
F
A
IL
CH OC-12-DSO SM-IR
CISCO
10000
C
A
R
R
IE
R
A
L
A
R
M
L
O
O
P
F
A
IL
6XCT3–DS0
0
5
4
3
2
1
CISCO
10000
C
A
R
R
IE
R
A
L
A
R
M
L
O
O
P
F
A
IL
6XCT3–DS0
0
5
4
3
2
1
FA
IL
PERFORMANCE R
O
UTING ENGINE
C
O
N
S
O
LE
S
TA
T
U
S
A
C
O
C
R
IT
IC
A
L
M
IN
O
R
M
A
JO
R
E
T
H
E
R
N
E
T
LIN
K
A
C
T
IV
IT
Y
A
U
X
S
L
O
T
0
S
L
O
T
1
FA
IL
PERFORMANCE R
O
UTING ENGINE
C
O
N
S
O
LE
S
TA
T
U
S
A
C
O
C
R
IT
IC
A
L
M
IN
O
R
M
A
JO
R
E
T
H
E
R
N
E
T
LIN
K
A
C
T
IV
IT
Y
A
U
X
S
L
O
T
0
S
L
O
T
1
CISCO
10000
C
A
R
R
IE
R
A
L
A
R
M
L
O
O
P
F
A
IL
6XCT3–DS0
0
5
4
3
2
1
CISCO
10000
C
A
R
R
IE
R
A
L
A
R
M
L
O
O
P
F
A
IL
6XCT3–DS0
0
5
4
3
2
1
CISCO
10000
C
A
R
R
IE
R
A
L
A
R
M
L
O
O
P
F
A
IL
6XCT3–DS0
0
5
4
3
2
1
CISCO
10000
C
A
R
R
IE
R
T
X
R
X
F
A
IL
OC–12/STM–4 POS SM–IR
FANS
OK
FAN
FAILURE
MULTI-
FAN
FAILURE
When hot s
wapping this f
an tray,
removal an
d replacem
ent must
be done in
under tw
o minutes
or
system shu
tdown will o
ccur.
CAUTIO
N
CISCO
10000
CISCO
10000


