background image

12.

Avoid accidental starting.  Be sure the Trigger (7) is not engaged before
plugging in. 
 Carrying power tools with your finger on the Trigger (7), or plugging
in power tools with the Trigger (7) on, invites accidents.

13.

Remove adjusting keys or wrenches before turning the power tool on.  A
wrench or a key that is left attached to a moving part of the power tool may result
in personal injury.

14.

Do not overreach.  Keep proper footing and balance at all times.  Proper
footing and balance enables better control of the power tool in unexpected
situations.

15.

Use safety equipment.  Always wear eye protection.  Dust mask, non-skid
safety shoes, hard hat, or hearing protection must be used for appropriate
conditions.

TOOL USE AND CARE

16.

Use clamps (not included) or other practical ways to secure and support
the workpiece to a stable platform.
  Holding the work by hand or against your
body is unstable and may lead to loss of control.

17.

Do not force the tool.  Use the correct tool for your application.  The correct
tool will do the job better and safer at the rate for which it is designed.

18.

Do not use the power tool if the Power Switch does not turn it on or off.
Any tool that cannot be controlled with the Power Switch is dangerous and must
be replaced.

19.

Disconnect the Power Cord Plug from the power source before making any
adjustments, changing accessories, or storing the tool.  
Such preventive
safety measures reduce the risk of starting the tool accidentally.

20.

Store idle tools out of reach of children and other untrained persons.  Tools
are dangerous in the hands of untrained users.

21.

Maintain tools with care.  Keep cutting tools sharp and clean.  Properly
maintained tools with a sharp cutting edge are less likely to bind and are easier
to control.  Do not use a damaged tool.  Tag damaged tools “Do not use” until
repaired.

22.

Check for misalignment or binding of moving parts, breakage of parts, and
any other condition that may affect the tool’s operation.  If damaged, have
the tool serviced before using.
  Many accidents are caused by poorly main-
tained tools.

SKU 90814

PAGE 4

Содержание 90814

Страница 1: ...eight Tools All rights reserved No portion of this manual or any artwork contained herein may be reproduced in any shape or form without the express written consent of Harbor Freight Tools For technical questions please call 1 800 444 3353 Model 90814 ASSEMBLY AND OPERATING INSTRUCTIONS CARVING CHIPPING TOOL REV 01 04 ...

Страница 2: ...EA 1 Keep your work area clean and well lit Cluttered benches and dark areas invite accidents 2 Do not operate power tools in explosive atmospheres such as in the presence of flammable liquids gases or dust Power tools create sparks which may ignite the dust or fumes 3 Keep bystanders children and visitors away while operating a power tool Distractions can cause you to lose control Protect others ...

Страница 3: ...pes radiators ranges and refrigerators There is an increased risk of electric shock if your body is grounded 7 Do not expose power tools to rain or wet conditions Water entering a power tool will increase the risk of electric shock 8 Do not abuse the Power Cord Never use the Power Cord to carry the tools or pull the Plug from an outlet Keep the Power Cord away from heat oil sharp edges or moving p...

Страница 4: ...e the tool Use the correct tool for your application The correct tool will do the job better and safer at the rate for which it is designed 18 Do not use the power tool if the Power Switch does not turn it on or off Any tool that cannot be controlled with the Power Switch is dangerous and must be replaced 19 Disconnect the Power Cord Plug from the power source before making any adjustments changin...

Страница 5: ...SI approved safety impact eye goggles ear protection and heavy work gloves when using the Carving Chipping Tool Using personal safety devices reduce the risk for injury ANSI approved safety impact eye goggles ear protection and heavy work gloves are available from Harbor Freight Tools 3 Maintain a safe working environment Keep the work area well lit Make sure there is adequate surrounding workspac...

Страница 6: ...s known to the State of Cali fornia to cause cancer birth defects or other reproductive harm Some ex amples of these chemicals are lead from lead based paints crystalline silica from bricks and cement or other masonry products arsenic and chromium from chemically treated lumber Your risk from these exposures varies depending on how often you do this type of work To reduce your exposure to these ch...

Страница 7: ...wire cord and three prong grounding plug The plug must be connected to a properly grounded outlet If the tool should electrically malfunction or break down grounding provides a low resistance path to carry electricity away from the user reducing the risk of elec tric shock See Figure A 2 The grounding prong in the plug is connected through the green wire inside the cord to the grounding system in ...

Страница 8: ...an use either a two or three wire extension cord 2 As the distance from the supply outlet increases you must use a heavier gauge extension cord Using extension cords with inadequately sized wire causes a serious drop in voltage resulting in loss of power and possible tool damage See Figure C next page 3 The smaller the gauge number of the wire the greater the capacity of the cord For example a 14 ...

Страница 9: ...d damp or wet areas SKU 90814 PAGE 9 SYMBOLOGY Double Insulated Canadian Standards Association Underwriters Laboratories Inc Volts Alternating Current Amperes No Load Revolutions per Minute RPM noxxxx min A V RECOMMENDED MINIMUM WIRE GAUGE FOR EXTENSION CORDS 25 FEET 50 FEET 75 FEET 100 FEET 150 FEET 0 2 0 18 18 16 16 16 2 1 3 4 18 18 16 14 14 3 5 5 0 18 18 16 14 12 5 1 7 0 18 16 14 12 12 7 1 12 0...

Страница 10: ...e numbers in parenthesis after parts refer to the corresponding numbers on the Parts List also on page 13 1 CAUTION Always make sure the Power Cord of the Carving Chipping Tool is unplugged from its electrical outlet prior to making any adjustments to the tool 2 Choose the right bit for your application The Bull Point Breaker Bit 9 and the 2 Chisel 6 are designed for Light Duty use in brick tile a...

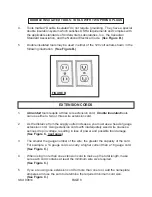
Страница 11: ...ely in place Plug in the tool Set the Speed Control 3 to Low Medium or High Speed by matching up the center line on the switch to the corresponding line The longest line High refers to the fastest speed Do not adjust the speed while the tool is being used See FIGURE 8 Note This unit has a contact safety feature that requires the tip of the tool be pressed onto the workpiece or the Trigger 7 won t ...

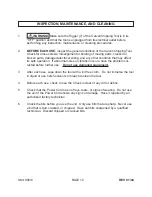
Страница 12: ...bnormal noise or vibration occurs have the problem cor rected before further use Do not use damaged equipment 3 After each use wipe down the tool with a lint free cloth Do not immerse the tool in liquid or use harsh solvents or bleach to clean the tool 4 Before each use check to see the Chuck is clear of any dirt or debris 5 Check that the Power Cord has no frays tears or signs of wearing Do not u...

Страница 13: ...RTAKEN BY CERTIFIED AND LICENSEDTECHNICIANS AND NOT BYTHE BUYER THE BUYER ASSUMES ALL RISK AND LIABILITY ARISING OUT OF HIS OR HER REPAIRS TO THE ORIGINAL PRODUCT OR REPLACEMENT PARTS THERETO OR ARISING OUT OF HIS OR HER INSTALLATION OF REPLACEMENT PARTS THERETO PLEASE READ THE FOLLOWING CAREFULLY PARTS LIST NOTE Some parts are listed and shown for illustration purposes only and are not available ...

Отзывы: