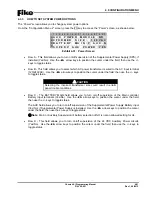
4.0 CONFIGURATION MENU
Cheetah Xi Programming Manual
4-35
P/N: 06-651
Rev 1, 09/2013
4.5.2.2
HOW TO SET VESDA SECTOR/ZONE CORRELATION
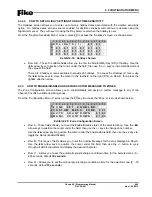
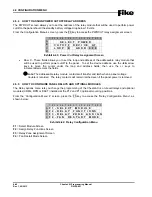
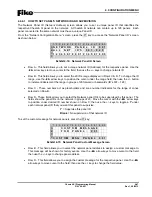
The VESDA Sector Zones option lets you configure how each sector of the VESDA detector will report to the
Cheetah Xi.
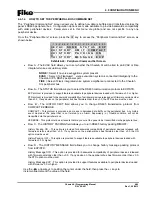
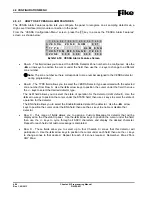
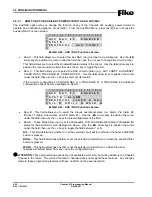
From the “VESDA Configuration Menu” screen, press the F2 key to access the “VESDA Sector” screen, as
shown below:
1 2 3 4 5 6 7 8 9 0 1 2 3 4 5 6 7 8 9 0
A
V E S D A
Z O N E
N U M
0 0 1
B
S 1 : 0 0 0 A L M
S 2 : 0 0 0 A L M
C
S 3 : 0 0 0 A L M
S 4 : 0 0 0 A L M
D
Exhibit 4-55: VESDA Sector Screen
•
Row A - This field allows you to select the VESDA detector Zone Number to be configured. Use the
◄►
arrow keys to position the cursor under the field; then use the +/- key to change to VESDA
detector zone number.
•
Rows B & C - These fields allow you to set a Cheetah Xi zone number that the VESDA sector
(Sector 1 – 4) will participate in and what operational state it will cause the panel to enter. Use the
◄►
arrow keys to position the cursor under the field; then use the +/- keys to change desired zone.
Then arrow over under the state and use the +/- keys to toggle through events of ALM, SUP or TRB.
4.5.2.3
HOW TO SET VESDA ZONE NUMBER AND LOOP/ADDR
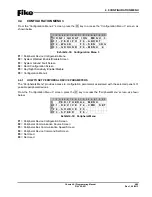
The EVAX option lets you configure the VESDA to report as a “virtual” address on the Cheetah Xi
addressable loop. This option is used if the VESDA needs to be monitored by a point ID system (i.e., EVAX,
DACT, LED Graphic, Computer Graphic, etc.).
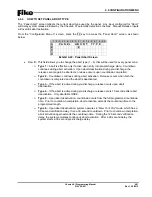
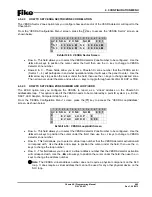
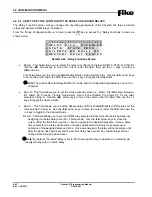
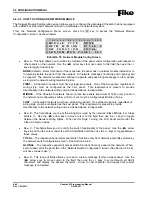
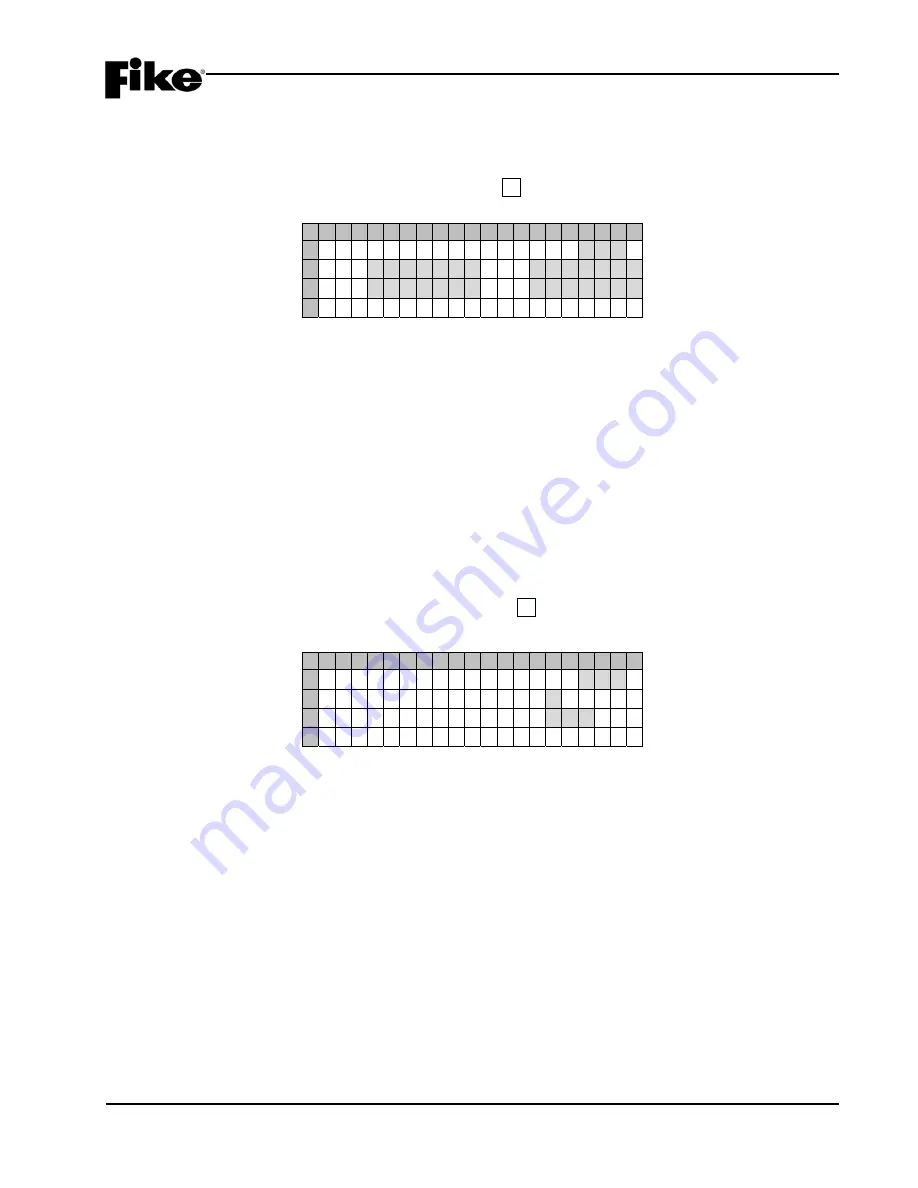
From the “VESDA Configuration Menu” screen, press the F3 key to access the “VESDA Loop/Address”
screen, as shown below:
1 2 3 4 5 6 7 8 9 0 1 2 3 4 5 6 7 8 9 0
A
V E S D A
Z O N E
N U M
0 0 1
B
E V A X
L O O P :
0
C
E V A X
A D D R :
0 0 0
D
Exhibit 4-56: VESDA Loop/Addr Screen
•
Row A - This field allows you to select the VESDA detector Zone Number to be configured. Use the
◄►
arrow keys to position the cursor under the field; then use the +/- keys to change to VESDA
detector zone number.
•
Row B - This field allows you to select a virtual loop number that the VESDA detector activation will
correspond with. Use the
◄►
arrow keys to position the cursor under the field; then use the +/-
keys to change the loop number.
•
Row C - This field allows you to select a virtual address number that the VESDA detector activation
will correspond with. Use the
◄►
arrow keys to position the cursor under the field; then use the +/-
keys to change the address number.
L
Note:
The VESDA virtual address number does not require a physical component on the SLC
loop. It does require a virtual address that can not be used for any other physical device on the
SLC loop.
Содержание 10-068
Страница 52: ...3 0 GETTING STARTED 3 14 Cheetah Xi Programming Manual Rev 1 09 2013 P N 06 651 Reserved for future use ...
Страница 108: ...4 0 CONFIGURATION MENU 4 56 Cheetah Xi Programming Manual Rev 1 09 2013 P N 06 651 Reserved for future use ...
Страница 111: ......
Страница 112: ...704 SW 10th Street P O Box 610 Blue Springs Missouri 64013 Tel 816 229 3405 Fax 816 229 0314 www fike com ...

