


11
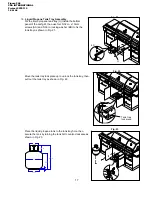
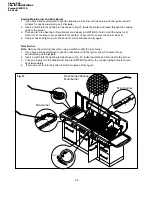
5.
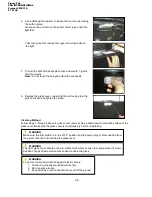
Side Panel Assembly
Use two 1/4-in. x 15-mm truss head screws (BB) and two
1/4- in. locking washers (GG) to connect the bottom of the
left side panel (F) to the bottom panel (D). Make the left
side panel flush with the rear of bottom panel and tighten
the screws as shown in Fig. 5.
Repeat for the right side panel (G).
NOTE:
The hem of both side panels are facing
front if you are standing and facing the grill.
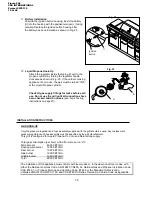
6.
Back Panel Assembly
Remove the back panel from the carton. Position the back panel (H)
with the flat side facing outward. Attach the back panel to the
bottom panel (D) with
two 1/4-in. x 15-mm truss head screws (BB)
and two 1/4-in. locking washers (GG) as shown in Fig. 6.
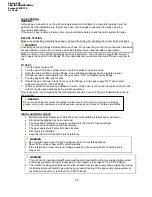
Use two 1/4-in. x 15-mm truss head screws (BB) and two
1/4-in. locking washers (GG) to connect the back panel
(H) to the
left
side panel (F) as shown in Fig. 7.
Use two 1/4-in. x 15-mm truss head screws (BB) and two
1/4-in. locking washers (GG) to connect the back panel
(H) to the
right
side panel (G) as shown in Fig. 7.
Fig. 5
Fig. 6
H
D
Fig. 7
H
F
D
F
G
4 X
2 X
2 X
Hem of
side panel
2 X
G
Figure 246
CSA INTERNATIONAL
Project 2078110
12 of 46