ChamSys QuickQ Скачать руководство пользователя страница 57

Chapter 13. 10Scene Window and 10Scene Wall

Plates

10Scene buttons create simple, quick architectural control.

10Scene buttons are available as 10 button wall plates, 10 buttons on the front panel of the
QuickQ Rack, or the 10Scene app for iOS, Android and Microsoft Windows.

To connect 10Scene wall plates to a QuickQ console use a 10Scene Gateway (up to 20 per
Gateway), 10Scene wall plates can be connected directly to the QuickQ Rack (up to 40).

A QuickQ system can support up to 40 10Scene wall plates connected via either direct sockets
on the rack or across Gateways. A maximum of 10 Gateways can be connected to a QuickQ
system.

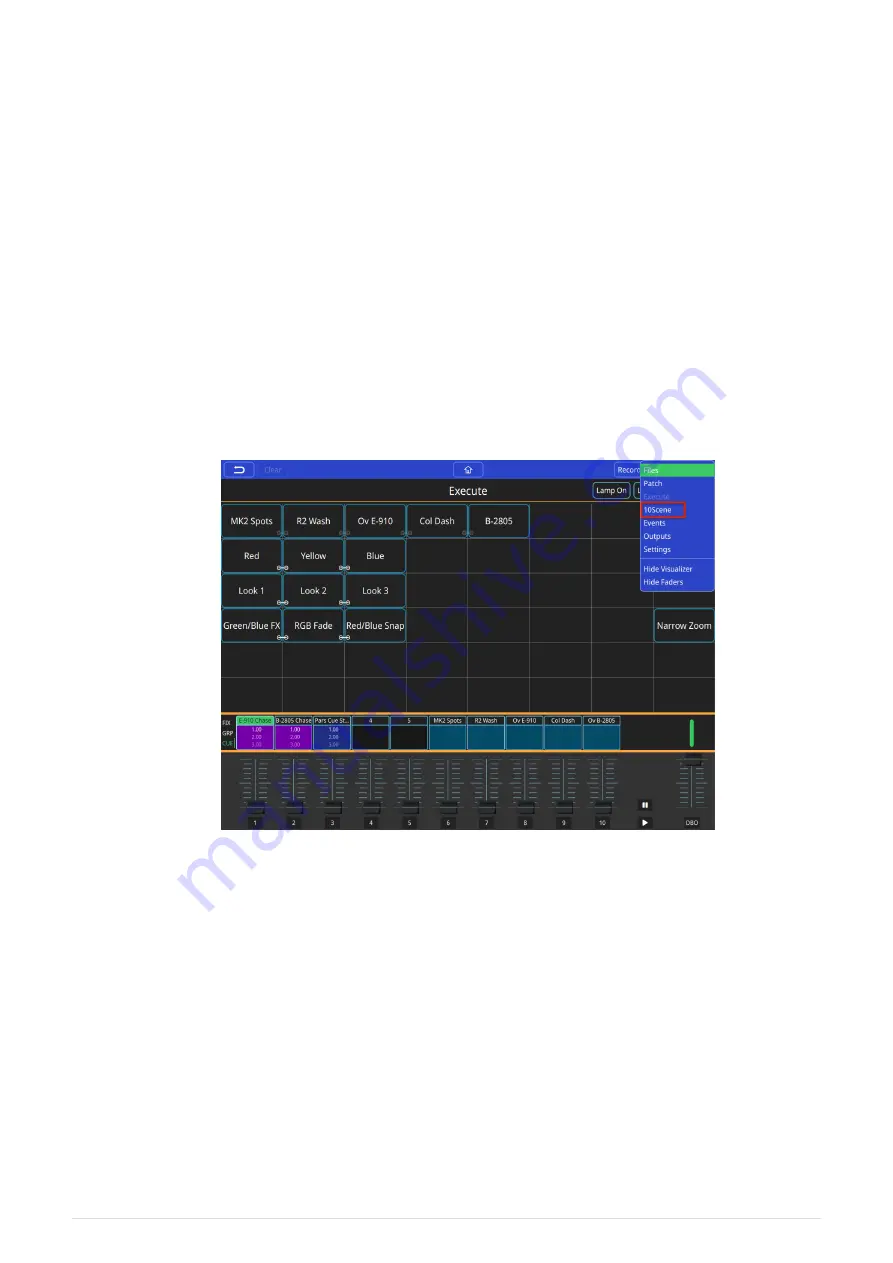
Access the 10Scene Window from the main menu.

The 10Scene Window has four views, Panel view, Contact Events, Gateways and the 10Scene
settings.

2021-03-12

QuickQ v6

53

Содержание QuickQ

Страница 1: ...QuickQ Manual Installation Operation Manual and Warranty Certificate ChamSys Support mailto support chamsys co uk Software Version v6 2021 03 12...

Страница 2: ...er Interface 8 3 Setting Up and Connecting 10 Assemble the QuickQ Console 10 Connecting the Remote App to a QuickQ Console 10 Assemble the QuickQ Rack 10 Connecting the Remote App to a QuickQ Rack 10...

Страница 3: ...kQ 39 Adding Effects to Fixtures 39 Recording Effects to Cues 41 Effects on Dimmer Channels 41 9 Execute Window 42 10 Settings Window 44 Access Levels 45 DMX Settings 46 Setting Up a QuickQ Console to...

Страница 4: ...61 Appendix A DMX Ethernet and Art Net 64 DMX 64 Ethernet 64 Art Net 64 Appendix B FCC Part 15 Notice 66 Appendix C Technical Specifications 67 Appendix D Disposal and Recycling of Unwanted Consoles...

Страница 5: ...of authorship contained in this manual including but not limited to all design text and images are owned by ChamSys Ltd All rights reserved Manual Use ChamSys authorises its customers to download and...

Страница 6: ...tal or plastic surfaces this may cause the paint or lettering to be removed Gently use a damp cloth to clean the panels Do not put water on the touchscreen as this may get inside it and make it unusab...

Страница 7: ...such as Using This Manual Indicates some useful information to add to your knowledge and experience Indicates some additional information that may be relevant A Warning statement indicates situations...

Страница 8: ...nsoles all feature a large multitouch touchscreen Consoles run the same software but differ in the number of multifunction faders playbacks encoders and DMX universes Consoles have built in WiFi to al...

Страница 9: ...matically hand off control to the lighting console and resume control once the console is turned off 10 buttons on the front of the unit allow for control of 10 individual scenes or 10 playbacks of si...

Страница 10: ...Remote App Scan the included QR code printout with your tablet or phone to connect The QuickQ Rack is programmed using the QuickQ Remote App or by attaching a mouse and a monitor QuickQ Designer Appli...

Страница 11: ...ol for communication between wall mounts and the controller 10Scene wall plates are powered over the 10Scene protocol no external power supply is required U S fit version 300 054 fit into a standard U...

Страница 12: ...visible on programming windows Clear Clear captured Live fixtures Record Record captured Live fixtures and record options Action Action menu Beneath to top blue shaded section is a navigation area to...

Страница 13: ...palettes that allow for faster editing of your show The bottom section of the touchscreen bounded by 2 thick orange lines shows the playback preview windows one per playback fader Up to 3 cues from t...

Страница 14: ...turn the Status switch on 2 Download the App The QuickQ Remote App is available for free download from the Google Play and Apple App Stores 3 Scan the QR Code Use the Remote App to scan the QR Code d...

Страница 15: ...the QR Code Use the Remote App to scan the QR Code supplied on a printed sheet with the Rack Powering On and Off The QuickQ consoles and QuickQ Rack will power on when they are connected to the mains...

Страница 16: ...the console will automatically open the Patch Window Patch the Fixtures Patching is the process to tell QuickQ consoles what fixtures you want connected to which faders and to tell the console to use...

Страница 17: ...he console software contains the library that was current at the time the software has created Even if you have just updated your console software you should download and install today s fixture libra...

Страница 18: ...LED fixtures Entering Chauvet Mav would filter the library to show all fixtures manufactured by Chauvet and in the Maverick range Entering sharpy for example would show all fixtures in the library cal...

Страница 19: ...that the fixtures are connected to QuickQ will automatically assign the fixtures into the lowest available DMX address If you would like to enter a different DMX address enter it in the Start Address...

Страница 20: ...ch one at a time RDM Auto Patch Manual patching as above can be automated if your fixtures have RDM built in To use RDM Auto patch in the Patch Window select RDM Auto Patch RDM on QuickQ consoles is p...

Страница 21: ...s in Group mode Naming Fixtures QuickQ uses creates a name for the fixture by default This name is used on the Home screen and you can change it from the default to a name that is useful for you It is...

Страница 22: ...ake is made and the address is already in use select Find first free address and a solution will be found for you Then match this address on the physical fixture Inverting Pan and Tilt If instruments...

Страница 23: ...e window by clicking on Drag fixture icons onto the centre section of the Home Window to create a layout Zoom in or out by pinching and fine tune Fixture Icon positions A grid can be turned on or off...

Страница 24: ...im to make controlling fixtures intuitive and fast You may not need to understand the following rules to get started but they will help to gain a better idea of how your programming is applied QuickQ...

Страница 25: ...green border You can deselect fixtures by touching them again Select Fixtures with the Multifunction Faders in Fixture Mode The multifunction faders on the left of the console control individual fixtu...

Страница 26: ...e on the fader when pressed Activating Cues and Releasing Cues Cues can be started and stopped from playing or outputting by raising and lowering the playback faders or the cue faders When playing we...

Страница 27: ...f In addition at the top of this window there are buttons to lamp on or strike selected instruments or to lamp off the selection If you have arc lamps then it may be necessary to lamp on after applyin...

Страница 28: ...use on window if no encoders QuickQ 10 and Remote App Trackpad or select arrows for either individual pan or tilt control Effects Fine encoder control don t forget to turn off when finished Controllin...

Страница 29: ...r to multiple fixtures If you have picked 1 fixture and chosen colour for it you can choose other colour mixing fixtures and press SNAP to force that colour onto all the chosen fixtures at once Colour...

Страница 30: ...hen any of the beam control options can be used If you are going to use the same beam attributes in more than one cue consider saving them to a palette Palettes are referenced in cues so modifying a p...

Страница 31: ...one cue consider saving them to a palette Palettes are referenced in cues so modifying a palette will change every cue the palette is used in Beam Palettes Press Record and use the green button to add...

Страница 32: ...ranges and sub selections within an attribute Alternatively a long press and hold on the encoder tab will show selection boxes for those ranges for any given encoder 28 QuickQ v6 2021 03 12...

Страница 33: ...ction faders Alternatively select one of the Group Icons in the Home Window Recording a Palette Palettes are found towards the top of their respective parameter windows Palettes are greyed out in each...

Страница 34: ...a cue to with a red shading Select and modify some attributes Intensity colour beam and position add any effects and press record Select the Fader Preview to record a new cue or the next cue to a pla...

Страница 35: ...yback fader When the last cue in the chase is reached the chase will automatically loop back to the beginning and play the sequence again Lowering the fader will release the chase and stop it playing...

Страница 36: ...e speed can be multiplied or divided using buttons on the tab Crossfade can be set between a full fade between steps default or a snap between steps Fine fine control of encoder actions Reorder Cues i...

Страница 37: ...nd will run any fade timing assigned to the cues on playback 1 The in the cue stack window can also be used All other cue stacks in theatre mode will need to be run from this go button location as the...

Страница 38: ...isplay the cue list for that playback Then the button on the console can be used to run the cues on the cue stack A running cue will have a green outline and a progress bar in the fade column Cue Name...

Страница 39: ...imes on a cue in a cue stack hold the fade time or double tap the fade time of the cue The Intensity Fade In times can be edited The Intensity Fade Out time is set the same as the fade in time This ca...

Страница 40: ...he cue will stop running after finishing the fader times and wait until you press the button again Follow Previous Cue This cue will start playing back automatically immediately after the previous cue...

Страница 41: ...Go to a Cue Pull out the arrows on the end of the comments box and select Go to This Cue 2021 03 12 QuickQ v6 37...

Страница 42: ...tured attributes to an existing cue Select some fixtures and make any required changes Press Record Select Show Options Select Merge Select the cue to merge the changes into Recording a New Cue from C...

Страница 43: ...e can be controlled in size and speed Changing the size will change how far from the original value that attribute will move for each part of the effect Adding Effects to Fixtures To add an effect fir...

Страница 44: ...d is displayed in BPM Beats per Minute and can be set via the speed encoder or using the tap to time on the middle right edge of the screen Size Sets the amplitude of the effect this is relative to th...

Страница 45: ...s dimmers are treated as HTP or Highest Takes Precedence channels This means that the highest value will always be what shows on stage This needs to be taken into consideration when writing effects on...

Страница 46: ...rded to them The Execute Window is accessible on the MagicQ remote iOS and Android applications and can also be triggered from 10Scene wall plates To access the Execute Window Execute To resize the Ex...

Страница 47: ...or tapping on an execute to release any other executes that are linked to it In order to Link executes they must be directly next to each other horizontally Use the Action Menu to link and unlink exec...

Страница 48: ...er recording Double tap the playback window above a playback fader Then select the change required from the button QuickQ consoles can be run in 2 different modes live mode and theatre mode Live mode...

Страница 49: ...ch and settings Programmer allows users to program shows but not to change the patch or settings Operator prevents any changes to the show file but the show can still be operated as normal When in the...

Страница 50: ...ting Fixtures do not need to be patched Allow other consoles to control this universe This is typically only used on a QuickQ Rack When selected the QuickQ Rack will hand over control to the other con...

Страница 51: ...work to Yes Set Art Net Universe Art Net universes start at Universe 0 If your node has been set to receive Art Net Universe 0 you would have console universe 1 being sent out on Art Net Universe 0 Ne...

Страница 52: ...nection on the console is used to connect phones and tablets to the console The console s WiFi connection cannot be used to output DMX Scan the displayed QR code using the QuickQ remote app on your de...

Страница 53: ...Dutch Update Options In the Update Window in settings you can find information on the currently installed software version change notes and copyright information As well as buttons to update the cons...

Страница 54: ...ower left corner shown below With timecode values being read by the console MIDI timecode can be enabled on individual cue stacks by pressing the menu button selecting cue stack options and enabling U...

Страница 55: ...possible to also control the GO and Pause buttons for each of the 10 playbacks A note starting at note 72 to 81 will control the GO button moving up an octave starting at note 84 to 93 will control th...

Страница 56: ...ight for a chase open the chases playback window by either holding or double tapping on the corresponding playback legend above the playback fader From here access the chase options via the menu butto...

Страница 57: ...plates to a QuickQ console use a 10Scene Gateway up to 20 per Gateway 10Scene wall plates can be connected directly to the QuickQ Rack up to 40 A QuickQ system can support up to 40 10Scene wall plate...

Страница 58: ...ther a cue or a chase 10Scene toggles executes 1 10 on and off in this mode 10Scene wall plates will toggle on and off the first 10 execute cues recorded in the Execute Window 10Scene controls execute...

Страница 59: ...ents action can also be used to join zones QuickQ supports 4 unique contact inputs per system Gateways are always socket 1 and 2 Gateways SnakeSys Gateway interfaces are used to connect 10Scene wall p...

Страница 60: ...time interval happens The three choices are No Action On or Off Once that choice is made tap Change and you can then tap on an item such as a playback or execute to preform that action on Once comple...

Страница 61: ...0 and 100 Set playback fader level pb playback go optional non zero value Go on playback pb playback flash 0 sets to 0 non zero sets to 100 Set playback level to 100 pb playback pause optional non ze...

Страница 62: ...ommand is an ASCII string with a number followed by a letter The supported commands are A Activate Playback R Release Playback T Activate Playback at 100 U Release Playback 0 G Go on Playback S Stop g...

Страница 63: ...rear panel Select menu button on the top right then select settings then update Select update from USB DRIVE Select the file for you console system on the USB drive The software will be copied from t...

Страница 64: ...ower cable to the unit then Press and hold front panel buttons 1 3 and 5 while plugging back in Power to the unit Keep these buttons pressed for about 10 seconds and release when the front panel butto...

Страница 65: ...s taken one after the other Cue A recorded collection of values of levels and attributes for one or more fixtures Cue List Another term for cue stack Cue Stack One or more cues either taken one after...

Страница 66: ...ixture Number Each fixture is given a number during patching Fixtures 1 to 20 or 1 to 40 on the QuickQ 30 can also be controlled from the fixture faders with the corresponding number These may also be...

Страница 67: ...ixtures are connected to the console and connected via DMX Playback Playbacks are the faders on the bottom right of the console The QuickQ 10 has one cue stack and two chase playbacks while the QuickQ...

Страница 68: ...the sending computer followed by the IP address of the receiving computer followed by the data The IP addresses allow the data to be routed to the correct computer On a typical office network computer...

Страница 69: ...between your QuickQ console and node s Unlike normal office networks the IP address must be in the range 2 x x x or 10 x x x where x is between 0 and 255 The subnet mask must be set to 255 0 0 0 This...

Страница 70: ...cause interference with radio and television reception However there is no guarantee that interference will not occur in a particular installation If this equipment does cause harmful interference to...

Страница 71: ...Faders 2 Chase 1 Cue Stack 10 Chase or Cue Stack 10 Chase or Cue Stack 0 Cue Stacks 1 10 10 10 Dedicated Home Button Y Y Y Y Connection s USB Ports 2 2 2 2 10 100 Mbps Ethernet Port 1 1 1 1 External...

Страница 72: ...525 x 350 x 106 525 x 350 x 106 760 x 350 x 106 400 x 186 x 48 Weight 4 7Kg 5 2Kg 6 1Kg 3 1Kg Power 12v DC 12v DC 12v DC 90 240VAC Power Supply External 12V 2A External 12V 2A External 12V 2A Inbuilt...

Страница 73: ...WEEE disposal and recycling regulations ChamSys products must not be disposed of through normal household waste For non UK customers please contact your local distributor For UK customers please conta...

Страница 74: ...le For Warranty claims please contact the dealer you purchased the console from If you are based outside of the UK please contact your local dealer Your local dealer can be located here https secure c...

Отзывы: