27
2.3 CHIMNEY CONNECTOR
Your chimney connector (commonly called stove pipe) and chimney must have the same
diameter as the stove’s exhaust outlet. The stove pipe must be made of aluminized or cold roll
steel with a minimum 24-gauge thickness (0.021" or 0.53 mm). It is strictly forbidden to use
galvanized steel.
The following recommendations may be useful for the installation of your chimney connector:
•
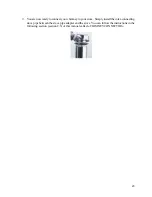
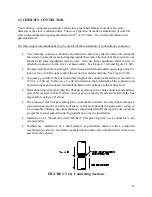
Your chimney connector should be assembled in such a way that the male end (crimped)
faces down to prevent creosote dripping outside the joints. Attach each of the sections to one
another with three equidistant metal screws. Also use three equidistant metal screws to
attach the connector to the stove’s exhaust collar. See Figure 2.3 (A) and Figure 2.3 (B).
•
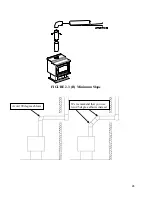
The pipe must be short and straight. All sections installed horizontally must slope at least ¼
inch per foot, with the upper end of the section toward the chimney. See Figure 2.3 (B).
•
To insure a good draft, the total horizontal length of the connector should never exceed 8' to
10' (2.4 to 3.04 m). In the case of vertical installation, the total length of the connector can
be much longer and connected without problem to the chimney at the ceiling level.
•
There should never be more than two 90 degrees elbows in the whole connector and chimney
system. Never start with a 90
o
elbow. Always go up vertically for at least 2 feet from the flue
spigot before using a 90
o
elbow.
•
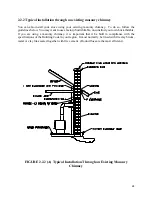
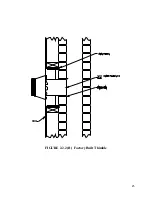
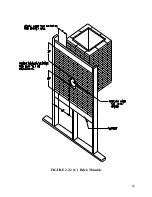
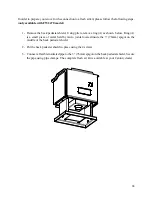
The connector must not pass through any combustible material, nor may it pass through a
concealed space (such as an attic, roof space, or closet). If passing through a wall, ceiling, or
into a masonry chimney, use either chimney components listed for that specific use, or means
acceptable to local authorities having jurisdiction over the installation.
•
Installation of a "barometric draft stabiliser" (fireplace register) on a connector is not
recommended.
•
Furthermore, installation of a draft damper is prohibited. Indeed, with a controlled
combustion wood stove, the draft is regulated upon intake of the combustion air in the stove
and not at the exhaust.
FIGURE 2.3 (A) Connecting Sections
Содержание 45398A
Страница 4: ...3 5 2 FW2470 43 5 3 FW2700 44 5 4 FW3000 45 CENTURY HEATING LIMITED WARRANTY 46 ...
Страница 20: ...19 Typical installation through the ceiling FIGURE 2 2 1 B Typical Installation Through the Ceiling ...
Страница 26: ...25 FIGURE 2 2 2 B Factory Built Thimble ...
Страница 27: ...26 FIGURE 2 2 2 C Brick Thimble ...
Страница 29: ...28 FIGURE 2 3 B Minimum Slope Avoid 90 degree eblows We recommend that you use two 45 degree elbows instead ...

