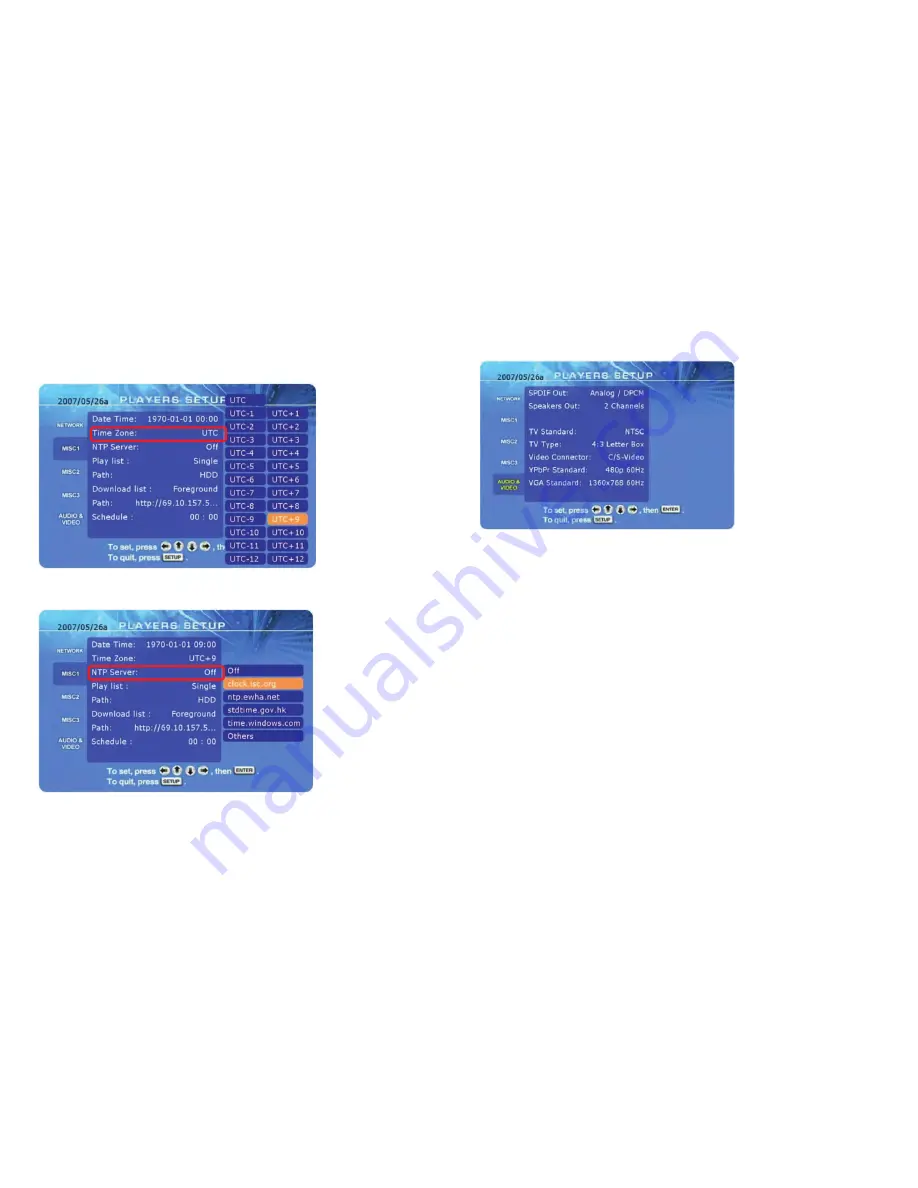
Time & Date
To set date and time on the HD-300ZX, the unit requires an internet connection
to synchronise the time with an NTP server.
1. Make sure the HD-300ZX has access to the internet.
2. Go to the Misc1 category in the setup menu. Select your time zone from the
list and press the ENTER key to set it.
3. Select a time server from the NTP Server list and press the ENTER key to set it.
Note: We recommend using your computer to ping the different servers, so
you can select the one which has the fastest reply time.
Audio & Video Category
In this category, you can configure the audio and video output of your
HD-300ZX.
Use the arrow keys on your remote control for navigation and the ENTER button
to configure the settings.
[SPDIF] Depending on the audio cable you are using, set this to Analog if you
are using the simple RCA left/right audio cables or to Digital if you are using
the optical SPDIF cable.
[Speakers] Depending on your speaker set up, set this to 2 Channels if you are
only using 2 speakers or to 5.1 Channels if you are using digital audio with 5
speakers and surround sound.
[TV Standard] Select your TV system from the list. You can choose either NTSC
or PAL.
[TV Type] Select the aspect ratio for your TV. You can choose from 4:3 Letter
Box, 4:3 Pan-Scan and 16:9.
[Video Connector] Depending on which A/V cable you are using, select the
corresponding connection from the list. For the standard Composite cable,
choose C/S-Video, for the Component cable, choose YPbPr and for the VGA
cable, choose VGA.
[YPbPr Standard] Select the resolution and frequency of your TV display. The
range includes resolutions from 480p to 1080i with a frequency of either 50Hz or
60Hz.
[VGA Standard] Select the resolution and frequency of your display or monitor.
The VGA output is using 60Hz and offers multiple resolutions from 640x480 to
1920x1200.
Note: If your display is blank and you can not see the HD-300ZX menu, press
the TV Mode button on your remote control to toggle between the different
video outputs. Once you can see the main screen, go to the setup menu and
save your video output.


