background image

EN-16

Using the Step Sequencer to Create a Song

3.

While holding down the 

PAD selector button, 

use the 

11 () and 12 (+) buttons to change 

the pad tone.

This changes the tone of the pad you pressed in step 1.

Use the procedure below to sample sounds and assign 
them to a pad.

1.

Press the 

SAMPLING selector button.

2.

Use the 

VALUE knob to select the sampling 

type.

3.

Press the pad to which you want to assign the 
sampled sounds.

4.

Press the 

REC selector button.

This starts recording.

5.

Play the sounds you want to sample.

6.

Recording will stop when the specified 
recording time elapses or if you press the 
REC button.

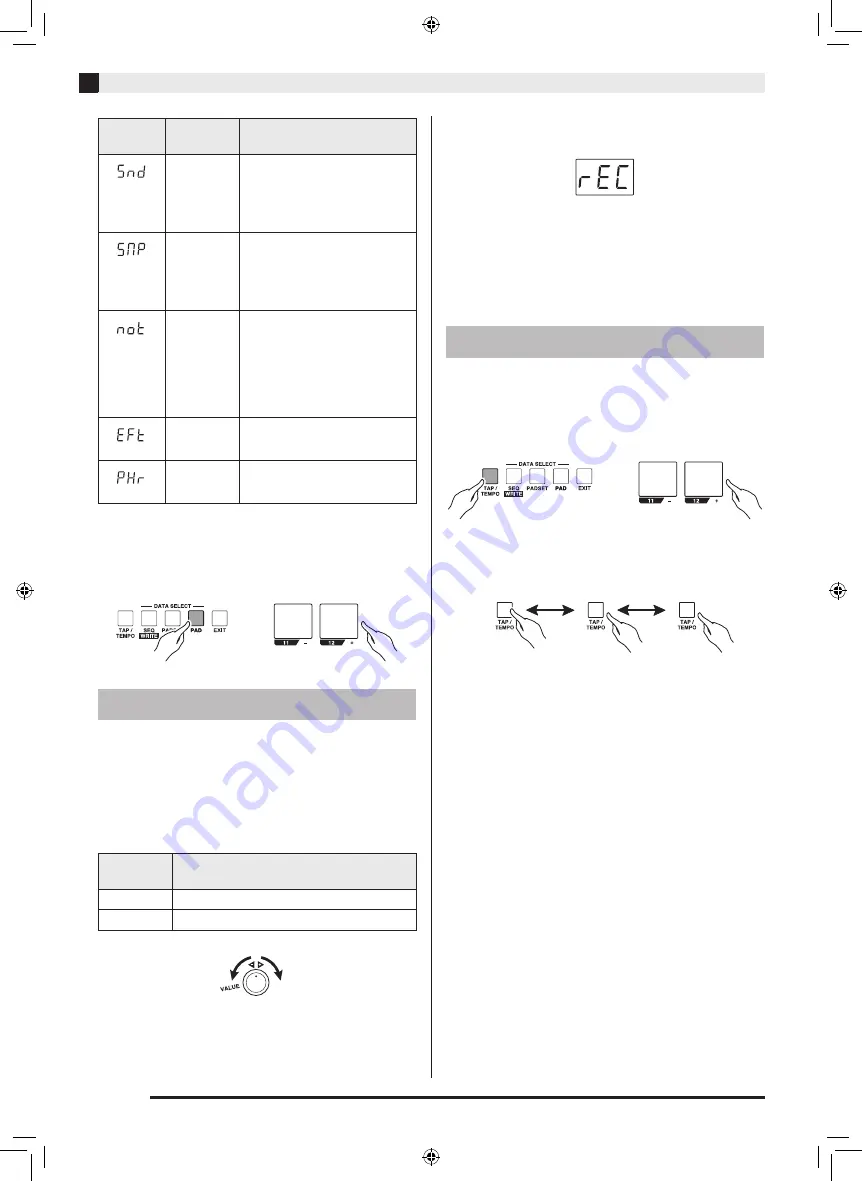
You can use either of the two methods below to change 
the tempo of a sequence.

z

While holding down the TAP/TEMPO selector 
button, use pads 11 () and 12 (+) to change the 
tempo.

z

Use the TAP/TEMPO button to tap the desired 
tempo. The setting will the average of a and b in the 
illustration below.

Display 

Indicator

Name

Description

Sound

Tapping the pad sounds a drum 
kit, or a snare drum or other 
single sound. This tone can be 
selected when “DRM” (drum) is 
selected as the tone for all pads.

Sampling

Tapping the pad produces a 
sound recorded with the 
sampler. This tone can be 
selected when “DRM” (drum) is 
selected as the tone for all pads.

Note

Tapping the pad plays a musical 
scale using the tone assigned to 
all pads. This tone can be 
selected when “MLD” (melody), 
“SYN” (solo synthesizer), or 
“SMP” (sampling) is selected as 
the tone for all pads.

Effect

Tapping the pad applies the 
effect.

Phrase

Tapping the pad plays multiple-
note phrase.

Sampling

Display 

Indicator

Description

00-31

Samples for approximately three seconds.

32-35

Samples for approximately nine seconds.

Changing the Tempo

a

b

First tap

Second tap

Third tap

XWPD1-ES-1A.indd   18

2014/12/25   11:44:36

Содержание transformer xw-pd1

Страница 1: ...eep all information for future reference Guarde toda informaci n para tener como referencia futura English Espa ol Safety Precautions Before trying to use this product be sure to read the Safety Preca...

Страница 2: ...lly or has been dropped The apparatus shall not be exposed to dripping or splashing and that no objects filled with liquids such as vases shall be placed on the apparatus The P Power indicator being u...

Страница 3: ...16 Changing the Tempo EN 16 Working with an External Sound Source EN 17 Adjusting Volume EN 17 Applying Effects EN 17 Adjusting the Intensity of the Effect EN 17 Slicing Audio EN 17 Applying the Scra...

Страница 4: ...se are weld lines that result from the plastic molding process They are not cracks or scratches Musical Instrument Etiquette Always be aware of others around you whenever using this product Be especia...

Страница 5: ...hem with water 2 Contact your physician immediately Leaving alkaline battery fluid in your eyes can lead to loss of sight Warning Smoke Strange Odor Overheating and Other Abnormalities Continued use o...

Страница 6: ...d over the head or ingested Never place the plastic bag this product comes in over your head or in your mouth Doing so creates the risk of suffocation Particular care concerning this precaution is req...

Страница 7: ...r documentation and precautions that come with them Connections Connect only specified devices and equipment to the product s connectors Connecting anything else creates the risk of fire and electric...

Страница 8: ...ck REC button 13 16 Starts and stops real time recording Also used to start and stop sampling FUNCTION button 14 15 Used for configuring detailed settings HOLD button 14 17 Puts sounds and or effects...

Страница 9: ...put or change a number or value setting 7 FX1 FX2 knobs 17 Adjust the intensity of the applied effects 8 ASSIGNABLE fader 18 Can be used to apply a scratch effect The function assigned to this fader c...

Страница 10: ...Battery compartment br Speaker IMPORTANT Before connecting an external device first set VOLUME to minimum volume Connection Examples br bq Smartphone Household power outlet Speaker XWPD1 ES 1A indd 1...

Страница 11: ...ies or a charger Remove the battery compartment cover located in the center of TRACKFORMER s bottom panel and load six AA size batteries into the battery compartment Make sure the plus and minus ends...

Страница 12: ...owered operation Approximately 4 hours NOTE You can disable Auto Power Off if you want For more information refer to the separate User s Guide Tutorial You can use any one of the three operations show...

Страница 13: ...olume z Set the MIX FADER to a position that is right of center TRACKFORMER has a built in song that demonstrates its various features 1 While holding down the SAMPLING selector button press the PLAY...

Страница 14: ...ART hold down the FUNCTION button as you press the PLAY button You can use either of two methods to create a sequence pressing a pad and sequence step key to assign sounds to sequence step keys one by...

Страница 15: ...pad of the sound you want to cancel press the sequence step key that is assigned the sound To assign sounds while recording 1 Press the PLAY selector button 2 Press the REC selector button Recording...

Страница 16: ...he pad is depressed If you want an effect to be applied continually hold down the HOLD selector button as you press pad 13 NOTE Various effects are assigned to pads 14 through 16 in bank 1 of sequence...

Страница 17: ...ill revert to their last saved state You can also delete the contents of a particular bank and or pattern For more information refer to the separate User s Guide Tutorial 1 While holding down the PADS...

Страница 18: ...z Use the TAP TEMPO button to tap the desired tempo The setting will the average of a and b in the illustration below Display Indicator Name Description Sound Tapping the pad sounds a drum kit or a s...

Страница 19: ...pad 13 A simple operation changes the effect assigned to pad 13 For more information see Changing the Tone of a Particular Pad page EN 15 NOTE Various effects are assigned to pads 14 through 16 in ban...

Страница 20: ...ctor button 2 While holding down the FUNCTION selector button press the SLICE button This enables the freeze function 3 Hold down any one of the sequence step keys The sounds recorded when the freeze...

Страница 21: ...w to change the VELOCITY setting see the separate User s Guide Tutorial Sequence data does not play when I press the PLAY button There is no sequence data stored in the sequence data file whose number...

Страница 22: ...ort 32 Samples Long 4 Samples Quantization 16 bit Demo Song 3 Songs Fader Mix Fader Assignable Fader Tempo Range 60 200 Effect Pad Effect Preset 200 Types User 100 Types FX Control 2 knobs 1 fader Mas...

Страница 23: ...uid is spilled into the product when a foreign object falls into the product when the product is exposed to rain or moisture when the product does not operate normally when the product is dropped 10 D...

Страница 24: ...eep all information for future reference Guarde toda informaci n para tener como referencia futura English Espa ol Safety Precautions Before trying to use this product be sure to read the Safety Preca...

Отзывы: