E
54
12.
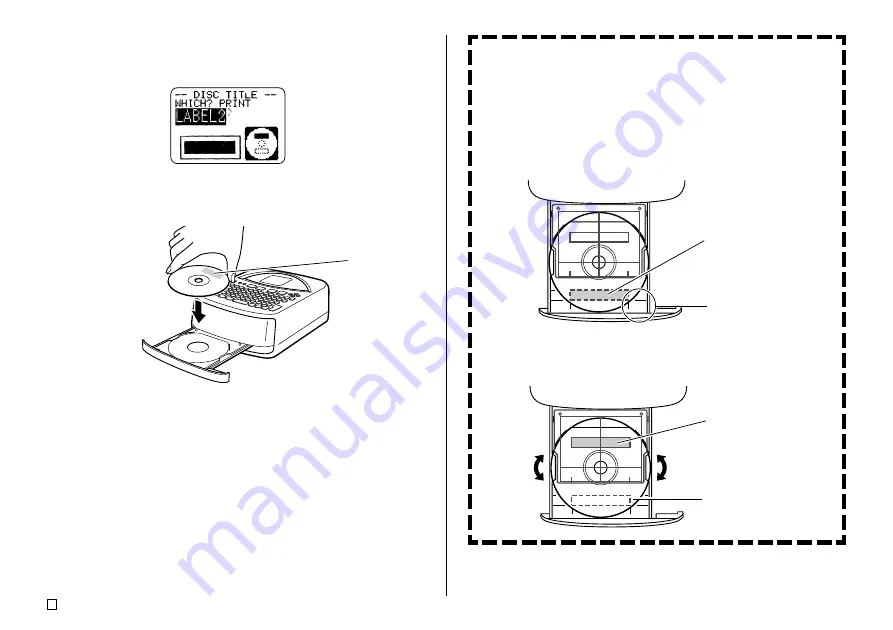
After printing of the Label 1 area is complete, a screen like the one shown
here will appear, and the disc tray will open part way. Carefully pull out
the disc tray and remove the disc.
13.
Press
SET
.
14.
Rotate the disc 180 degrees and place it back onto the disc tray.
15.
Repeat steps 7 through 9 to position the disc.
•
See “Positioning the Disc on the Disc Tray” in the right column of this
page.
16.
Close the disc tray and press
SET
.
•
This starts the Label 2 print operation.
17.
After printing is complete, the initial printer screen will appear and the
disc tray will open part way. Carefully pull out the disc tray and remove
the disc.
Label 1
printing
Positioning the Disc on the Disc Tray
Use the positioning guide to adjust the position of the disc on the tray in
the following cases.
•
When the label of the disc already has logos or other markings
•
When performing separate upper block and lower block printings
When the label of the disc already has logos or other markings
Note that you cannot print over a logo. Position the disc so the logo or
other markings on the disc label are not inside the shaded area.
When performing separate upper block and lower block printings
Before performing the second printing, rotate the disc 180 degrees. Next,
position the disc so the first printing is within the shaded area.
Printing will be
performed inside the
area indicated by the
guidelines on the disc
tray.
Guidelines
Area of first printing
(Label 1)
Area of second
printing (Label 2)
Содержание CW-75 - Disc Title Printer Color Thermal Transfer
Страница 65: ...63 E Illustrations Symbols Dingbats and Special Characters SYMBOL DINGBAT NUMBER GREEK RUSSIAN...
Страница 69: ...CASIO ELECTRONICS CO LTD Unit 6 1000 North Circular Road London NW2 7JD U K...
Страница 70: ...CASIO COMPUTER CO LTD 6 2 Hon machi 1 chome Shibuya ku Tokyo 151 8543 Japan MO0304 A...


