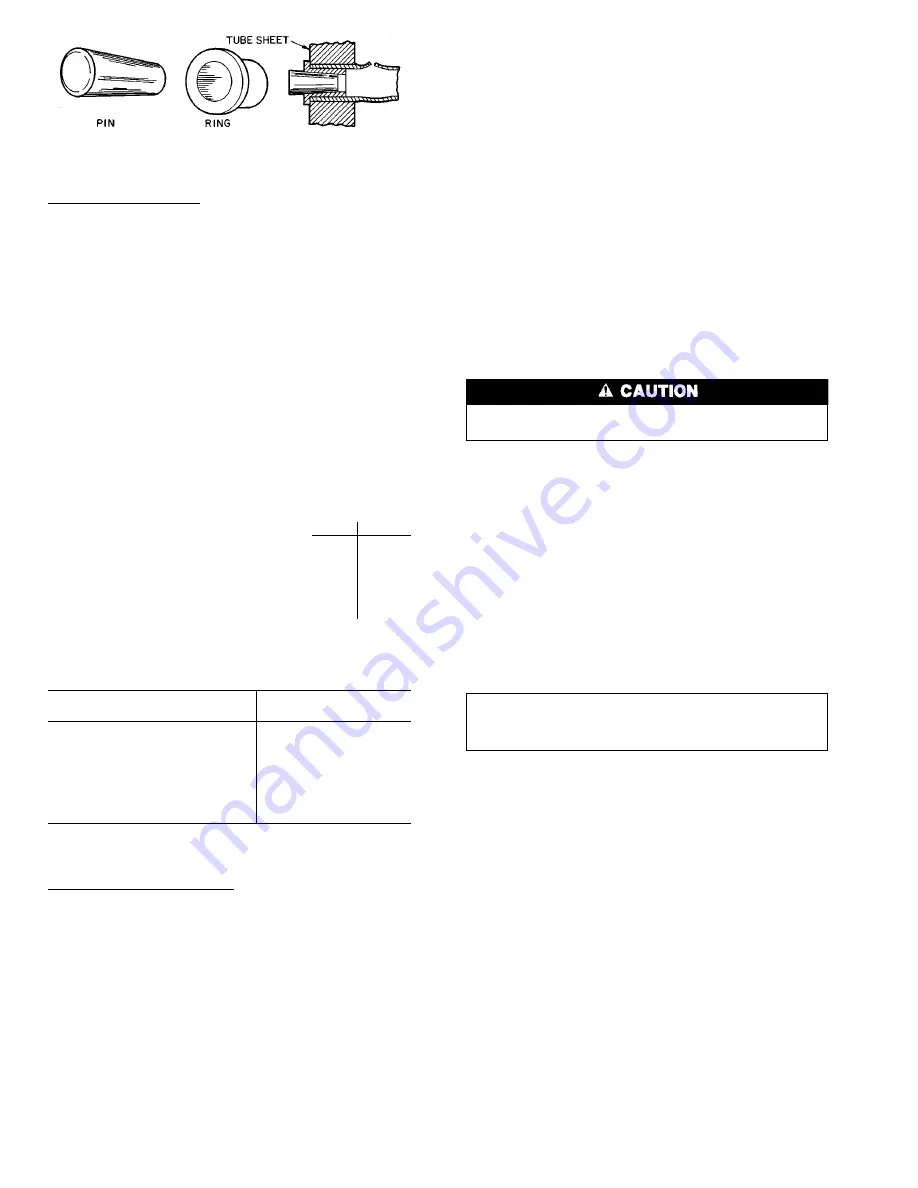
Retubing (See Table 14) — When retubing is to be done,
obtain service of qualified personnel experienced in boiler
maintenance and repair. Most standard procedures can be fol-
lowed when retubing the 10HB coolers. An 8% crush is
recommended when rolling replacement tubes into the tube
sheet. An 8% crush can be achieved by setting the torque on
the gun at 48 to 50 in.-lb (5.4 to 5.6 N-m).
The following Elliott Co. tube rolling tools are required:
B3400 Expander Assembly
B3401 Cage
B3405 Mandrel
B3408 Rolls
Place one drop of Loctite No. 675 or equivalent on top of
tube prior to rolling. This material is intended to ‘‘wick’’ into
the area of the tube that is not rolled into the tube sheet, and
prevent fluid from accumulating between the tube and the
tube sheet.
Tube information follows:
in.
mm
• Tube sheet hole diameter . . . . . . . . . . . . 0.631
16.03
• Tube OD . . . . . . . . . . . . . . . . . . . . . . . . . 0.625
15.87
• Tube ID after rolling . . . . . . . . . . . . . . . 0.581
14.76
(includes expansion due
to
to
to clearance)
0.588
14.94
NOTE: Tubes next to gasket webs must be flush with tube
sheet (both ends).
Table 14 — Plugs
COMPONENTS FOR
PLUGGING
PART NUMBER
For Tubes
Brass Pin
853103-500*
Brass Ring
853002-570*
For Holes without Tubes
Brass Pin
853103-1*
Brass Ring
853002-631*
Loctite
No. 675†
Locquic
‘‘N’’†
*Order directly from: Elliott Tube Company,
Dayton, Ohio
†Can be obtained locally.
Tightening Cooler Head Bolts
Gasket Preparation — When reassembling cooler heads,
always use new gaskets. Gaskets are neoprene-based and are
brushed with a light film of compressor oil. Do not soak
gasket or gasket deterioration will result. Use new gaskets
within 30 minutes to prevent deterioration. Reassemble cooler
nozzle end or plain end cover of the cooler with the gaskets.
Torque all cooler bolts to the following specification and
sequence:
5
⁄
8
-in. Diameter Perimeter Bolts . . . . . . 150 to 170 ft-lb
(201 to 228 N-m)
1
⁄
2
-in. Diameter Flange Bolts . . . . . . . . . . 70 to 90 ft-lb
(94 to 121 N-m)
1. Install all bolts finger tight.
2. Bolt tightening sequence is outlined in Fig. 26. Follow
the numbering sequence so that pressure is evenly ap-
plied to gasket.
3. Apply torque in one-third steps until required torque is
reached. Load all bolts to each one-third step before pro-
ceeding to next one-third step.
4. No less than one hour later, retighten all bolts to required
torque values.
5. After refrigerant is restored to system, check for refrig-
erant leaks with soap solution or Halide device.
6. Replace cooler insulation.
Condenser Coils
COIL CLEANING — Clean coils with a vacuum cleaner,
fresh water, compressed air, or a bristle brush (not wire). Units
installed in corrosive environments should have coil clean-
ing as part of a planned maintenance schedule. In this type
of application, all accumulations of dirt should be cleaned
off the coil.
Do not use high-pressure water or air — fin damage may
result.
Condenser Fans —
Each fan is supported by a formed
wire mount bolted to fan deck and covered with a wire guard.
The exposed end of fan motor shaft is protected from weather
by grease. If fan motor must be removed for service or
replacement, be sure to regrease fan shaft, and reinstall fan
guard. For proper performance, fan should be positioned as
in Fig. 27 (standard and low-noise applications). Tighten set-
screws to 15
6
1 ft-lb (20
6
1.3 N-m).
If the unit is equipped with the high static fan option, the
fan must be set from the top of the fan deck to the plastic
ring or center of the fan to a distance of 2.13 in.
6
0.13 in.
(54
6
3 mm). This is different from standard fans, since there
is no area available to measure from the top of the orifice
ring to the fan hub itself. See Fig. 28.
IMPORTANT: Check for proper fan rotation (clock-
wise viewed from above). If necessary, switch any 2
power leads to reverse fan rotation.
Refrigerant Feed Components —
Each circuit has
all necessary refrigerant controls.
ELECTRONIC EXPANSION VALVE (EXV) — A cutaway
view of valve is shown in Fig. 29.
High-pressure liquid refrigerant enters valve through bot-
tom. A series of calibrated slots have been machined in side
of orifice assembly. As refrigerant passes through orifice, pres-
sure drops and refrigerant changes to a 2-phase condition
(liquid and vapor). To control refrigerant flow for different
operating conditions, sleeve moves up and down over ori-
fice and modulates orifice size. Sleeve is moved by a linear
stepper motor. Stepper motor moves in increments and is con-
trolled directly by processor board. As stepper motor rotates,
motion is transferred into linear movement by lead screw.
Through stepper motor and lead screw, 1500 discrete steps
of motion are obtained. The large number of steps and long
stroke results in very accurate control of refrigerant flow. The
valve orifice begins to be exposed at 320 steps. Since there
is not a tight seal with the orifice and the sleeve, the mini-
mum position for operation is 120 steps.
Fig. 25 — Elliott Tube Plug
60


