Adjustments, settings and alignments
Spectra II
36
Service Instructions
09.16
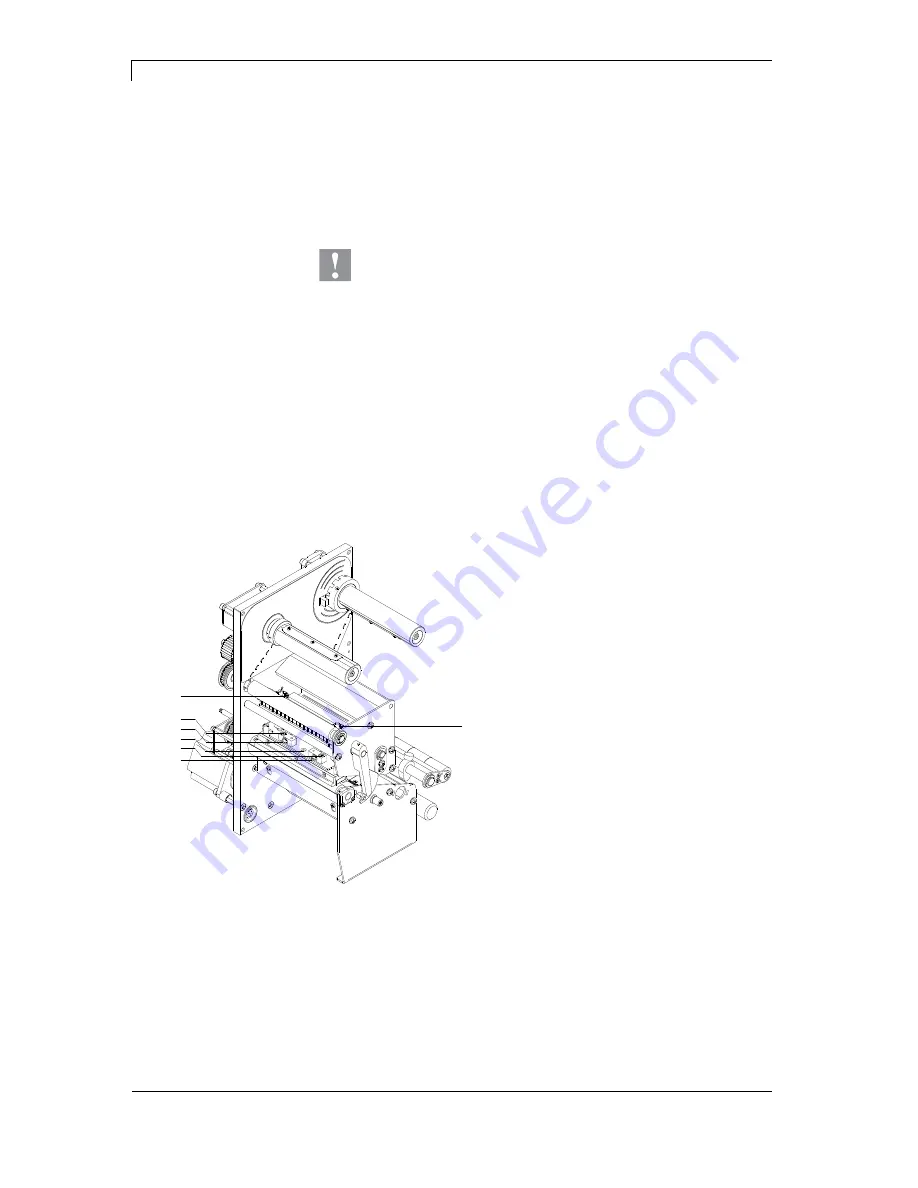
6.4 Adjusting the Transfer Ribbon Feed Path
Adjust the transfer ribbon feed path by changing the head contact
pressure. Increasing the head contact pressure with the screws (A)
shifts the ribbon feed path in the corresponding direction. Possibly
arising formation of wrinkles can be eliminated by bowing the
printhead.
CAUTION!
The printhead assembly can be damaged when bowing the
printhead.
Turning the adjustment screw (D) too hard can cause
damage to the printhead assembly.
As soon as a clear resistance is perceived when
turning the adjustment screw (D), only continue turning
the screw in very small increments, but no more than
one eighth of a turn.
Only turn the adjustment screw (D) as far as is
absolutely necessary.
A
A
C
B
C
B
D
Figure 16
1. Check the transfer ribbon feed path.
The wound up ribbon should be the
same distance from the disk of the
winder as the supply roller is from the
disk of the rewinder.
2. If the ribbon runs inward or outward, turn
the corresponding screw (B) after
loosening the screw (C) clockwise in
small increments.
3. Wait until the ribbon feed path has
stabilized after each step of the
adjustment.
4. Check the ribbon feed path for wrinkles.
5. If the wrinkles cannot be remedied (e.g.
wrinkles in the centre), turn the
adjustment screw (D) clockwise with
extreme care (see warnings) using a
hexagonal wrench (2 mm) and observe
the ribbon feed path.
When the adjustment screw (D) is
tightened, the printhead is bent
downward slightly in the centre. It is
possible that a slight lightening at the
edge areas of the print image could
occur here.
Содержание Spectra II
Страница 1: ......
Страница 12: ......
Страница 18: ......
Страница 46: ......
Страница 52: ......
Страница 62: ......
Страница 68: ......
Страница 69: ...Spectra II Wiring Plan 09 16 Service Instructions 67 10 Wiring Plan Figure 36 ...
Страница 70: ...Wiring Plan Spectra II 68 Service Instructions 09 16 Figure 37 ...
Страница 72: ...Wiring Plan Spectra II 70 Service Instructions 09 16 10 2 Power Electronics Figure 39 ...
Страница 76: ......


