or whatever bolt size is needed
for your stand-offs. Use an
Incidence meter on the wing root,
and against the prop-driver or
spinner backplate of the motor to
set the down-thrust to about 0.5
degrees for the first flight. Add
washers behind the (pilots view)
left side stand-offs and the front
firewall to set the right thrust to
approx. 1.5 degrees. The thrust-
line can easily be adjusted slight-
ly after trimming flights by adding
or removing 1 or 2 washers.
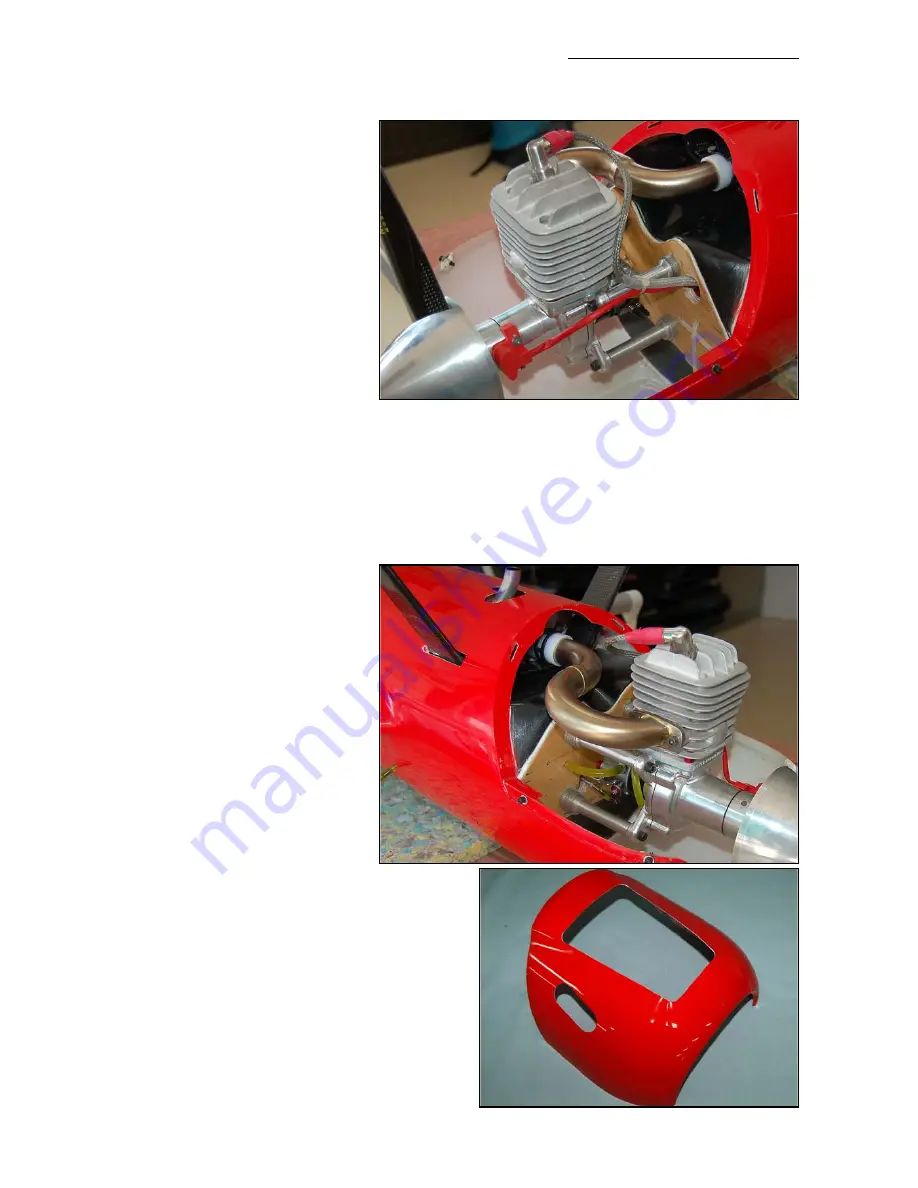
You will need to make a cut-out in
the cowl bottom as the DA-50
cylinder head sticks out, but this
gives excellent cooling and no
internal baffles are needed in the
cowling In any case make sure
that the fibreglass cowling clears
all hot parts by at least 6mm.
The header/manifold on the pro-
totype also touched the cowling,
and required a small cutout (seen
here), but ‘production’ headers
should fit completely inside the
cowling.
Mini-Pipe
A TD75 mini-pipe (Ø55 x 355mm
long) and specially manufactured
header from MTW is shown fitted,
and these are available as an
optional set from Composite-ARF
, as well as the DA-50. This com-
bination gives the engine a nice
throttle response, a perfect mid-
range, and increases top end power slightly.
(Now there is also a full-length MTW pipe avail-
able - see below)
Now mill the large cutout in the bottom of the
fuselage for the pipe cooling air exit. Cover the
bottom of the fuselage with masking tape and
draw the shape on accurately to make the neat-
est job of this task. For the MTW TD75 mini-pipe
the front of the cutout should be 240mm (9.4”)
from the front of the fuselage, the length of the
cutout is 230mm (9.25”), and the width should
Composite-ARF Yak 55
(2.1m/83”)
24
Left and right side views of the completed installation. Note
the HT ignition lead secured so that it cannot touch any
other metal parts, especially the exhaust header. Tygon fuel
line, throttle and choke linkages pass thru’ holes in the fire-
wall adjacent/behind the carb. Ignition unit is mounted on
the inside of the firewall on a rubber isolation pad, and you
can see the cable-ties used to secure it in the upper photo.
Note also outlet of mini-pipe cut shorter for easy installation.


